
Sharp-eyed iPhone users would’ve noticed one feature in the iOS Camera app they can turn on/off, one that is called HDR. But not very many would understand what it means or what it actually does, let alone try to use it. In fact most users wouldn’t even know that this feature exists because prior to iOS 7, the setting is hidden under the option menu on the camera, which they hardly ever touched.
The truth is, the HDR feature can actually help us to take a better picture, in certain circumstances.
What does HDR do and in which situation should we use it?
I will try to explain this in a simpler way in the next few paragraphs that everybody could understand. Hopefully after reading this post you will have enough knowledge about what HDR is, when you should use it and what apps are available in the market to create an HDR photo. But first let’s find out what HDR really means.
HDR is an acronym that stands for High Dynamic Range. It is a technique in Photography to capture a greater dynamic range of Brightness, between the lightest and darkest area of a scene or an object being photographed.
People often relate this technique with how human eyes work. Our eyes can see much greater range of brightness compare to the image sensor installed on an average DSLR, and even greater if compare to the image sensor on a smartphone camera.
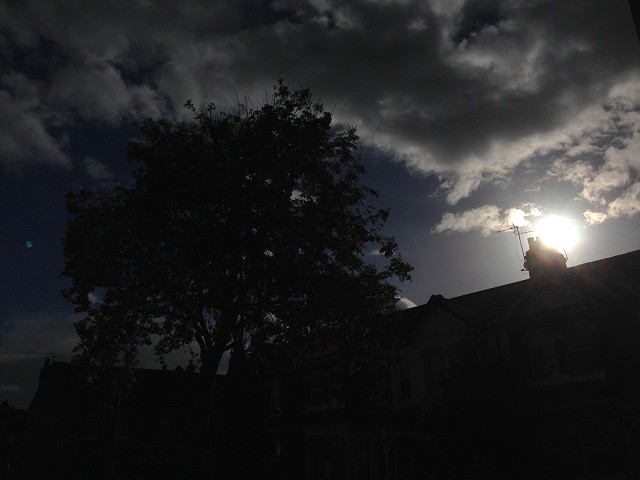
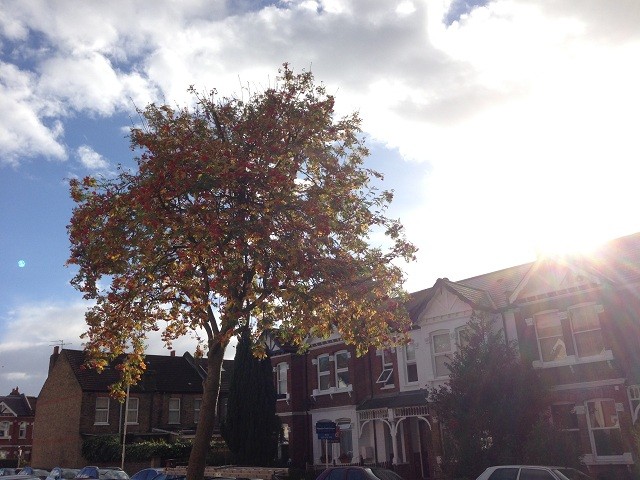
You can test this comparison easily by looking at a scenery (e.g. some landscape) where there is a very big difference between the lightest and the darkest area of the scene. For example on a bright day light where there are some shadows cast under trees or buildings. If you let your eyes to adjust for a couple of second, you should be able to see clearly not only the clouds in the sky but also the details under those shadows.
If you take a picture of the same scene with your iPhone (or any smartphone for that matter), you will get a photo that either too bright you can’t see any clouds in the sky, or too dark you can’t see any details under those shadows.
-

- The ‘Dark’ Side
-
- The ‘Light’ Side
HDR technique is an attempt to fix this issue. How does it do it?
Creating HDR using DSLR Camera and Desktop Software
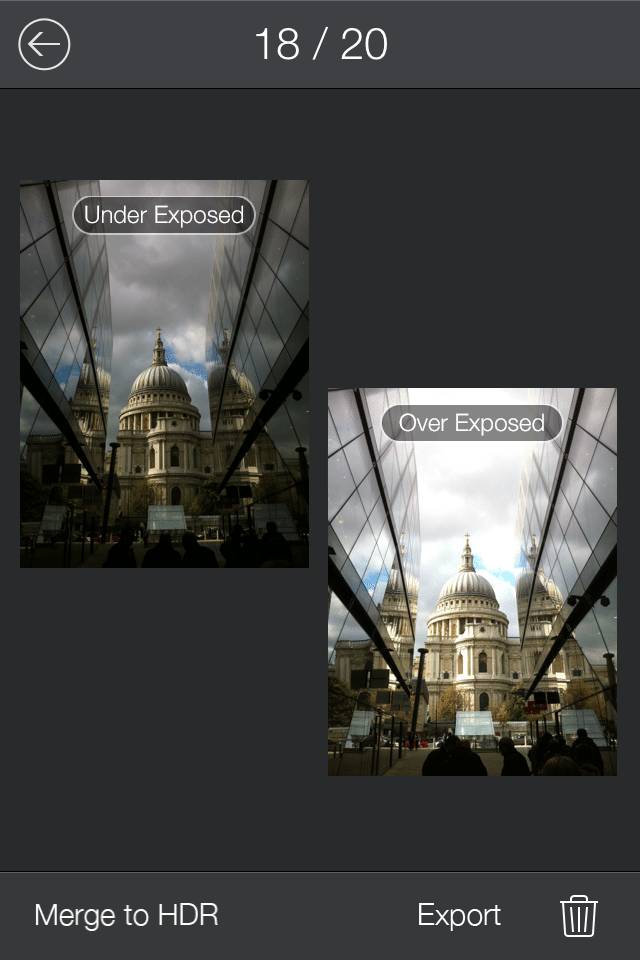
In DSLR world, creating an HDR image normally works by taking multiple photos (minimum 2) of the same scene with different exposure, ranging from the lightest to the darkest, and then blend them into one final combined image. If we use 2 images, one would be taken under-exposed, and the other with over-exposed. This process often simplified by using a feature called Auto-Bracketing where the camera will automatically take a minimum 3 pictures in sequence, one under, one normal and one over exposed.
These series of images will then fed into an HDR Post-Processing software, Photomatix is what most photographers use, where they will be stitched and blended together into one HDR Image. You can also apply further editing on this final image using the same software or others (like Photoshop), which people normally do.
For a complete and free HDR tutorial you can check out Stuck In Customs which is hosted by my favourite HDR artist Trey Ratcliff.

Creating HDR using your iPhone
But we are all here for the iPhone part, aren’t we? Creating HDR using DSLR and Desktop software is fundamentally easy, so to speak. What about creating one with our iPhone? Well, it used to be a very tedious and a long-winding exercise, but not any more. These days, you can do it, with an appropriate app, in a flash!
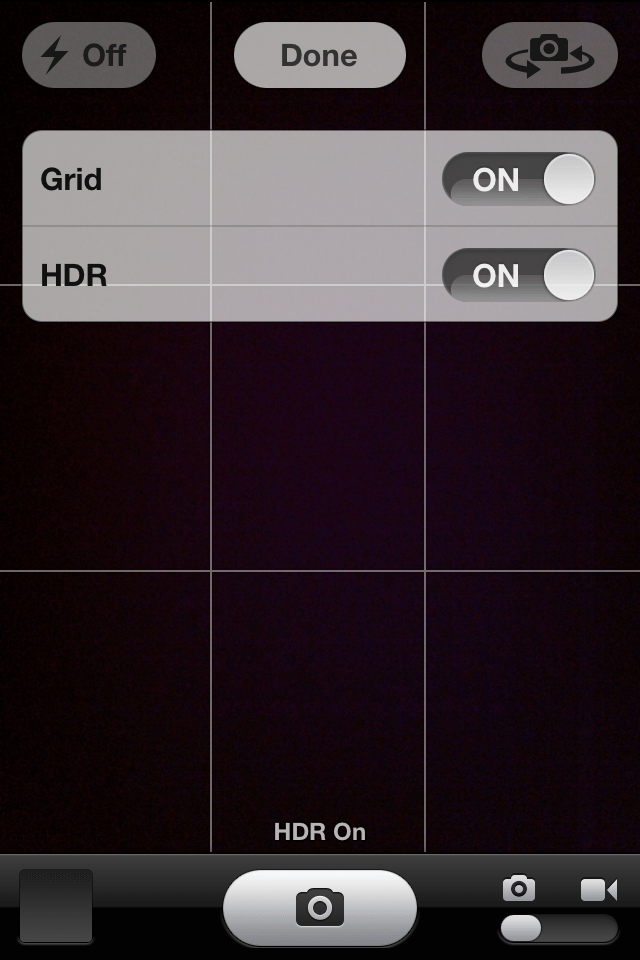
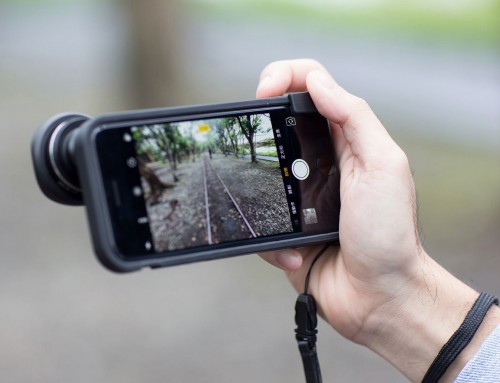
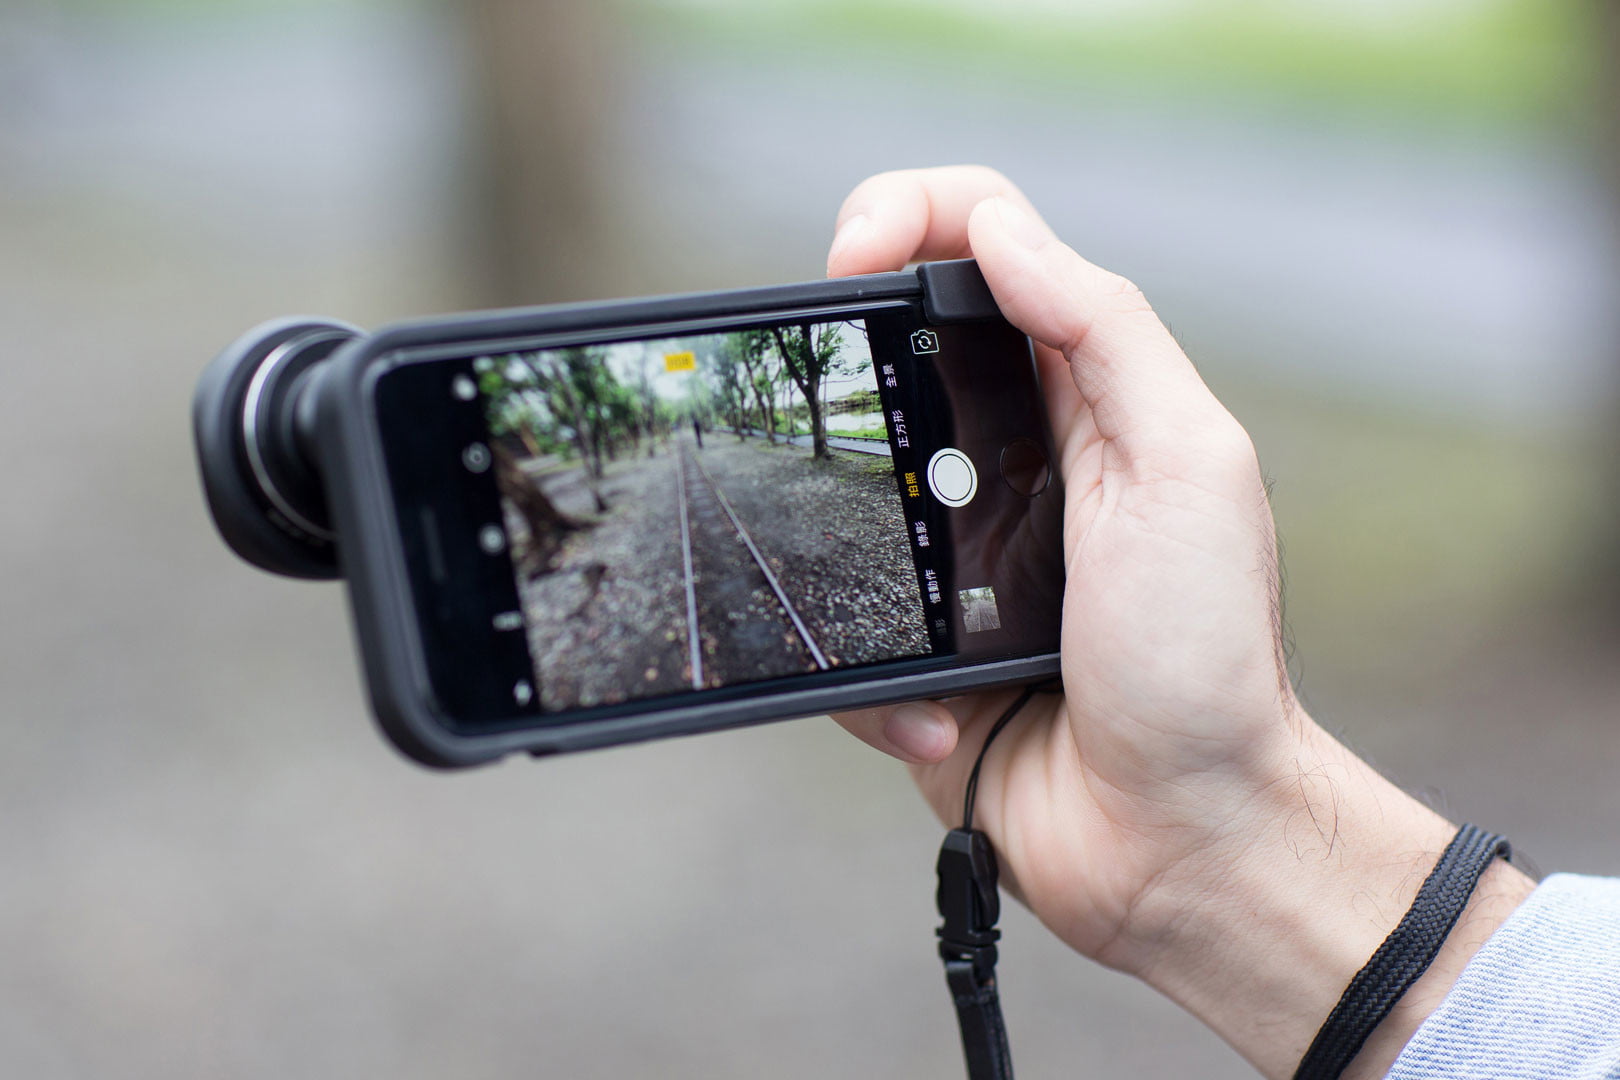
As I mentioned earlier, iOS Camera App has an HDR shooting mode built-in. To use this feature, in iOS 6 tap on the Option menu at the top of the camera view-finder and turn on HDR setting. In iOS 7, the setting has been simplified, now you can just toggle on or off from the HDR button located on the bar next to the Flash on/off menu.
-
- iOS 6 – HDR Option
-
- iOS 7 – HDR Button

When the HDR feature is turned on, the iOS Camera will automatically take 3 (three) pictures in sequence and combine them together. The resulting photo should make the brightest and the darkest part of the scene being exposed evenly. You should see details visible on the dark area of the scene, and the bright area shouldn’t be too overcast.

The HDR Image taken with an iPhone using HDR Shooting Mode
This is the theory anyway, as you will quickly find out that it doesn’t work for every single situation. But for many type of scenes and conditions the HDR feature will help you to create a better picture from your iPhone.
See Also: Tutorials on how to create mobile HDR photo with Fotor HDR.
Which scenes or conditions are best suited to use the HDR Shooting Mode?
Now that you’ve understood what HDR is and how it can help you to take a better picture, you could be thinking that you might as well have it turned on all the time. I wouldn’t blame you to think that way as I used to have the same perception too. But after using it for a while you would realise that it’s not always the best idea.
In general, HDR will help the most when we are faced with a scene where the difference between the brightest and the darkest area is great. Therefore it is normally better suited for taking photo of Landscape or Cityscape where the dynamic range is usually the greatest.
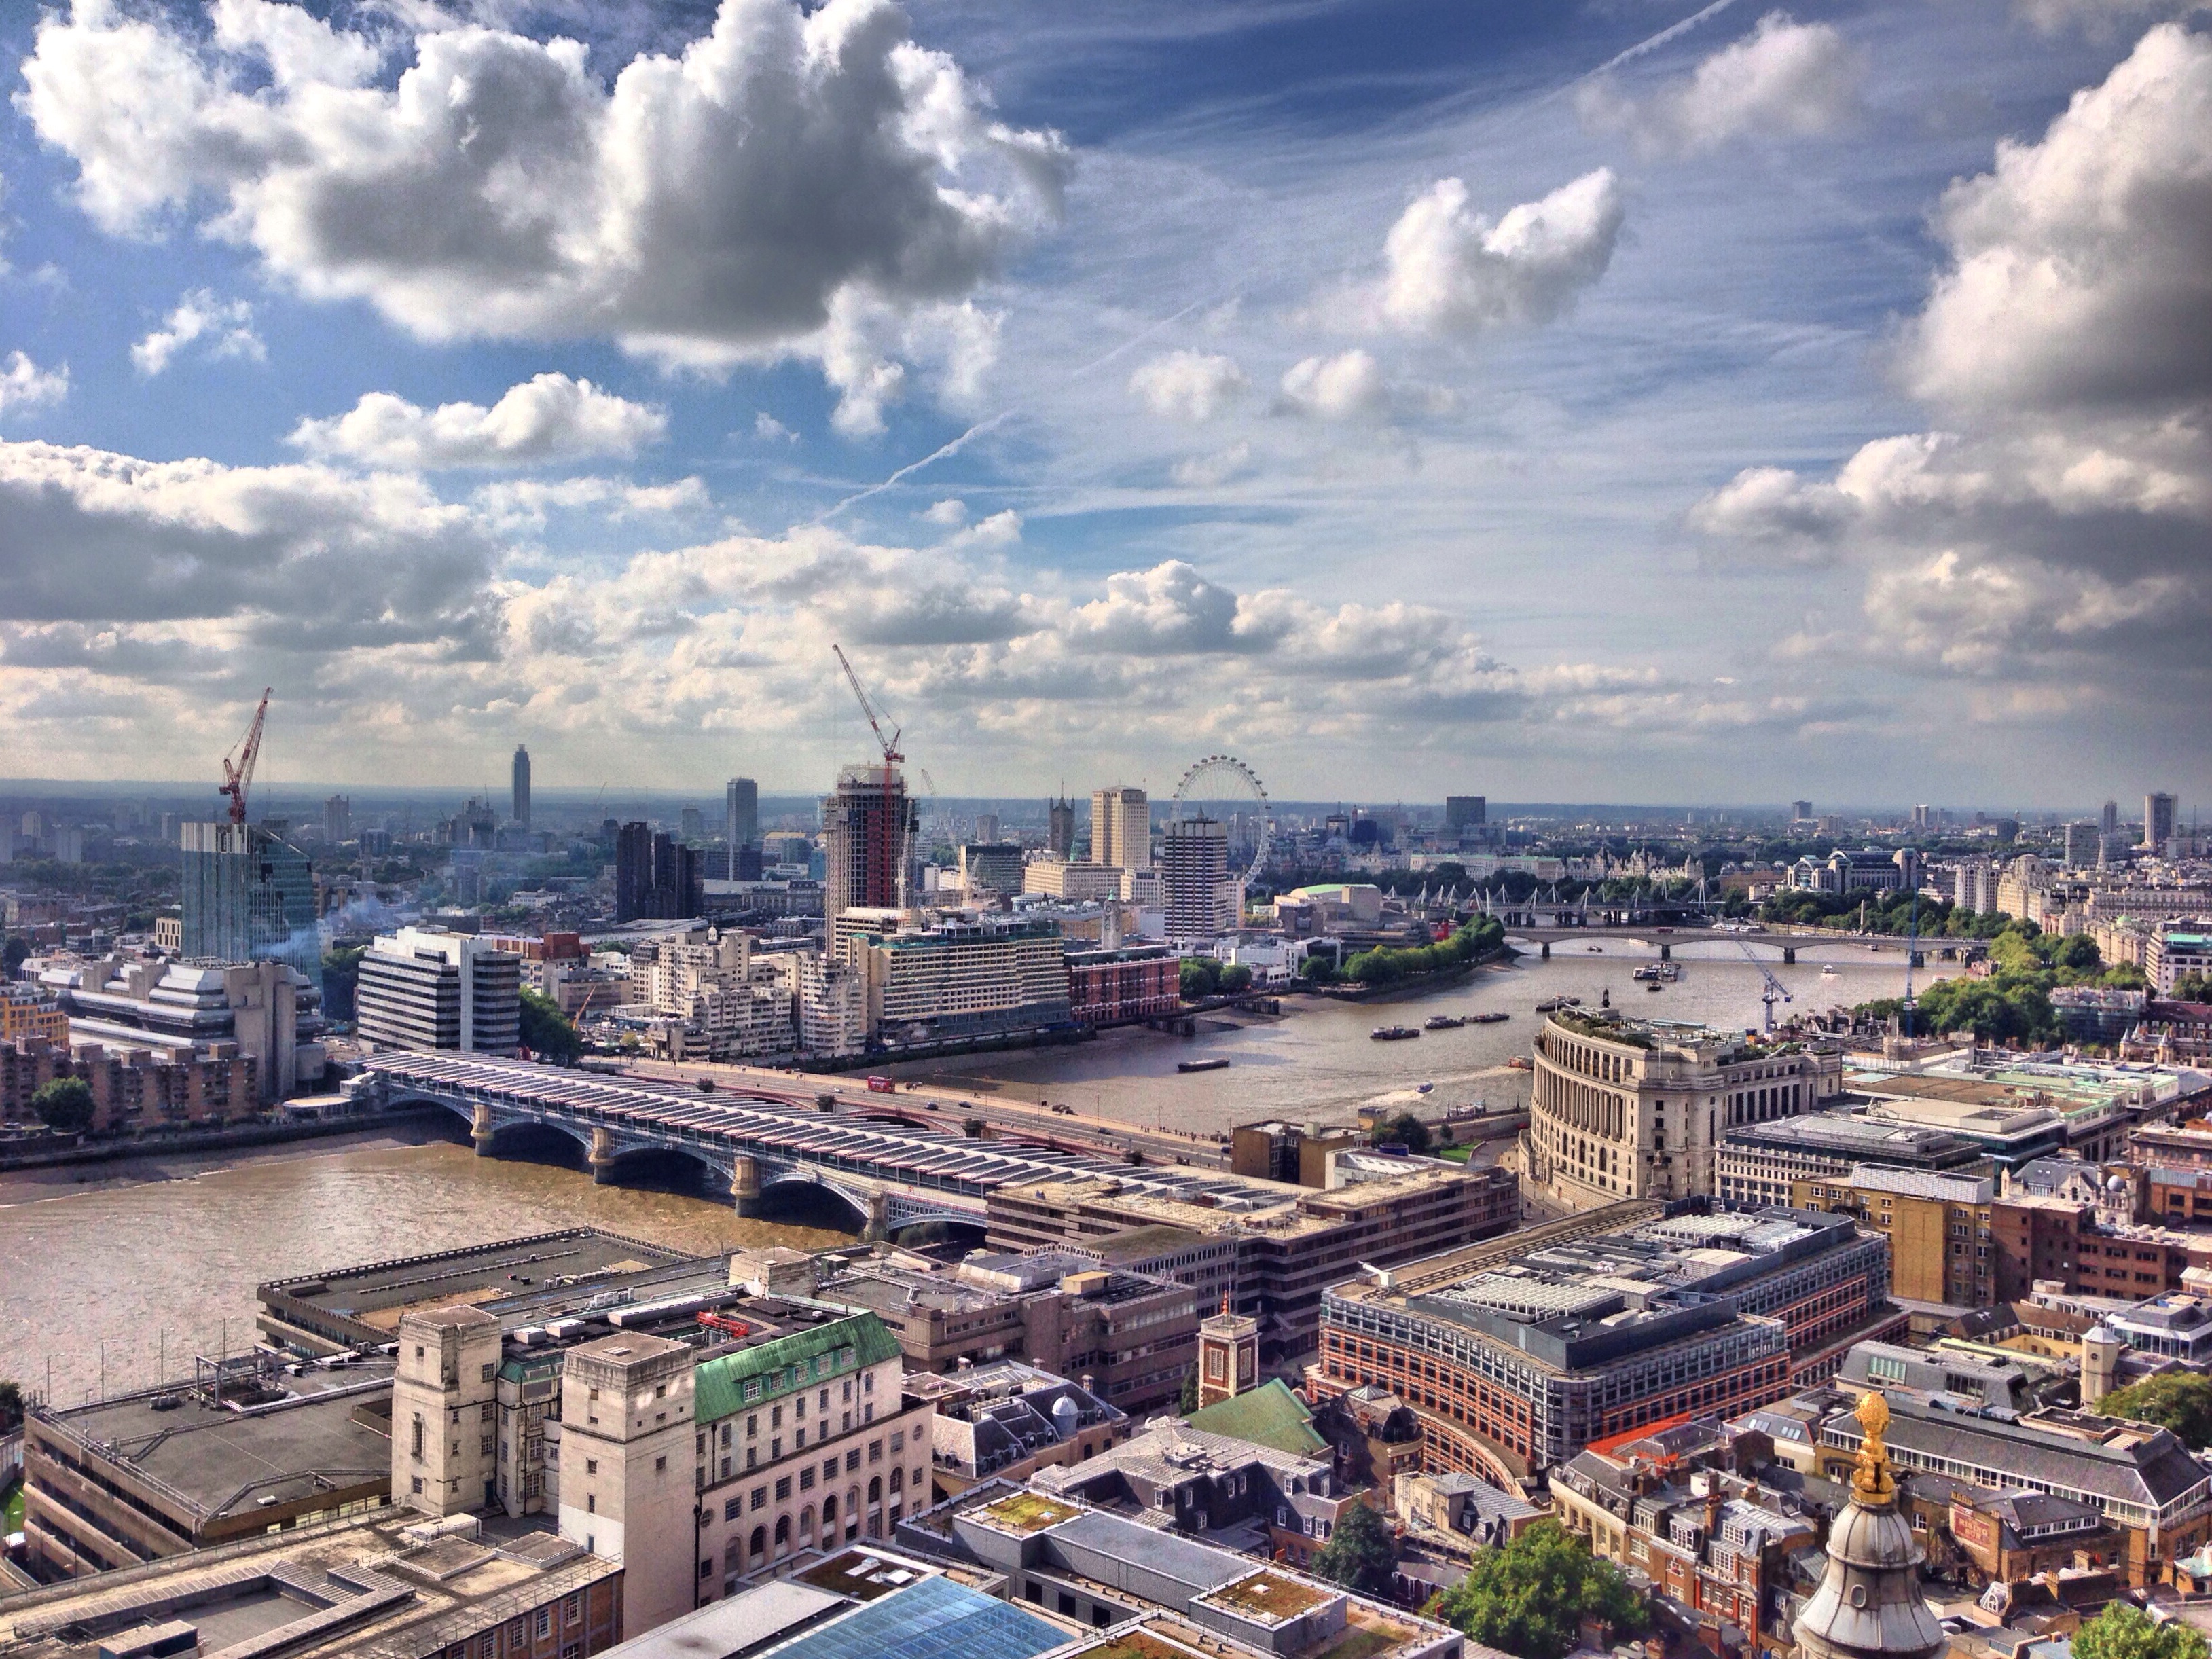
London Skyline in HDR – created using Fotor HDR
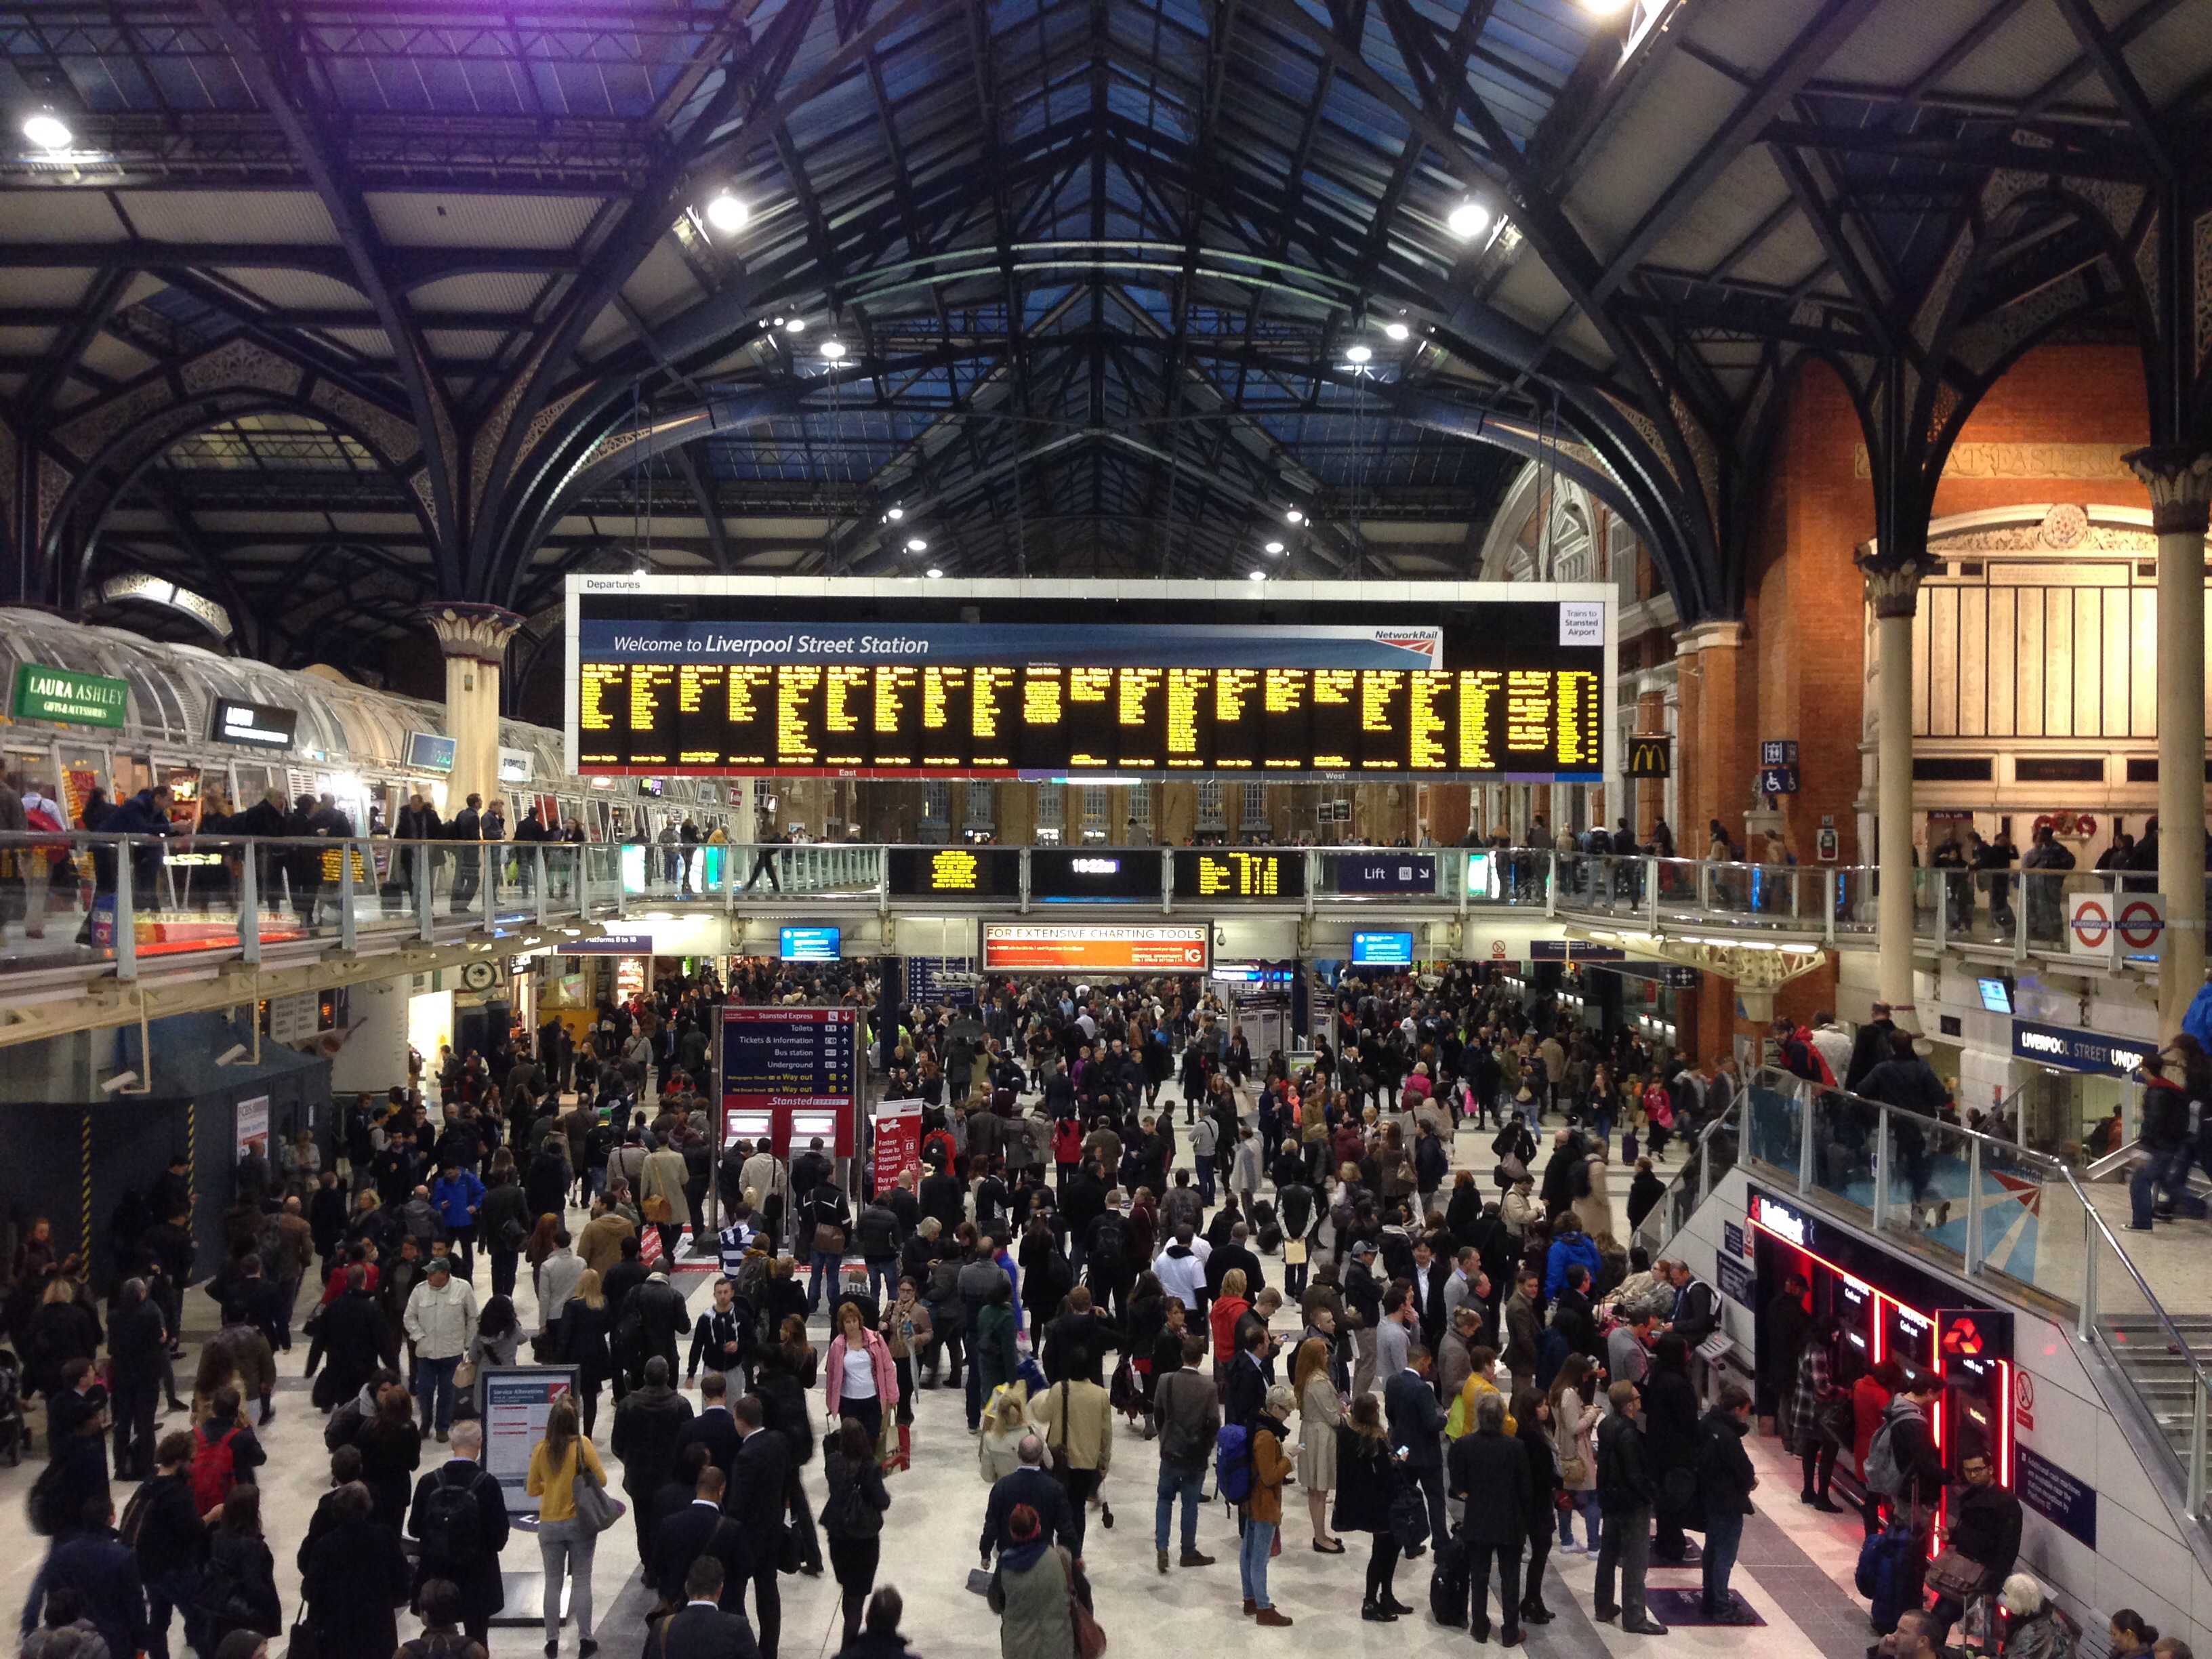
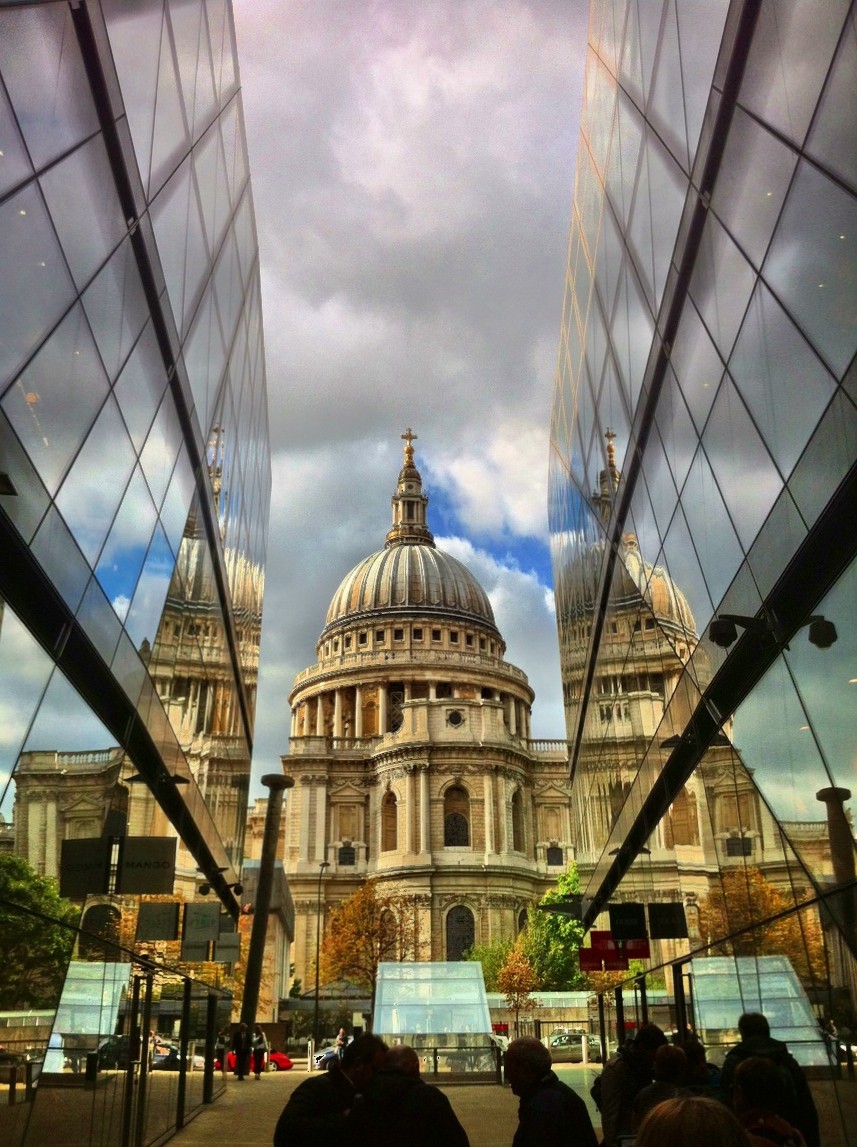
It is also very good for taking Indoor Architecture photos where only ambient lights (sunlight coming from windows or artificial lights) are available, and shadows are prominent.
-
- St. Paul’s Cathedral in HDR – created using Snapseed – HDRScape

-
- Liverpool Street Station in HDR – created using Fotor HDR
Some Night Time photography can also be enhanced using HDR, for example a City Skyline during night time featuring the City lights or some streets that are illuminated with street lights; though with the iPhone this could be tricky because generally the iPhone is not a good camera to take picture in a low light condition.
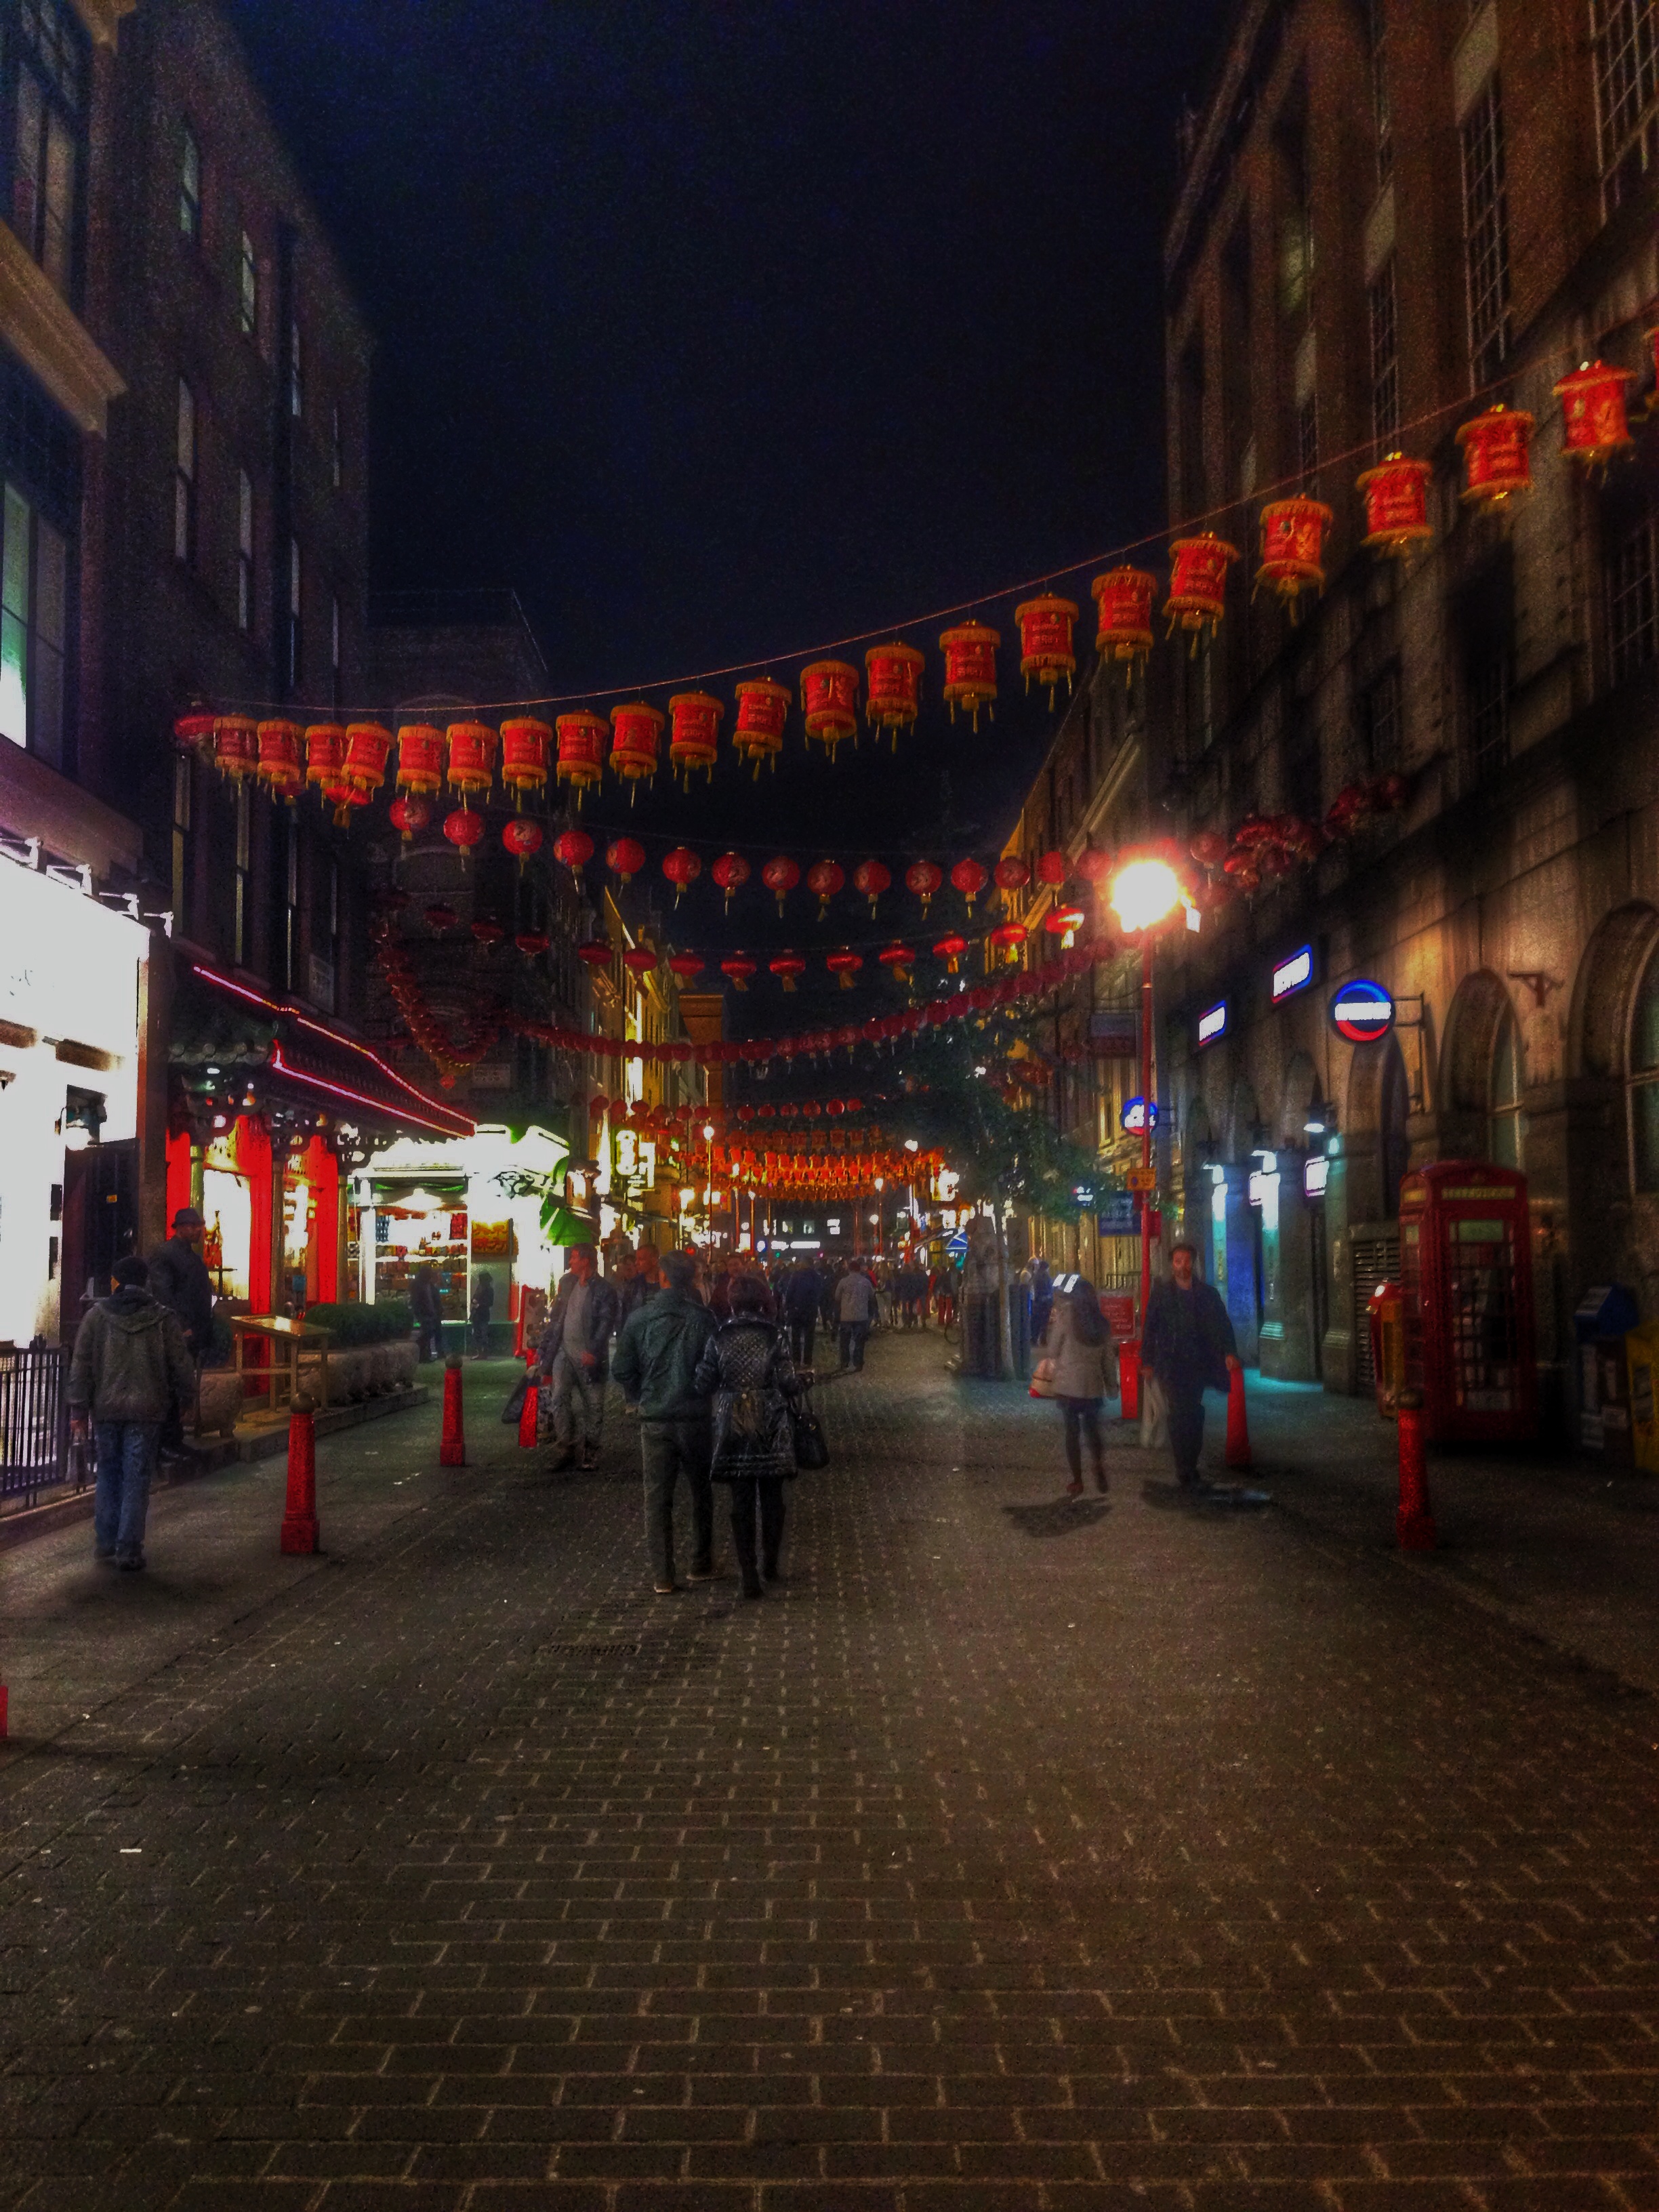
London China Town in HDR – Created using Snapseed – HDRScape
When would be a bad time to use HDR?
HDR won’t help much when the scene or the object is evenly exposed, i.e. has more or less the same value of brightness (either light or dark) throughout the whole area of the scene. For example, HDR won’t be a good choice to use to take photo of an evenly-exposed sky, on a cloudy day where there is no shadow, of a well-lit object on a bright background. I mean there is no harm of using it, but it won’t make the picture much better than if we were using the normal shooting mode.
Also since the iOS HDR feature takes 3 photos in sequence, it would be a bad choice to use it when the object doesn’t stand still. Therefore the HDR feature won’t be best suited for Sport photography or any type of scene where the object is always in motion.
One exception for this would be when the moving object is not the most important part of the scene and motion itself is actually adding an artistic value to the photo. An example for this would be taking photo of a busy street with people and vehicles passing by as one of the elements of a Cityscape scene.
When HDR is not HDR? Introducing Tone Mapping
I’m sure many of you have been wondering while reading this article: “So how can we create those amazing HDR images I have seen out there?”, because after you’ve tried the HDR Shooting Mode with your iPhone camera the result is nothing like the ‘HDR‘ you expected, am I right?
Well, that’s because the ‘HDR’ that you were thinking about is actually more a product of a Photography processing technique called Tone Mapping. You can read more in details about Tone Mapping from the list of resources below, but here is the gist of it.
Left alone, a standard unprocessed HDR Image will look ‘flat’ when viewed on a monitor screen (or worse printed on paper). This is because the range of brightness contained in an HDR Image has to be compressed to fit into the small range of brightness that an average monitor can show, though the latest 4K Digital TV might just be capable to show the wide dynamic range (that’s why the picture there looks like HDR photo). So, to make the HDR image looks more ‘attractive‘ people use the Tone Mapping technique. The Tone Mapping process will basically go through ‘each pixel’ on the image and adjust its contrast and remap its colour according to what value the surrounding pixels have. The result can be, as you know, beautiful – sometimes almost ‘out of this world‘.
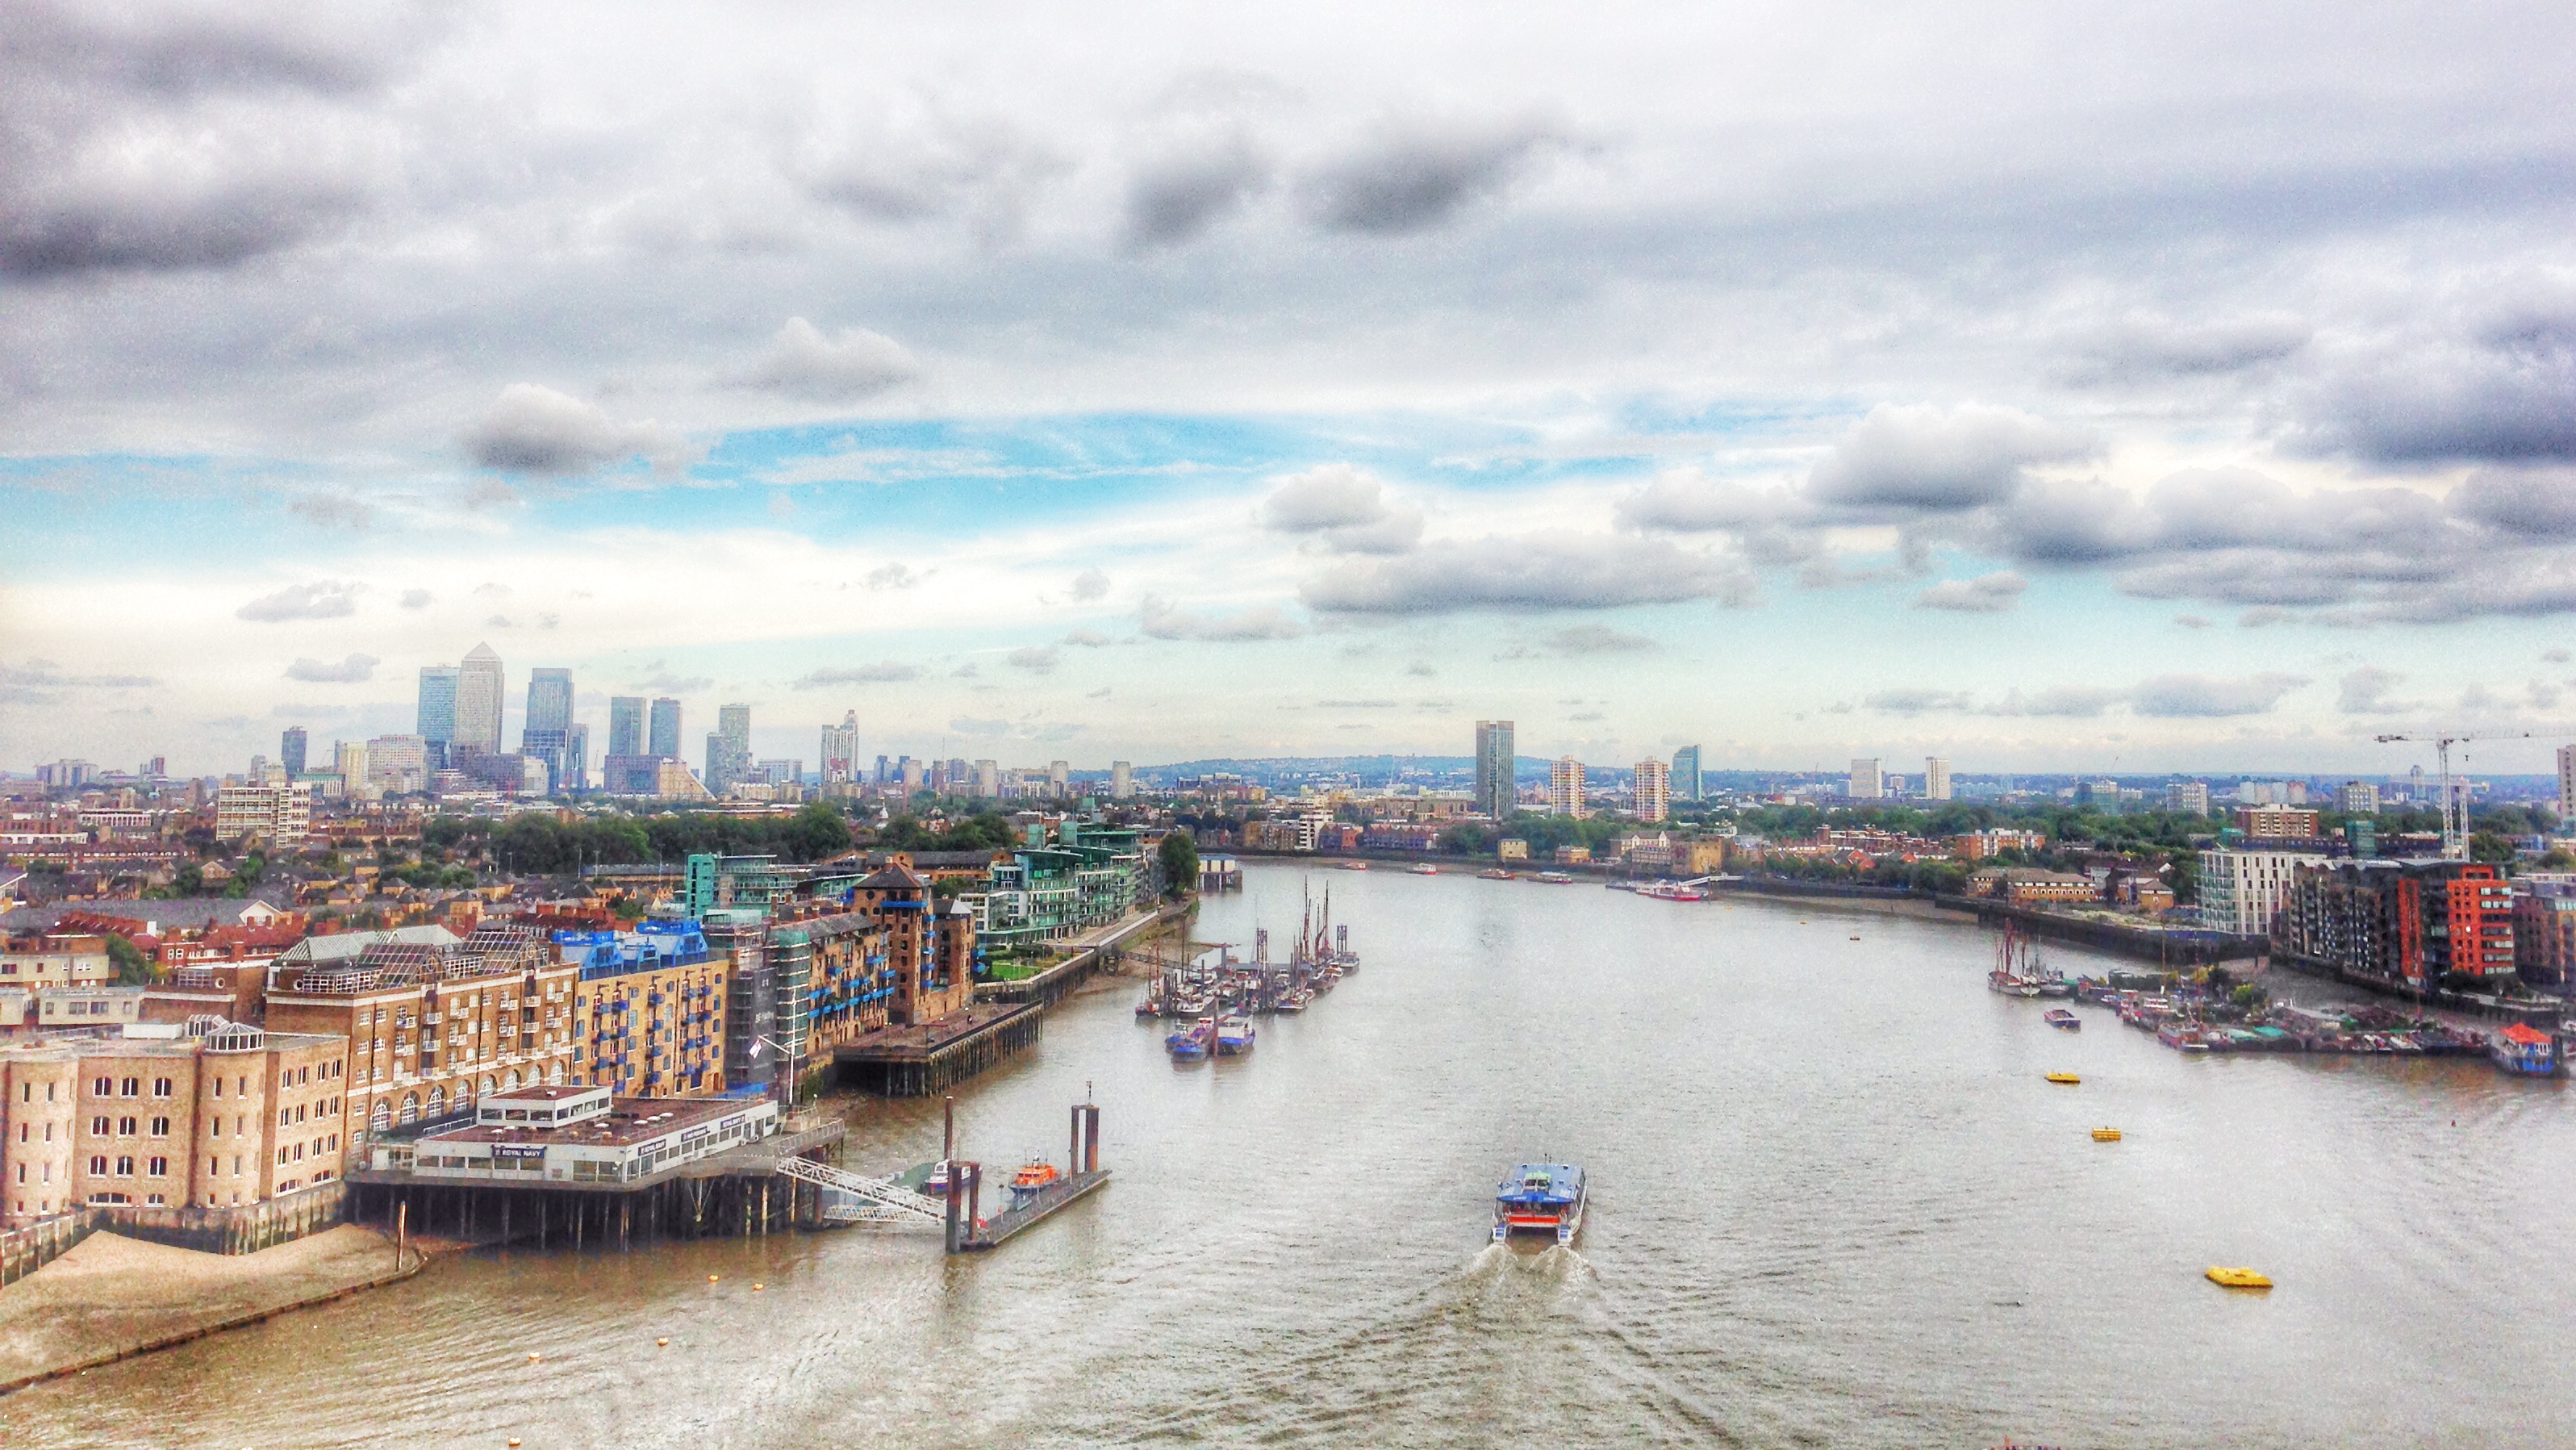
London Thames River in HDR – created using Snapseed HDRScape
The reason why a Tone Mapped image might not be an HDR image is because Tone Mapping process can be applied to only a single-exposed image (example above), in other words you don’t need to use a multi-exposed images to create a Tone Mapped picture.
The Best HDR Apps for your iPhone
You can find many ‘HDR‘ apps in the App Store. Some of them can take multi-exposed images (normally two) in-app and combine them together to create an HDR image. Some others can use just one photo, or two or three, from your photo album. All of them would employ some post-processing technique, and most definitely apply Tone Mapping on the resulting image. Though the quality and the level of control you get of the overall process are vary from app to app.
The best HDR app that I’ve used is called iCameraHDR, which can take 1 or 2 images, or uses images from the photo album, and create a raw HDR Image. This app has quite a sophisticated control we can use to affect the overall process and provides more editing tools too. Unfortunately you can’t get this app any more as it’s been discontinued by the developer. Although I’m happy to say that the replacement app, called Fotor HDR, has been up to task to do the same job, with slightly better workflow.
Luckily, there are more apps out there that we can use to create HDR, here are some of my All-Time Best:
1. Pro HDR
Pro HDR (£1.49) is one of the original HDR apps that has been around for a long time, even before iCameraHDR came out. Originally you could only processed photos that were taken directly with the app’s camera, but the latest version would allow you to pick your own dark and light image from your Photo Album. The Tone Mapping that is applied to the image in my opinion is quite subtle, which results in not too exaggerated HDR effect. I found it among the best result.
ProHDR
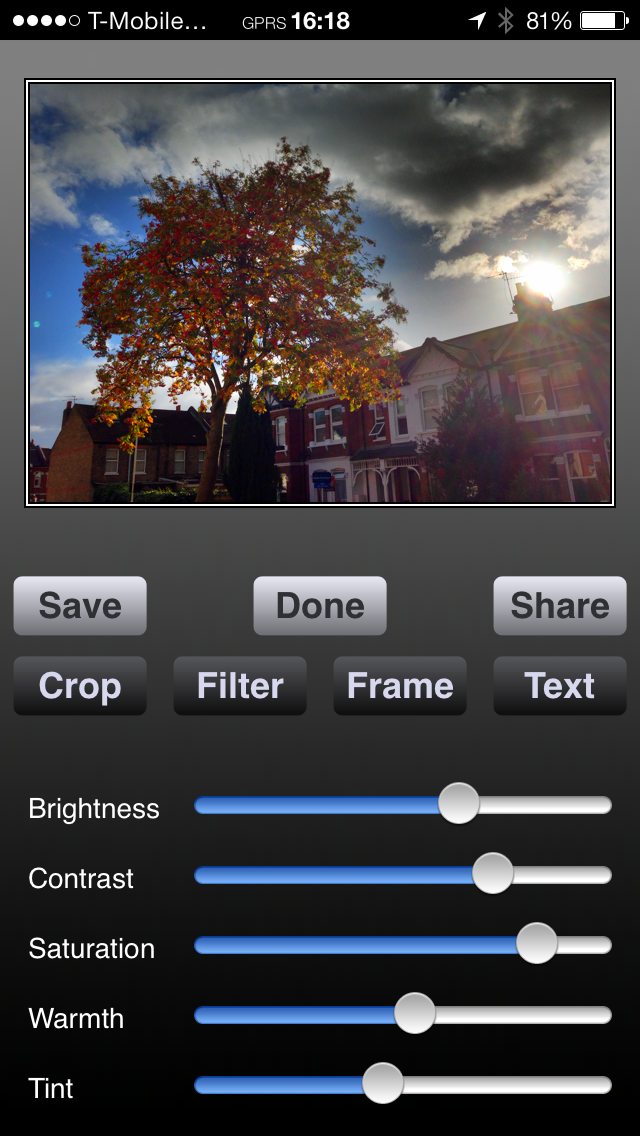
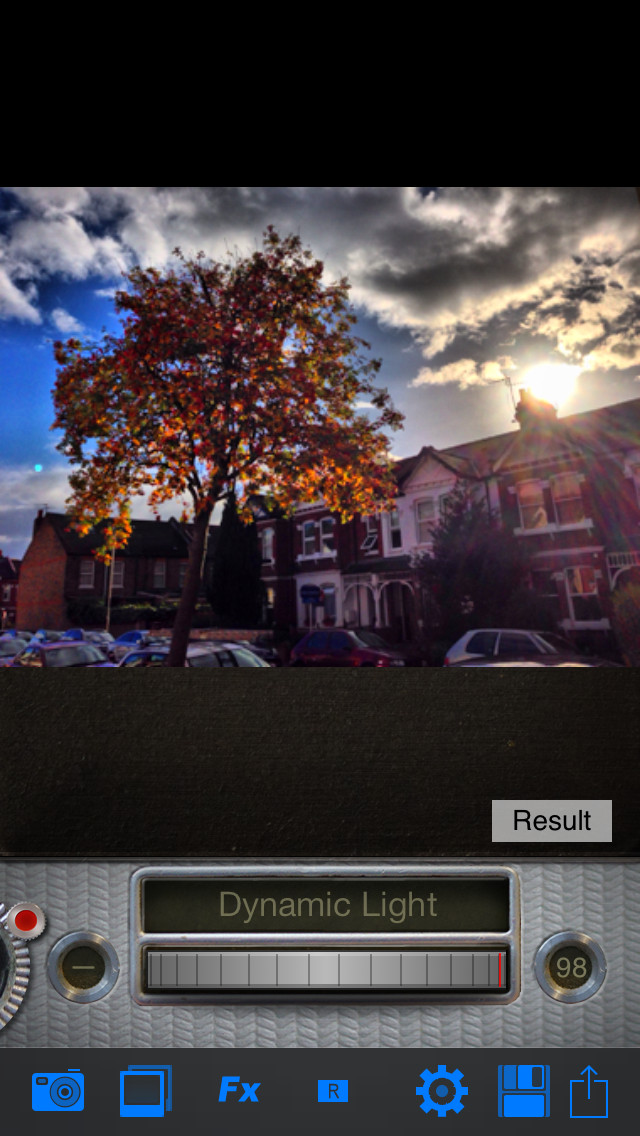
2. Dynamic Light
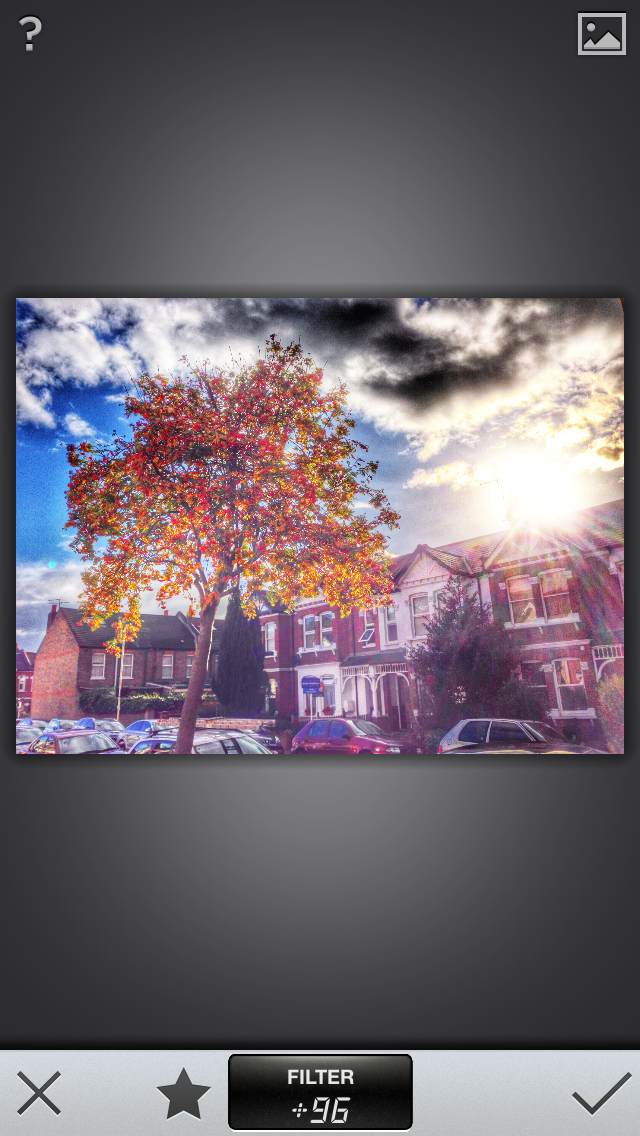
Dynamic Light (£0.69) used to be a long time favourite of mine because it can create a strong HDR effect from a single exposed image. In addition it also provide some other variation of HDR effect that you can apply to your photo, for example: Orton, Black and White, and Infra Red. These alternative effects can give different HDR look to your image.
-
- Dynamic Light
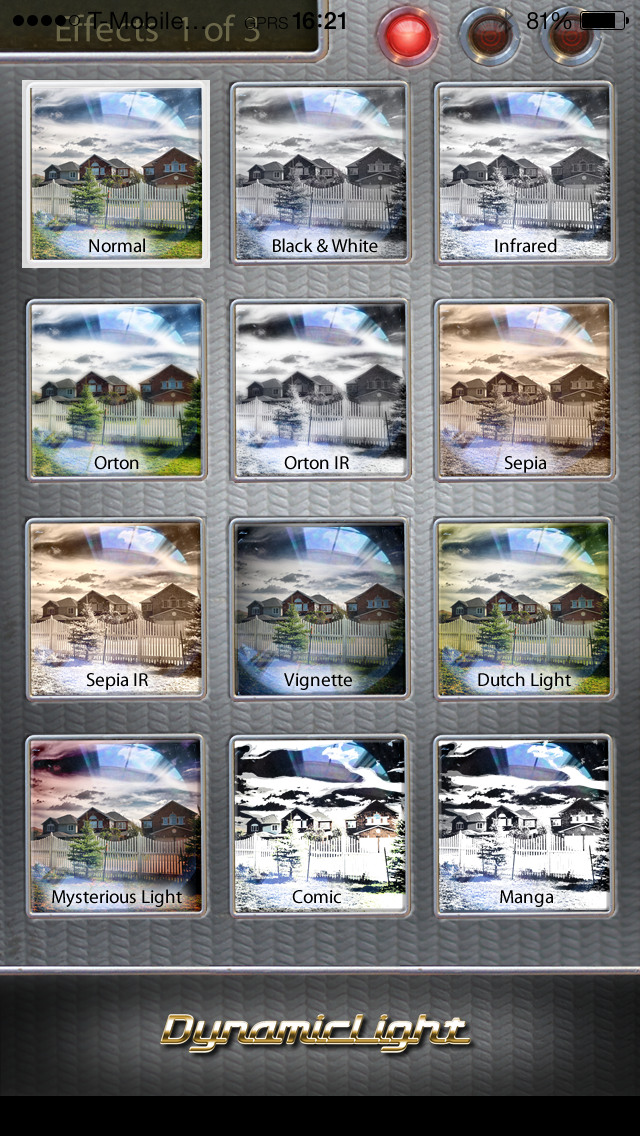
-
- Dynamic Light – Effects
-
- Dynamic Light – Orton

3. Fotor HDR
Fotor HDR (£1.49) is the successor to the famous iCameraHDR. Naturally, considering its pedigree, it boasted 32-bit processing, HDR preset styles and Ghost reduction (for those shots with motion). At the moment it can only create HDR from images you take via in-app camera, i.e. you can’t load your own pictures from the photo album, but the developer assured me that this feature will be added on the next version. The resulting HDR is very good, I even dare to say that it’s better than what I used to get from iCameraHDR, and it’s even before further post-processing which I normally had to do with iCameraHDR’s image. You read a complete tutorial on how to create Mobile HDR photo using Fotor HDR in this post.
-
- Fotor HDR – Camera
-
- Fotor HDR – LightBox

-
- Fotor HDR – Creating HDR from 2 different Exposed images
-
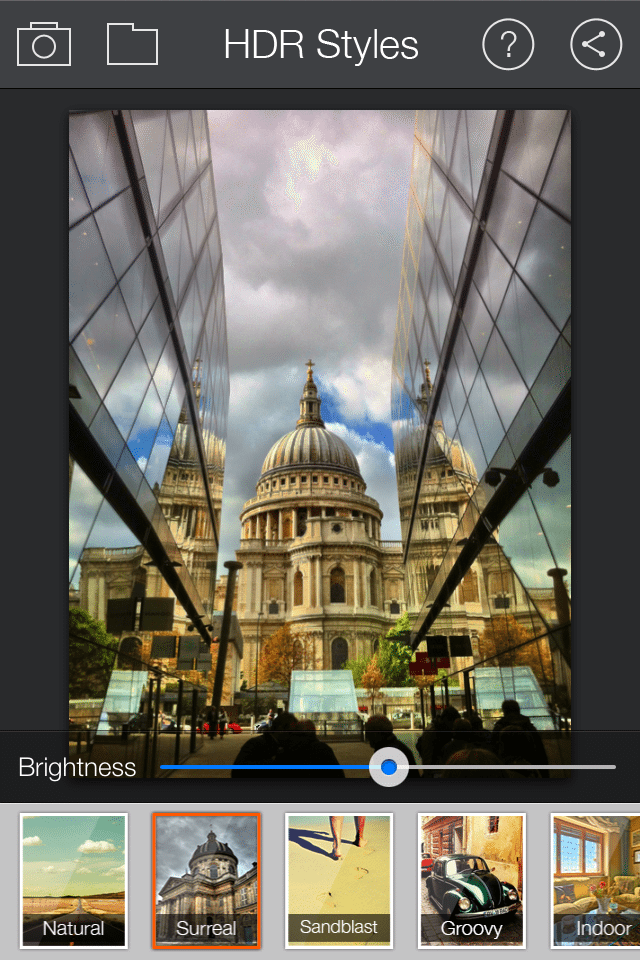
- Fotor HDR – Styles and Editing tools
-
- Fotor HDR – Resulting Image
4. Snapseed with HDRScape
Snapseed (Free) has been my go-to editing tool since its first infancy. It has a unique and original editing gestures which simplifies and gives your more precise control on your editing. Recently it came out with a new version which include some new features including one called HDRScape. And I can tell you that it does amazing thing with your photo! I must say that the quality of the resulting HDR picture is on par with Pro HDR or Fotor HDR, maybe even better considering that it does it from only one exposed image (it doesn’t take 2 images). In anyway you can always use the iOS HDR shooting mode to take the HDR photo and let Snapseed to do the Tone Mapping. Last but not least – it’s FREE – you can’t really beat that.
Snapseed – HDRScape
This probably has been quite a long article about one subject, but HDR photography and image processing is one of the most fascinating genre not only among general photography community but maybe even more so in mobile photography.
Online Resources on HDR (High Dynamic Range) Image Processing and Photography:
- HDR (Wikipedia)
- Tone Mapping (Wikipedia)
- How does the dynamic range of the human eye compare to that of digital cameras? (Photo.Stackexchange)
- What is Tone Mapping? How does it relate to HDR? (Photo.stackexchange)
- More on Dynamic Range (The online Photographer)
- Eye to Eye – Camera and Vision
- Camera vs Human Eye (Cambridge in Colour)
- Dynamic Range (Cambridge in Colour)
- What is HDR and when should I use it in my photos (Lifehacker)
- How to take HDR photos with your iPhone (iphonephotographyschool)
- Notes on the Resolution and other details of Human Eye (ClarkVision)
- Best HDR Photographers (HDRGuide)
- iShare – HDR Photography (iPhonesia)
What is HDR and How it can Help you take Better photos with your iPhone http://t.co/ght4pQC2Ys
RT @moblivious: What is HDR and How it can Help you take Better photos with your iPhone http://t.co/ght4pQC2Ys
[…] What is HDR in iPhone – How it can help you take better photos and How to create beautiful HDR Photography with only your iPhone. […]
What is HDR and How it can Help you take Better photos with your iPhone http://t.co/jmmc9qSJIR via @moblivious – A pretty good take on HDR!
Weekend project: HDR & tone mapping w/iOS http://t.co/fmLn3gYM0N
What is HDR and How it can Help you take Better photos with your iPhone – Moblivious http://t.co/RfUmkHZW1r
Great lesson in photography – What is HDR and How it can Help you take Better photos with your iPhone – Moblivious http://t.co/YYRnnEdPc1
[…] HDR (High Dynamic Range) Photography has to be one Photography genre that constantly fascinates many of people who have seen it, and admittedly I am one of them. A very good HDR photo feels as if it had an element of ‘magic‘ within it, that take our soul wandering to a realm of fantasy beyond our imagination. It urges us to keep mesmerising “Wow! How did they do that!?” Well as it turned out, it ain’t a hard thing to do. At least when you had the right ‘ingredients‘ and the correct ‘recipe‘: a good ‘photography eyes’, a decent DSLR and the appropriate desktop software with which you can concoct your HDR magic. […]
[…] used or seen this function before, maybe you remember one of my post when I talked about the Dynamic Range of Brightness, between the Lightest and the Darkest, of one scene. The Histogram tool in ProCamera […]
[…] What is HDR and how HDR can help take better photos in iPhone […]
[…] See also: What is HDR and how it can help you to take a better photo with your Smartphone. […]
Great article about HDR!I have one question though, how can I access to the original low dynamic range (LDRs) images, which were used to render the final HDR image? thanks!
Yes of course you can. If you are referring to Fotor HDR, please read this guide: http://moblivious.com/tutorials/easy-steps-to-create-mobile-hdr-photo-with-fotor-hdr/ – it will tell you how to Export the 2 original shots.
Let me know if you meant something else.
I’m having a problem with the pictures that I used the HDR setting on , that I’m now trying to pull up and arrange and send out are still downloading from days ago! (I phone 6plus user)
Downloading from where? What exactly do you want to do?