
HDR (High Dynamic Range) Photography has to be one Photography genre that constantly fascinates many of people who have seen it, and admittedly I am one of them. A very good HDR photo feels as if it had an element of ‘magic‘ within it, that take our soul wandering to a realm of fantasy beyond our imagination. It urges us to keep mesmerising “Wow! How did they do that!?” Well as it turned out, it ain’t a hard thing to do. At least when you had the right ‘ingredients‘ and the correct ‘recipe‘: a good ‘photography eyes’, a decent DSLR and the appropriate desktop software with which you can concoct your HDR magic.
A brief history of Mobile HDR for iOS
What about Mobile HDR? i.e. an HDR photo that exclusively taken and created with and using a smartphone? There was time when this seemed impossible, simply because the raw processing power (the chip inside the phone) was just not good enough to create a decent HDR photo. But as we have witnessed, that situation soon was changed. The processing power of a single smartphone have increased exponentially as newer and more power-hungry mobile technology emerges. This has had an obvious impact to how much power available for processor-intensive feature like, among others HDR image processing. ![]() At the end of 2009, a new iOS App that was dedicated to create HDR photos was released, the app was called ProHDR. It turned out to be one of the best HDR creation app to date, one which I still keep and use from time to time. When it was released the first time, it could only use images that were taken with the in-app camera to create the HDR photo (as opposed to pick images from the Photo Album). But on the newer release the app now allows the user to pick photos from the standard album. The app employs a subtle Tone Mapping that creates a uniquely soft HDR image.
At the end of 2009, a new iOS App that was dedicated to create HDR photos was released, the app was called ProHDR. It turned out to be one of the best HDR creation app to date, one which I still keep and use from time to time. When it was released the first time, it could only use images that were taken with the in-app camera to create the HDR photo (as opposed to pick images from the Photo Album). But on the newer release the app now allows the user to pick photos from the standard album. The app employs a subtle Tone Mapping that creates a uniquely soft HDR image.
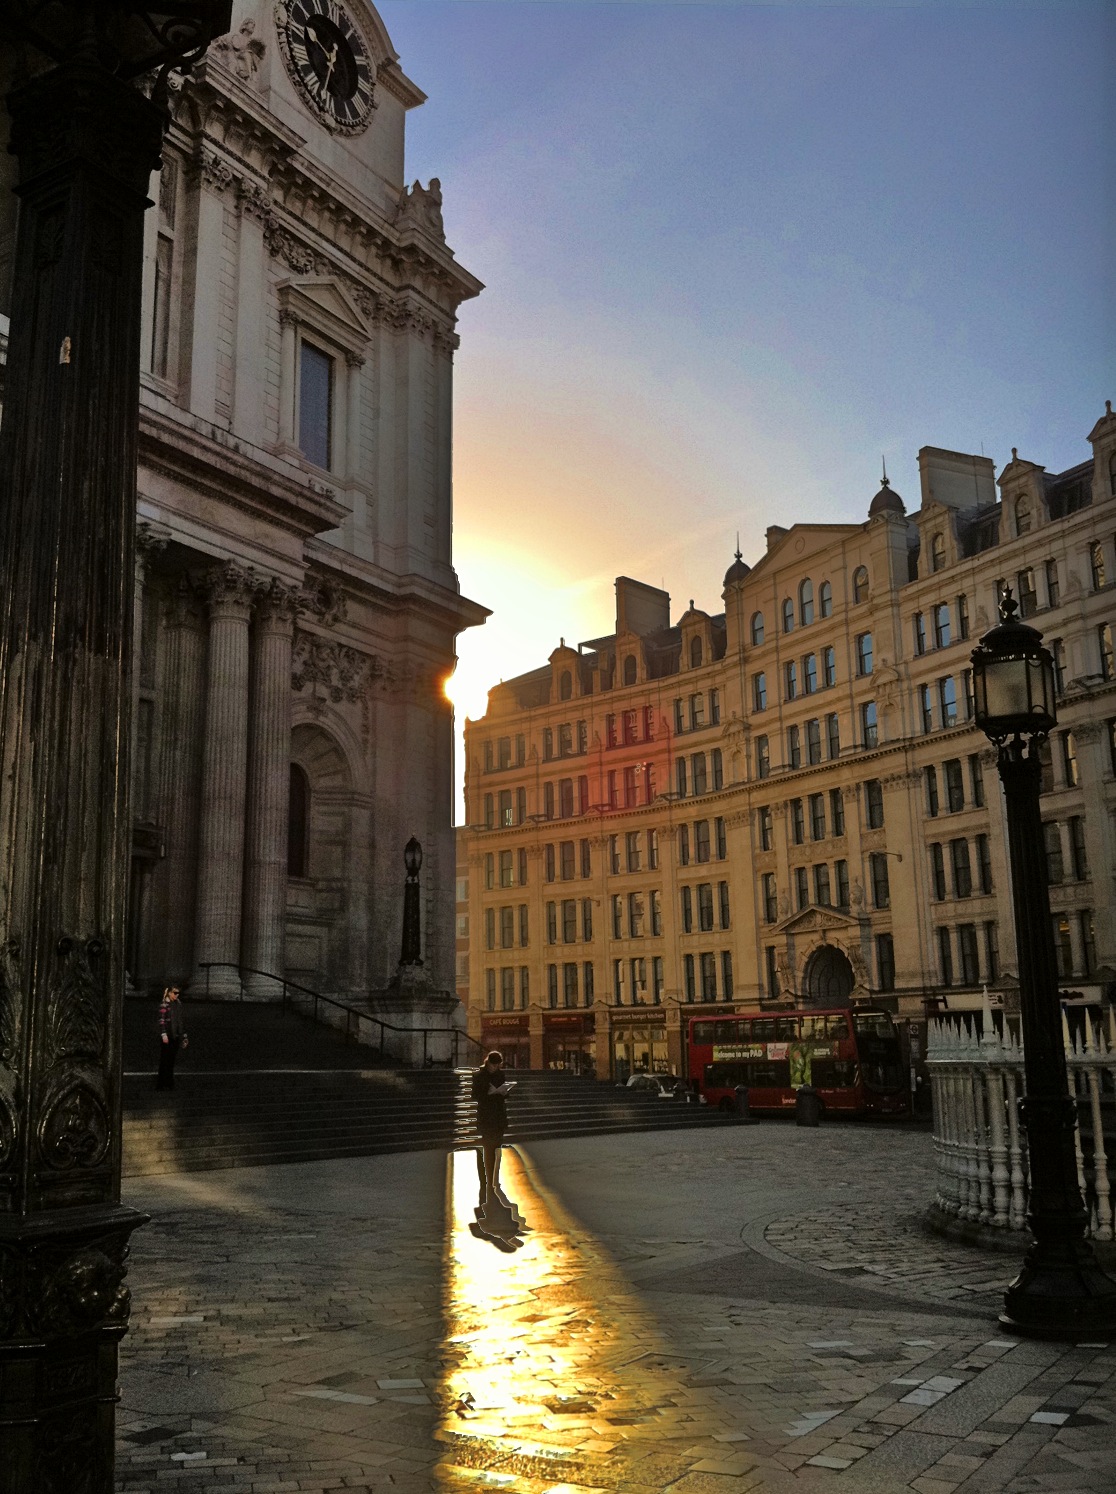
One of my first shot I took with ProHDR
On the following year (2010), Apple released iOS 4.1 which brought in HDR support to the standard Camera App. This is a simple HDR shooting mode which would take 3 photos with different exposure in succession and combine them to create a raw HDR image (without Tone Mapping).
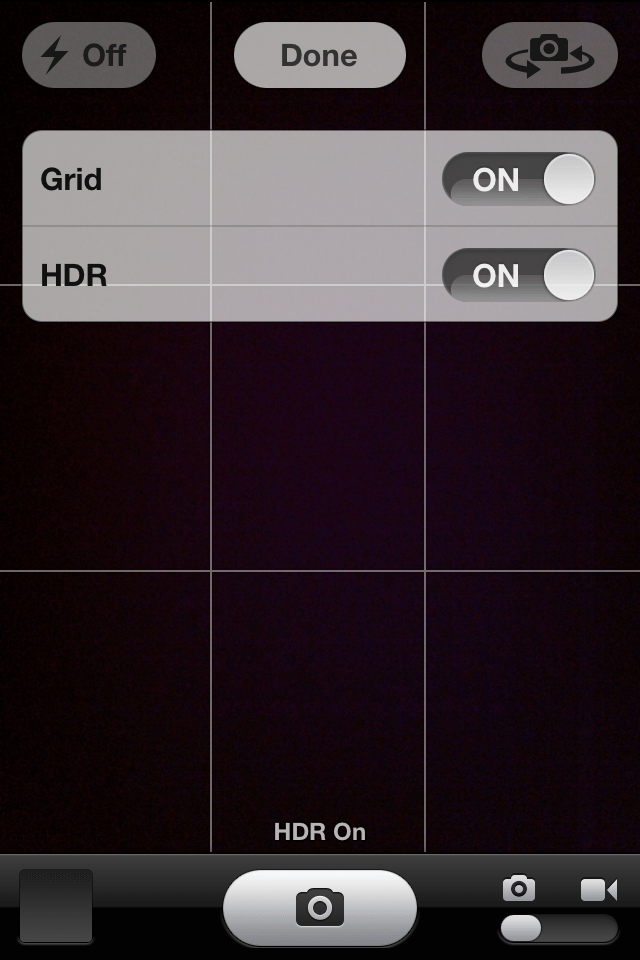
iOS 6 – HDR Option
Another 2 HDR apps then also released with comparable success, they were HDR Fusion and TrueHDR.
Early 2011 marked a turning point in Mobile HDR image creation when Everimaging, a company who also developed desktop HDR software, brought the first 32 bit HDR Processing workflow into the mobile platform by releasing iCameraHDR. It was the only mobile HDR app that provide 3 types of Tone Mapping style, a myriad of post-processing tools and a bunch of Filters in the same app.
It allows you to use, as HDR sources, either images taken from its built-in camera (where you can choose exposure point of each image), or from existing images in the Photo Album. The resulting HDR image created by iCameraHDR was the closest you can get as far as a Tone Mapped HDR image that people usually refer to when they talk about ‘HDR‘, which was no surprise considering its pedigree (i.e. Everimaging’s HDR desktop app big brother). This is why iCameraHDR had since become the ‘weapon of choice‘ by many Mobile HDR artists all around, me included. Unfortunately Everimaging decided to stop developing and supporting iCameraHDR and you can’t buy the app anymore from the App Store. Luckily Everimaging has released a successor of this formidable app, one with all the power of iCameraHDR but with a simpler workflow and easier learning-curve (iCameraHDR wasn’t famous for its ease-of-use).
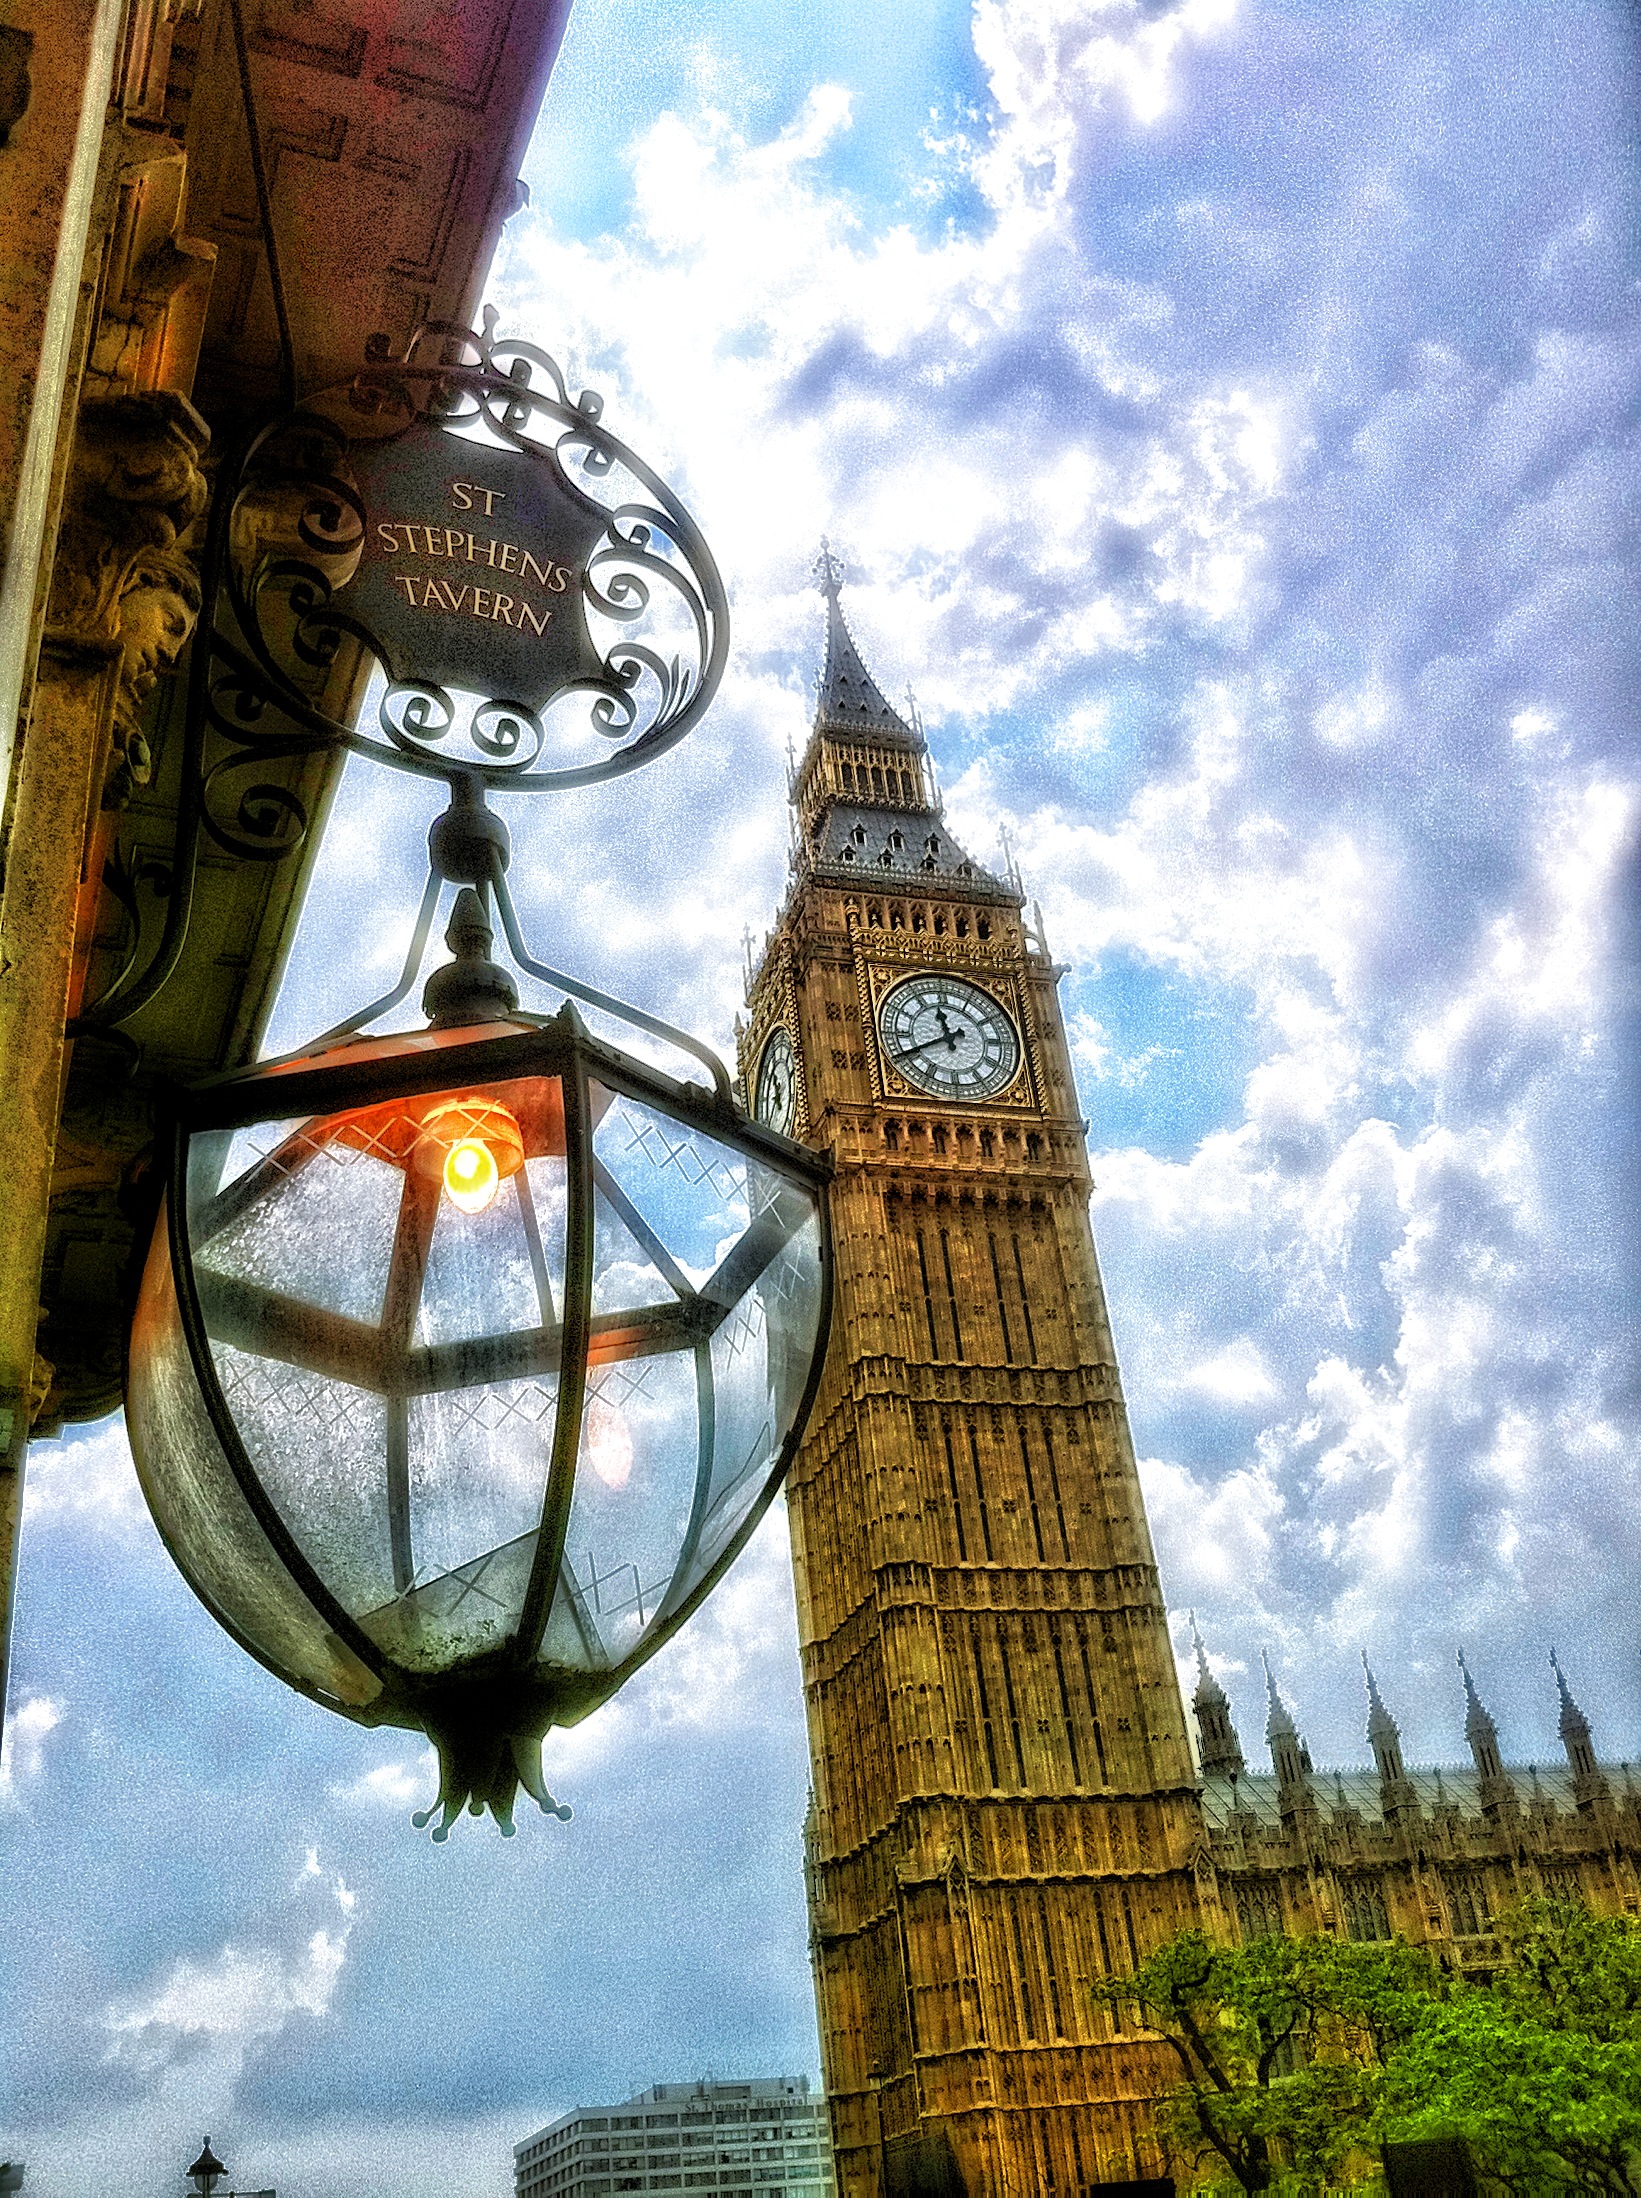
Here are some HDR images I created with iCameraHDR (post-processed).
-

- Big Ben – HDR created with iCameraHDR
-
- London Eye – HDR created with iCameraHDR

A new breed of Mobile HDR Apps
iOS 7 and in some extend the new iPhone 5S weren’t onlyintroducing a major user interface changes into the iDevices platform, but they have also spurred a lot of development of new so-called iOS7 inspired apps. One of these apps is Fotor HDR, the promised successor of the mighty iCameraHDR, developed by the same developer outfit Everimaging. And I can tell you that this new app is no less formidable than the one before it.
Fotor HDR came with the same key features that iCameraHDR had. Things like:
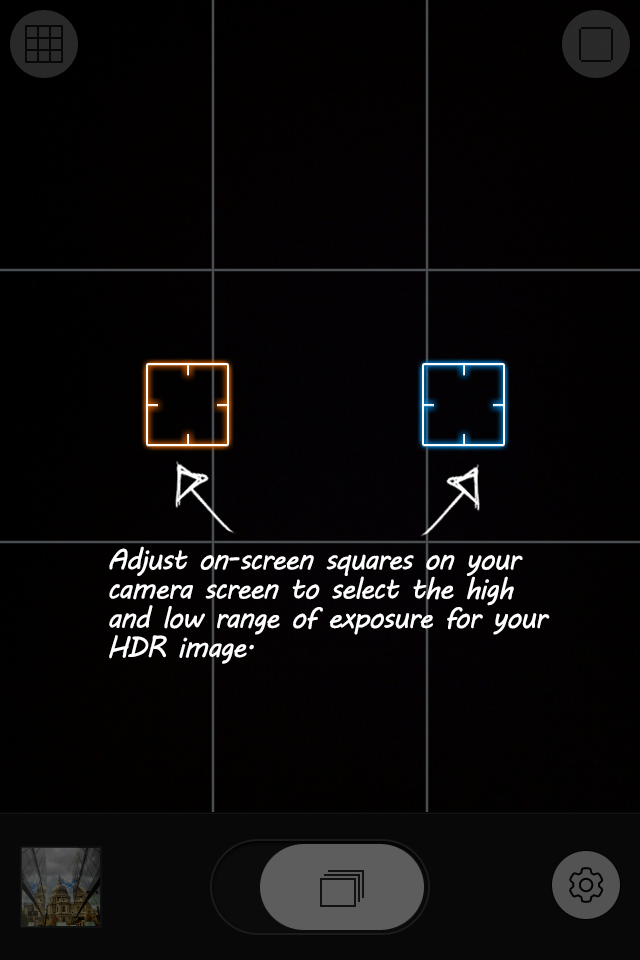
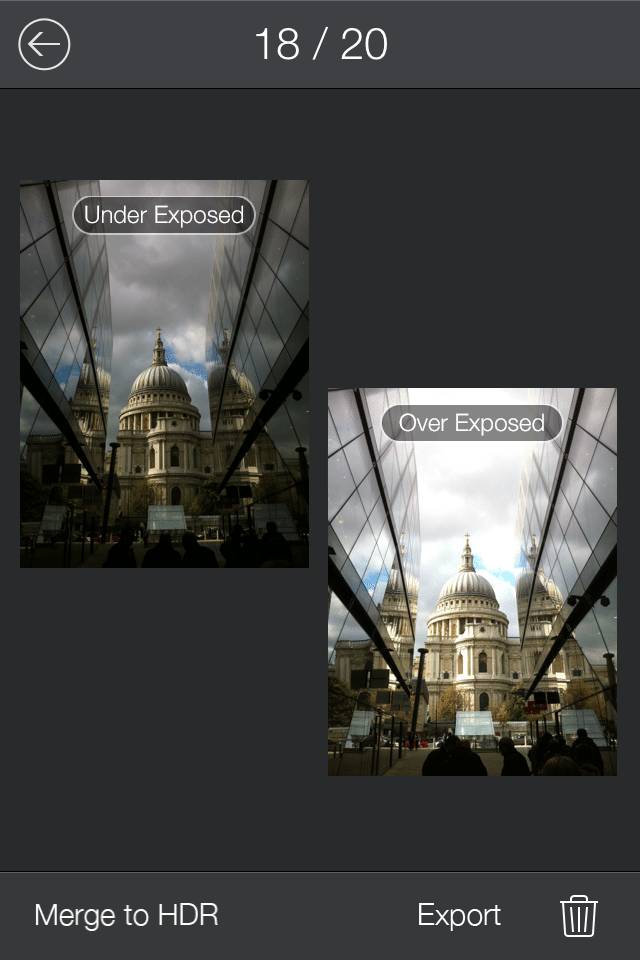
1. Dual capture mode – Automatically capture 2 differently exposed images (one light one dark – also known as Auto Exposure Bracketing or AEB) using the in-app camera, which you can automatically process to create HDR image immediately after you capture them, or save them for later processing. You have also an option to set your own ‘dark’ and ‘light’ point of the scene before the photos are taken. In addition, you can also export the two bracketed images to the Photo Album, which then you can feed to other HDR app of your choice, like ProHDR I mentioned above.
-
- Fotor HDR – Creating HDR from 2 different Exposed images
2. 32-bit processing workflow, the same one as iCameraHDR had, but much much quicker. I can personally attest that it takes more than half the time with Fotor HDR to create the final HDR image than I used to do with iCameraHDR. The Tone Mapping that Fotor HDR applies to the image gives similar result to what we used to get with iCameraHDR.
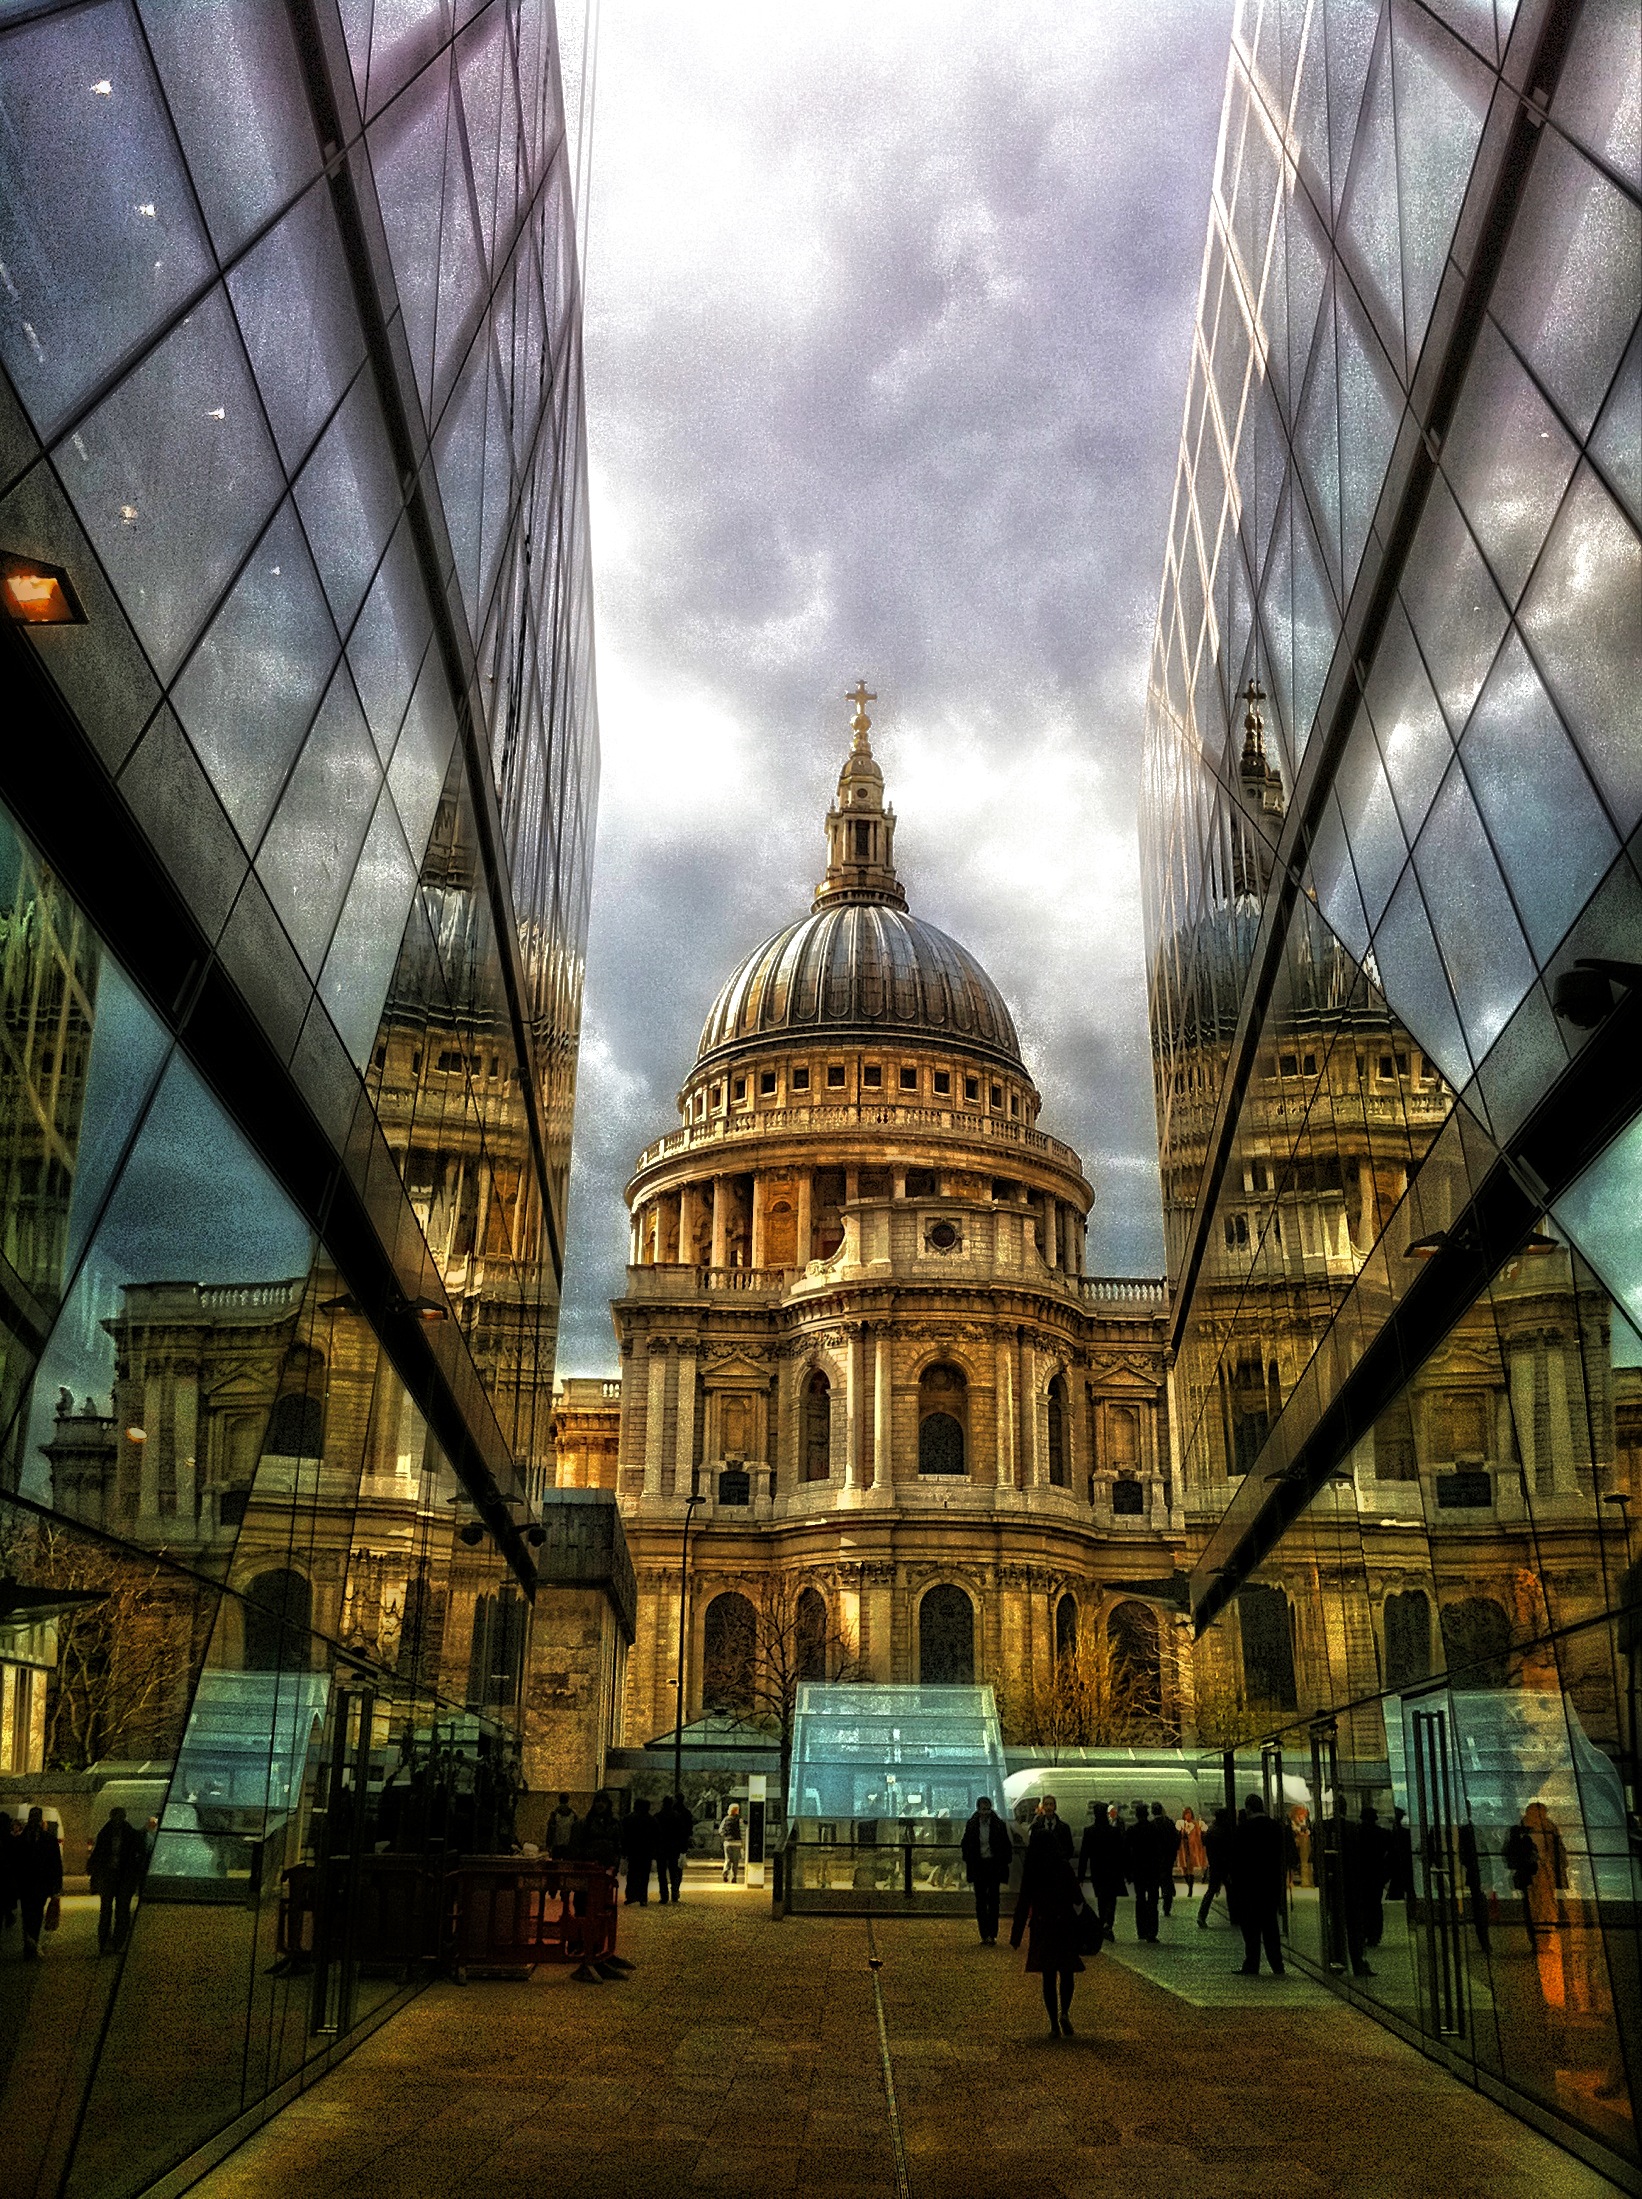
-
- HDR created with Fotor HDR
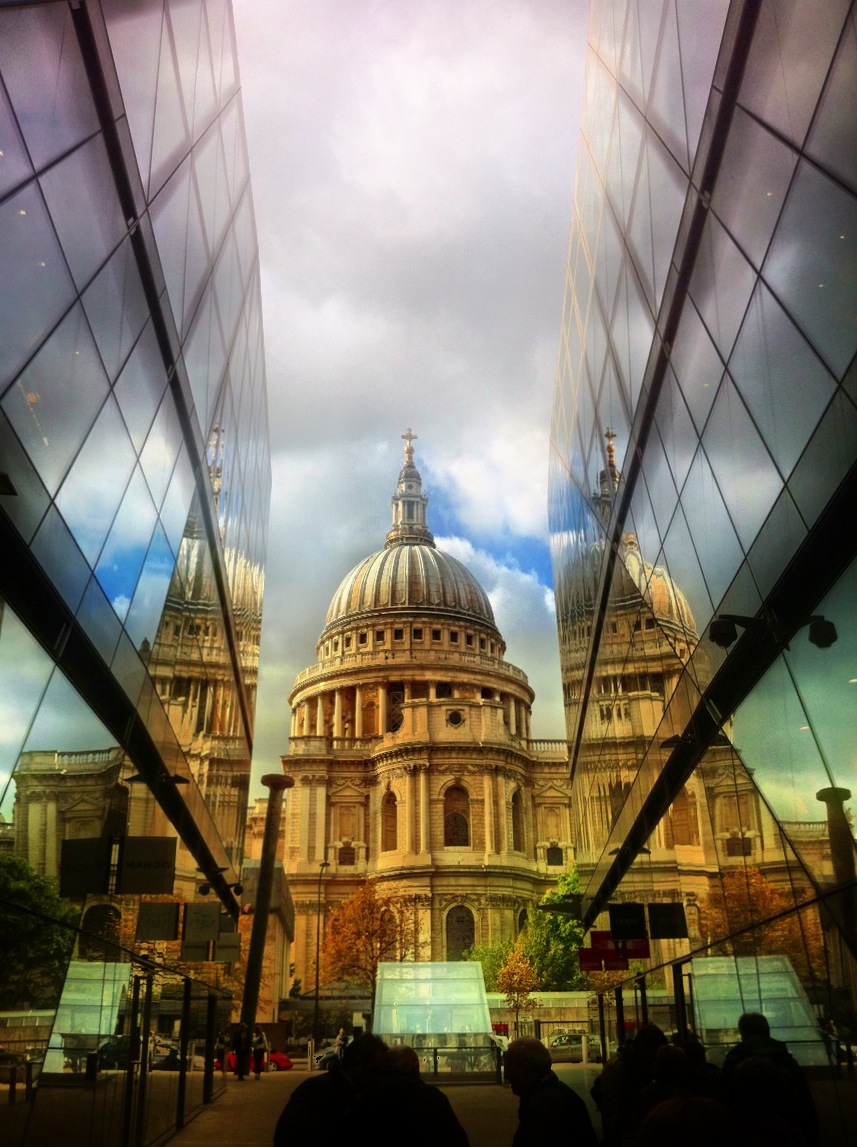
-
- HDR created with iCameraHDR
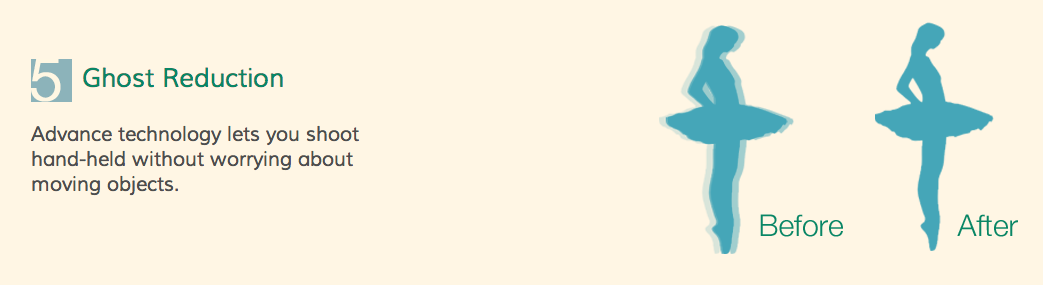
3. Sophisticated Alignment and Ghost Reduction. If you shoot and create HDR image regularly, you would know that one of the problem when shooting bracketed photos (photos taken with different exposures) is when there exist movements in the scene or when there is camera shake. This movement will need to be re-aligned when combining these images, which could create the artefact called Ghosting. Fotor HDR boasts to employ an advance technology to create a better alignment and to reduce ghosting.
4. Simplified post-processing tools. iCameraHDR provided not only the standard editing tools, e.g. Contrast, Brightness, Saturation, etc. but also some advance ones like Highlight/Shadow, Blur/Sharpening, Lens Correction, etc. While these sounds cool, in reality users had never bothered to use the majority of them (most of us wouldn’t even understand what half of them actually do). Fotor HDR limit post-processing tools to only Brightness, Contrast, Saturation and Vignette.
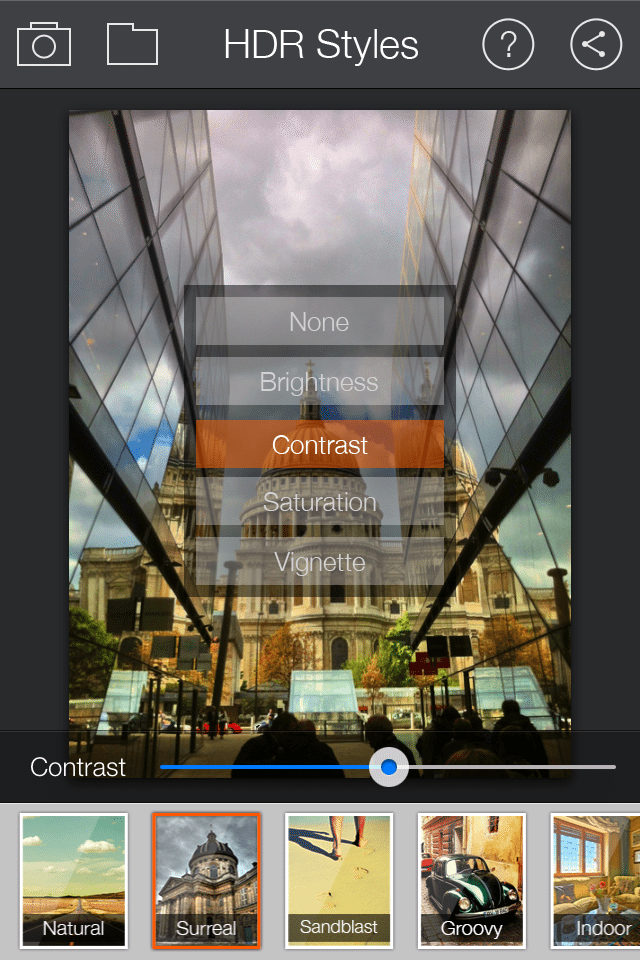
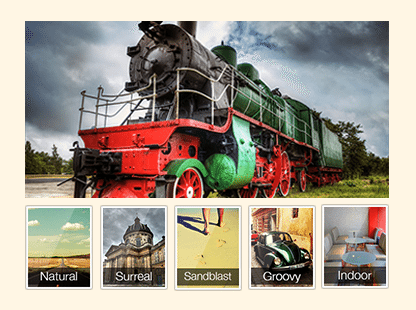
5. Filters – or in Fotor HDR they are called HDR Styles. HDR aficionado would know that there are more than one way to ‘skin an HDR Image’ – so to speak. There are a few styles that each HDR Artist would follow in their HDR creations. Fotor HDR tries to cater to this audience by providing some Style Presets that you can apply to the HDR image. These styles come in a range of for example Surreal, Sandblast, Groovy, Indoor, B&W, Grunge, etc.
I call Fotor HDR as a new breed of mobile HDR app because with this app we can get the same (or better) quality as what we used to get with iCameraHDR but in a simpler steps and less time. The easier learning-curve is such a joy for me and probably for many people, because I don’t know how many times I had to show people how to use iCameraHDR, it’s so complicated. Now people can do it in a few simple steps. Having said that, I’m going to write a step-by-step tutorial just to show you how easy it is to create HDR Image using Fotor HDR.
The timing issue is even more important. It used to take literally a couple of minutes to create the final HDR image; the progress bar used to stuck on 80% and didn’t move forward for a while you convinced that something wrong with it, and as if the app could hear your thought, it crashed 🙂 Fotor HDR takes no time to process the final image, and I haven’t had any crashes when I was doing it.
My only grief with this first version is that we can’t use our own photos from the photo album as we used to be able to with iCameraHDR. But the developer promised me that this feature will be added on the next version.
As far as creating mobile HDR by combining 2 images (the true HDR process) concerns, Fotor HDR is simply the best mobile HDR app you can get in the market right now, especially if you had graduated from “iCameraHDR school”. If the developer can put back the ability to pick our own images, then this would be perfect!
In a future post I will show you the other new breed of mobile HDR app that can create HDR image using only one original photo! This one will blow your mind!
In the meantime you can watch the following video to discover a bit more about Fotor HDR:

Fotor HDR – The iCameraHDR Replacement is finally here and it is Spearheading a new breed of Mobile HDR Apps http://t.co/0BEV3h9gp6
Fotor HDR – The iCameraHDR Replacement is finally here and it is Spearheading a new breed of Mobile HDR Apps http://t.co/cSE5Jcd6H7
RT @moblivious: Fotor HDR – The iCameraHDR Replacement is finally here and it is Spearheading a new breed of Mobile HDR Apps http://t.co/0B…
Fotor HDR – The iCameraHDR Replacement is finally here and it is Spearheading a new breed of Mobile HDR Apps http://t.co/zXtjSqMteT
[…] HDR, as I explained on my previous post, is the long-awaited successor of probably the most favourite mobile HDR app – iCameraHDR. […]
[…] using these apps; like some I’ve reviewed here – Tadaa 3D, Facetune, Fotor HDR, ProCamera 7; I can see the complexity of tasks that it must do, often indicated by how long it […]