
Fotor HDR, as I explained on my previous post, is the long-awaited successor of probably the most favourite mobile HDR app – iCameraHDR. Despite of its ability to create a good Tone-Mapped HDR image, iCameraHDR was not exactly famous for its simplicity nor stability. Users often felt bewildered when faced with its complicated user interface and workflow, it took ages to create the final HDR image – that is when it actually created it successfully because sometimes it just crashed in the middle of it.
But the new Fotor HDR has been really worth the wait, it is a worthy successor of the mighty iCameraHDR. Not only that it retains the quality of the HDR image created, it also hugely simplify the whole process of creation into a few steps, and last but not least it does it in a record time!
Today I want to show you how easy it is to create an HDR Image using Fotor HDR. If you haven’t got the app yet, you can get Fotor HDR from the App Store (£1.49).
See also: What is HDR and how it can help you to take a better photo with your Smartphone.
Settings
Ok, before we go to the actual creation process, it always good to check out the Settings. There are a few configurations that I want to show you so that you are aware of them.
1. Auto Light Detection
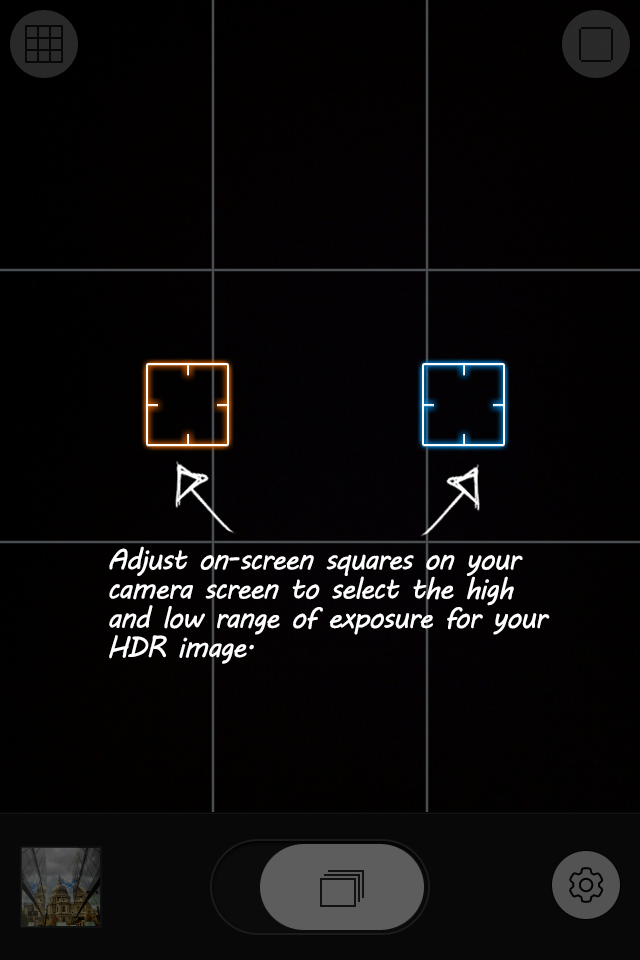
Fotor HDR works by taking 2 photos in sequence with difference Exposure, one ‘light‘ one ‘dark‘, in photography term this is called Auto Exposure Bracketing or AEB. If you turn this setting on, Fotor HDR will calculate the Dark and the Light point of the scene automatically and take the photo according to this calculation. If you turn the setting off, there will appear 2 boxes on the viewfinder, which then you can manually drag across the viewfinder to set the Dark and the Light point according to your own need.
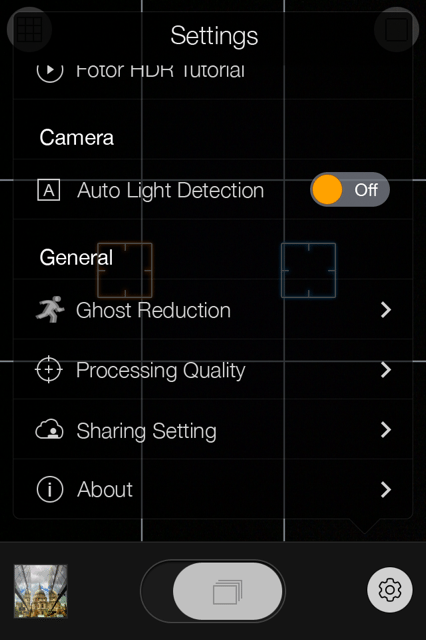
2. Ghost Reduction
One of the disadvantage of shooting multi-exposure photo is when there is movements on the scene or of the object. When the 2 photos are merged these movements create an artefact called Ghosting. Fotor HDR employs and advanced technology to reduce or eliminate ghosting. This setting configures how the app should treat this process. If you want the app to eliminate ghosting completely, choose the Advanced setting, otherwise choose Normal.

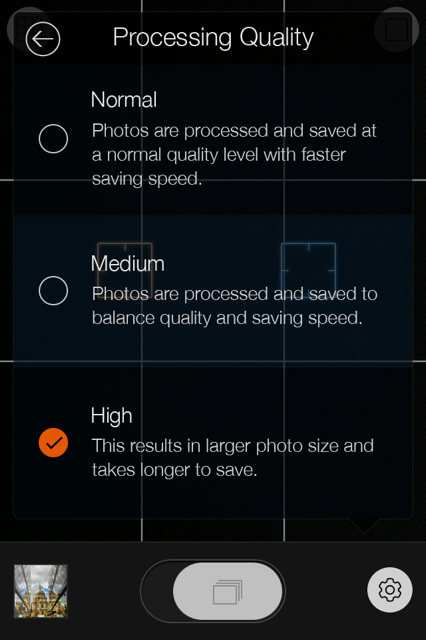
3. Processing Quality
This setting configures the level of processing quality the app should apply when it creates the HDR Image. Personally I will just set it to High for all time, as I don’t see any advantage of getting anything lower than the best quality. Even using my old iPhone 4, the speed impact is negligible.
You can explore other settings yourselves, they are self-explanatory.
Capturing Auto Exposure Bracketing (AEB) Photos
Before we start capturing our photos, there is one thing you should know. The old iCameraHDR allows you to pick your own photos from the Photo Album to create HDR image. In this version of Fotor HDR you cannot do this, yet. The developer has promised me that this one important feature will be included on the next release. For now we can only use pictures taken with the built-in Camera.
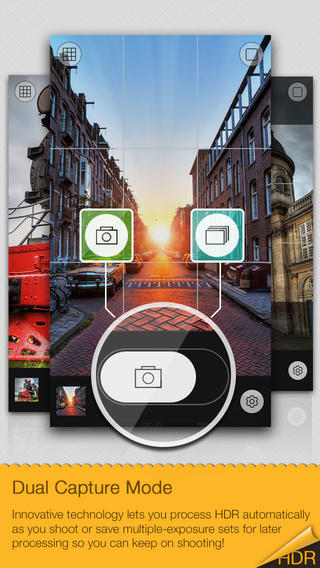
Dual Shooting Mode
Fotor HDR has 2 Shooting Modes. You can swap between the 2 modes by swiping the shutter release left or right. The difference between the 2 modes is the immediacy when the 2 multi-exposed photos would be merged. If you set the shutter release to the ‘left‘ setting, Fotor HDR will merge and process the photos as soon as you shoot them. On the contrary, if you use the ‘right‘ setting, the shots that are taken will be saved to the internal photo album (AKA Lightbox) but not merged. This means you can keep shooting without waiting for the merging process. Personally I like to set it to the later setting. I normally do the merging and processing later on after I finish all the shooting.
Auto or Manual Exposure
As I mentioned on the Settings section above, you can configure the shooting mode to automatically calculate the Dark and Light exposure point of the scene or you can do it manually by changing the Auto Light Detection setting.
If you set it to Auto then as soon as the Viewfinder get the Focus you can tap on the shutter release to take the shot. If you set it to Manual, drag the 2 boxes around the viewfinder to set your Dark (represented with the darker coloured box) and Light (represented with the lighter coloured box) exposure point as you see it fit.
To take an absolute control of how the Exposure for the 2 photos is calculated, I recommend that you turn this setting off, i.e. use the manual setting.
Merging the AEB (Auto Exposure Bracketing) Photos
If you chose to auto merge/process the photos, Fotor HDR will automatically merge and process them. But if you chose to do this manually, you need to go the Lightbox and pick which ‘AEB pair’ you want to merge.
Tap on the Lightbox button on the bottom-left of the the viewfinder to access the list of photos. From the Lightbox choose the pair that you want to process.

Fotor HDR – LightBox
Fotor HDR will then open the 2 photos side by side and here you can choose either to merge the photos, to export them, or to delete them.
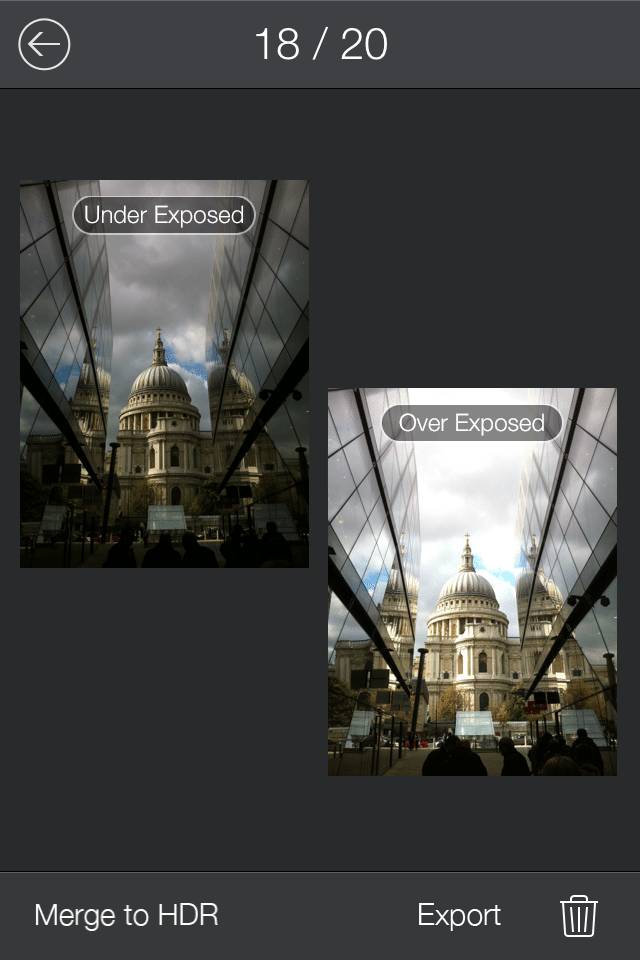
Fotor HDR – Creating HDR from 2 different Exposed images
If you choose to export them, the photos will be saved to the main Photo Album.
Choose the ‘Merge to HDR‘ option to begin the process of merging the photos into an HDR Image. This process might take a few seconds depending on the speed of your iDevice.
Notes that on this version you cannot choose your own AEB photos from your local Photo Album, but the developer has promised that this feature will be there in the next release.
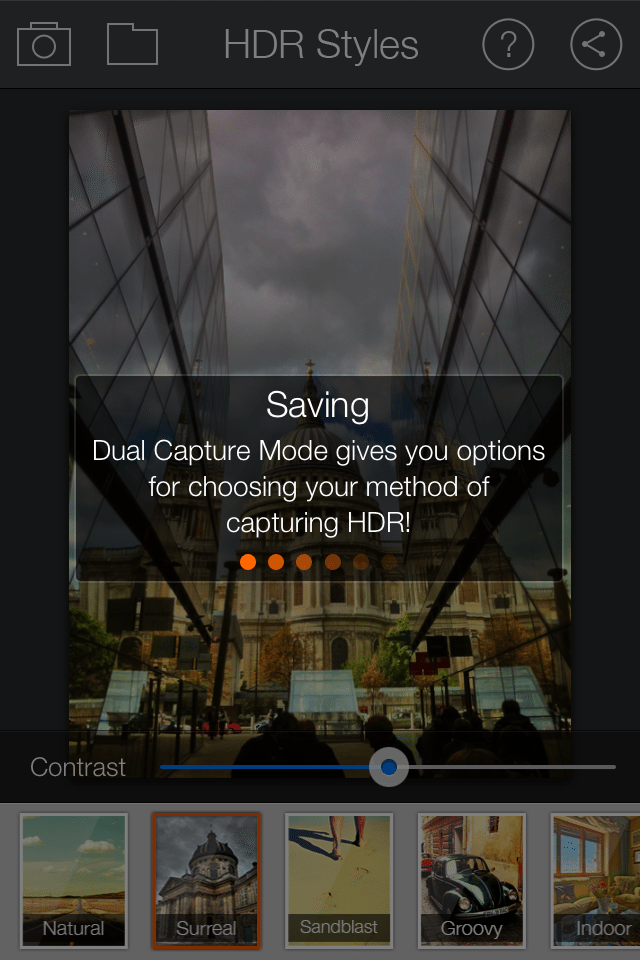
HDR Style Editing and Post Processing
When Fotor HDR finished merging and creating the initial HDR image, the result will be loaded to the next screen – HDR Styles. In this screen you can do a few things:
1. Use the editing tools to post-processed your HDR image. To do this just tap – hold and swipe up or down to choose which tool you want to use from the list on the pop-up menu that appears. After you choose which tool you want to use, you can adjust the value of, e.g. the Brightness, by using the slider underneath the photo. There are 4 editing tools that are available for you at the moment, they are: Brightness, Contrast, Saturation and Vignette.
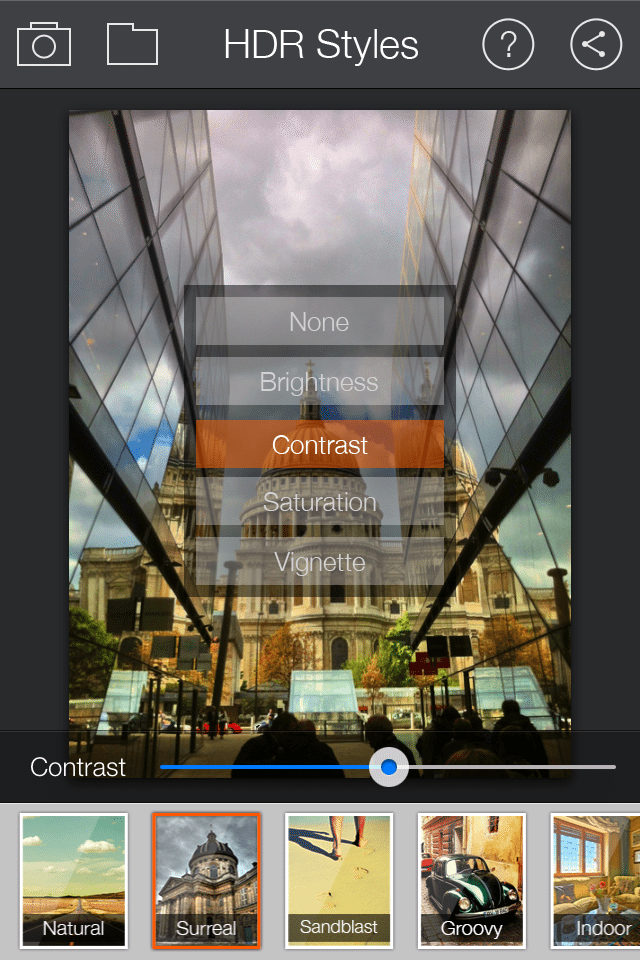
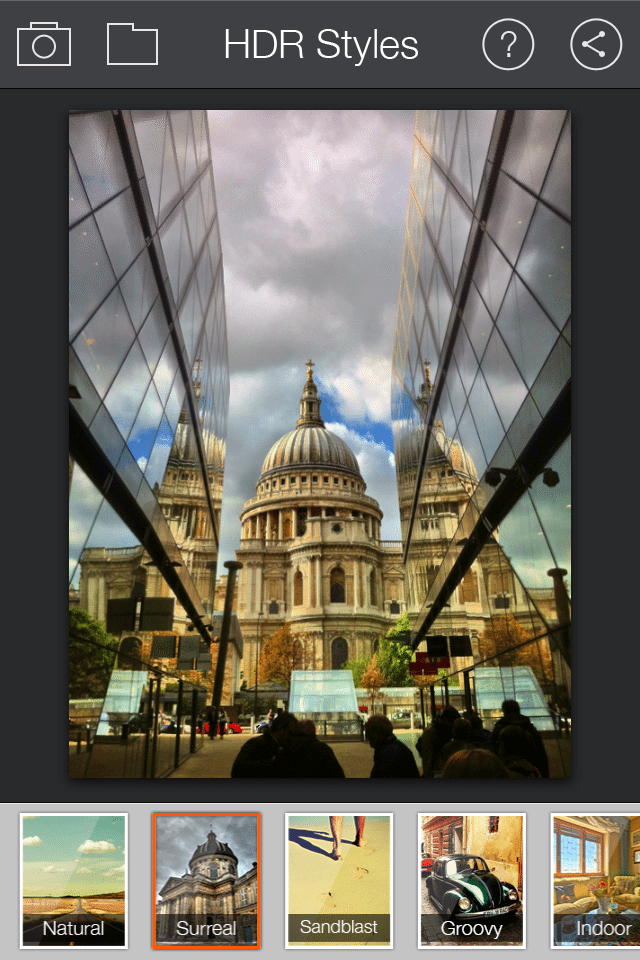
2. Apply one of the HDR Styles, a.k.a Filters to the HDR Image. Just like many other photo apps, Fotor HDR also provides a range of Style presets which you can apply to your HDR photo. The list of presets are: Natural (the original), Surreal, Sandblast, Groovy, Indoor, Cartoon, B&W, Sunshine, Grunge, and Sunset.
In my opinion, there isn’t much advantage to use these style presets, each of the filter you should be able to replicate using other apps (like Snapseed for example) with a much better result. The only preset that I might use from time to time is Surreal. Apart from that I suggest that you leave it on Natural.
3. Saving and Sharing
When you are happy with what you have, you can then Save the final result by tapping on the save button on the top right corner of the screen. The saving process will also take a few seconds (a process that used to take up to a minute with the old iCameraHDR).
After the saving process finished, Fotor HDR will automatically show you the Sharing menu, where you can directly share your result to a couple of Social Sharing network like Instagram, Facebook, Twitter, and Flickr, or you can Email it out. Alternatively you can just cancel the menu which will take you back to the editing screen.

You can find the saved HDR image in the Lightbox, in the same place where it saves the AEB photos. From there you can view it and save it to your iDevice Photo Album.
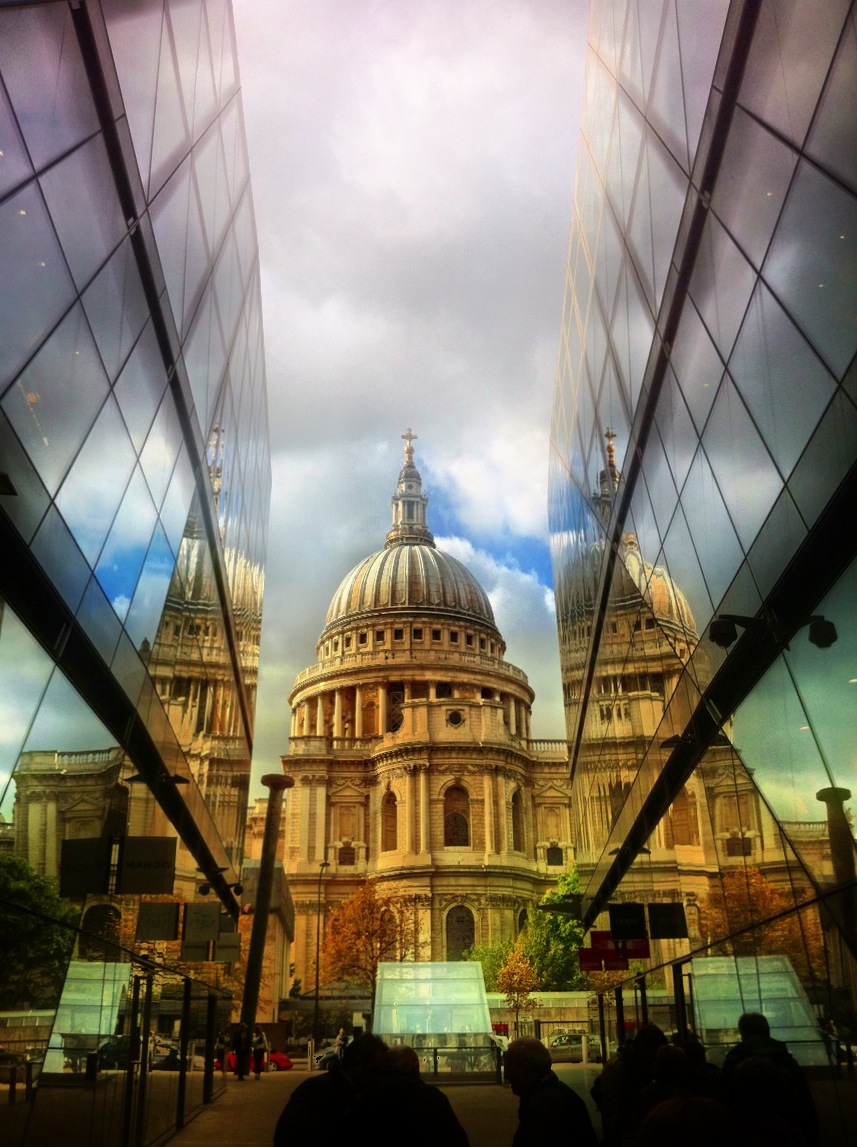
HDR created with Fotor HDR
As you can see from the above tutorial, it is practically easy to create an HDR Image using Fotor HDR. Former users of iCameraHDR will definitely appreciate the ease-of-use, simplicity and most importantly the speed of processing Fotor HDR gives them.
If you have any questions or any comments please don’t hesitate to write them to me below.

Easy Steps to Create Mobile HDR Photo with Fotor HDR + Promo Code Giveaway http://t.co/mvi0iG5LbX
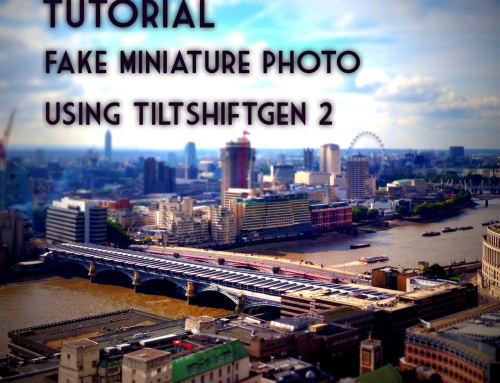
TiltShiftGen 2 iOS App Promo Code Giveaway – The easiest way to create Fake Miniature Photos http://t.co/6VhjezbIiB.
Easy Steps to Create Mobile HDR Photo http://t.co/IzBSYA2ysc – One day left for a chance to enter Fotor HDR Promo Code Sweepstakes
Easy Steps to Create Mobile HDR Photo http://t.co/pghHDxzFRy – One day left for a chance to enter Fotor HDR Promo Code Sweepstakes
Fotor HDR – Step by Step Tutorial to create Mobile HDR http://t.co/6VhjezbIiB.
[…] See Also: Tutorials on how to create mobile HDR photo with Fotor HDR. […]