

Long time iPhone users would already know that although it’s not impossible, it is much easier to download photos and videos from the smartphone than to upload to it.
There are actually a couple of techniques that you can use to upload your pictures to your iPhone. They range from a very simple method to one that requires you to install additional software.
One important thing to remember is that, unfortunately you cannot just plug your iPhone in and start copying images to it. This ‘limitation’ often takes new iPhone users by surprise as they expect the iPhone works like a USB drive (or just about every other mobile phone on that matter).
Sadly that is not the case. If you are wondering why, well it’s probably just enough to know that it has something to do with Copyright Protection.
You can get photos out from the iPhone easily though, just not the other way around.
So here we are, in a typical Apple’s way, being forced to find alternatives to do a simple thing (I can almost hear the triumphant whup from the Android users now).
1. Email
One of my favourite method of transferring photos from my Mac or PC; really from just about any Internet device that capables of doing email; is by emailing the photo to myself as an attachment.
This method is in my opinion the simplest and probably the quickest way of doing it. As a bonus, you can also use this method to transfer photos between devices.

Sending photo attachment via Gmail
The only thing to consider is that it only works well if you want to just send a small number of photos. This is due to a limitation that email providers (e.g. Gmail, Hotmail, Yahoo) have imposed on the size of an attachment that can sent in one email. Although there is no one stopping you to send more than one email, each with a couple of photos. It’s not the end of the world, just a bit tedious.
2. Online Cloud Storage
I’ve touched on the subject of Online Cloud Storage before, though probably more as a method to backup your photos instead of transferring them.
But since the Cloud Storage is accessible anywhere where you can use Internet connection, it could also be used as a transfer medium.
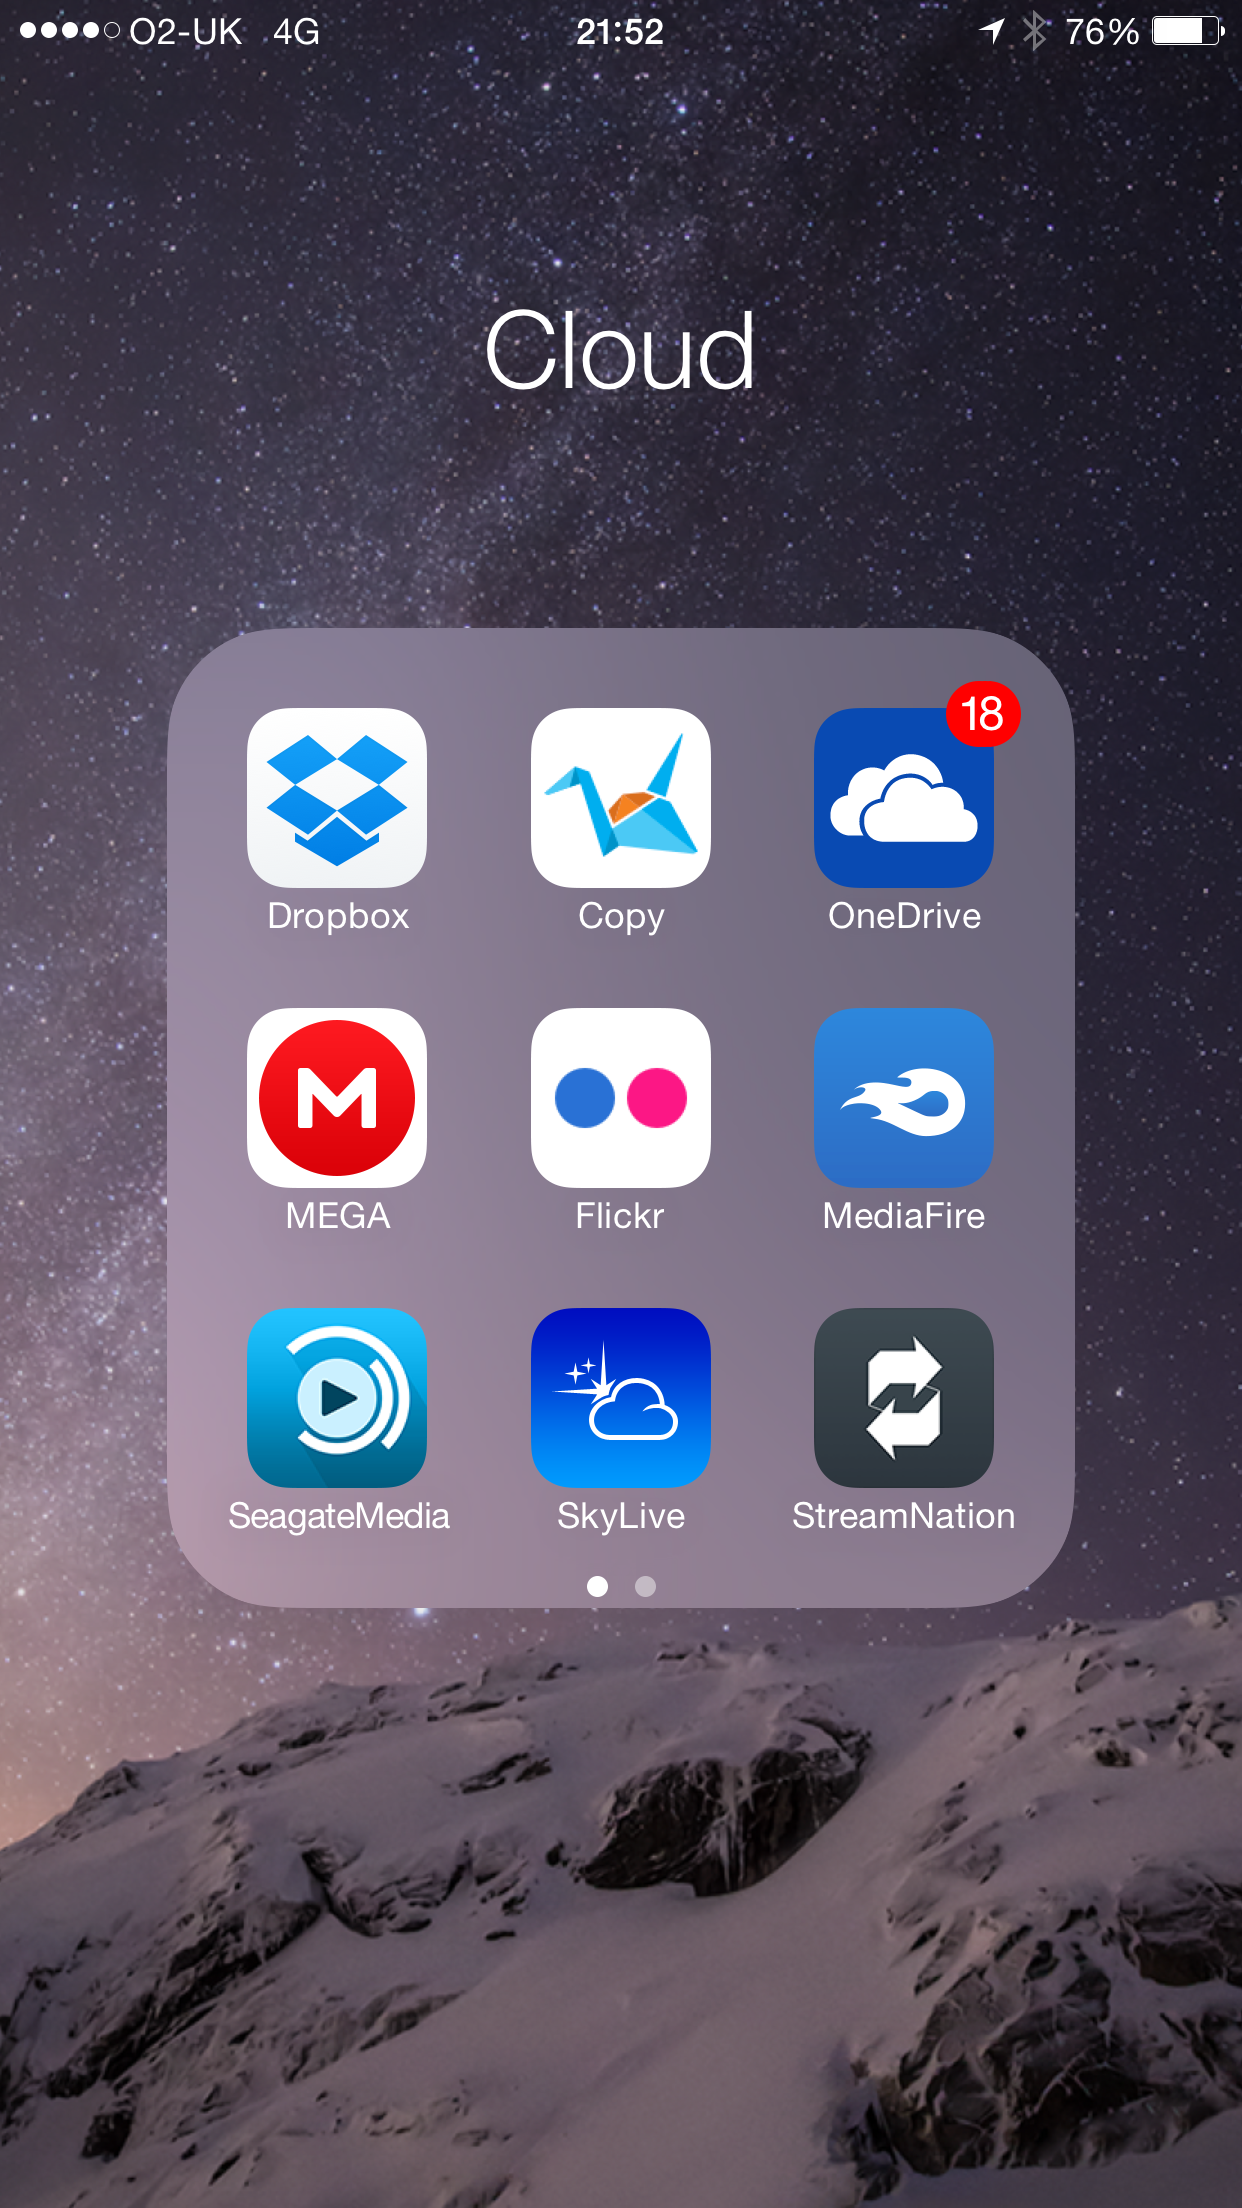
Cloud Apps
Just upload the photos you want to transfer from your Mac or PC to one of the cloud services, for example Dropbox, OneDrive or Copy.com (my favourite), via the web browser or the desktop app.
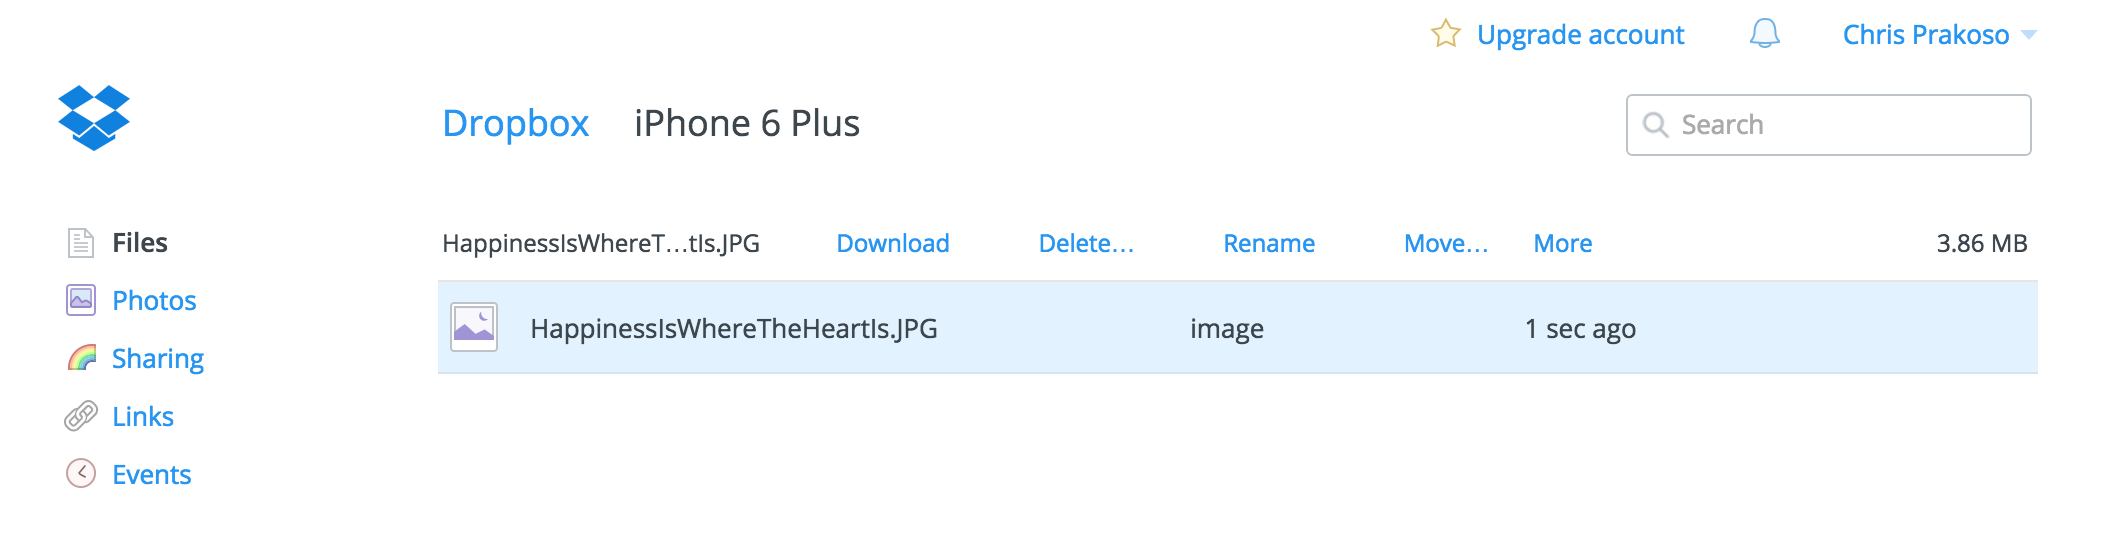
Dropbox Upload via Web Interface
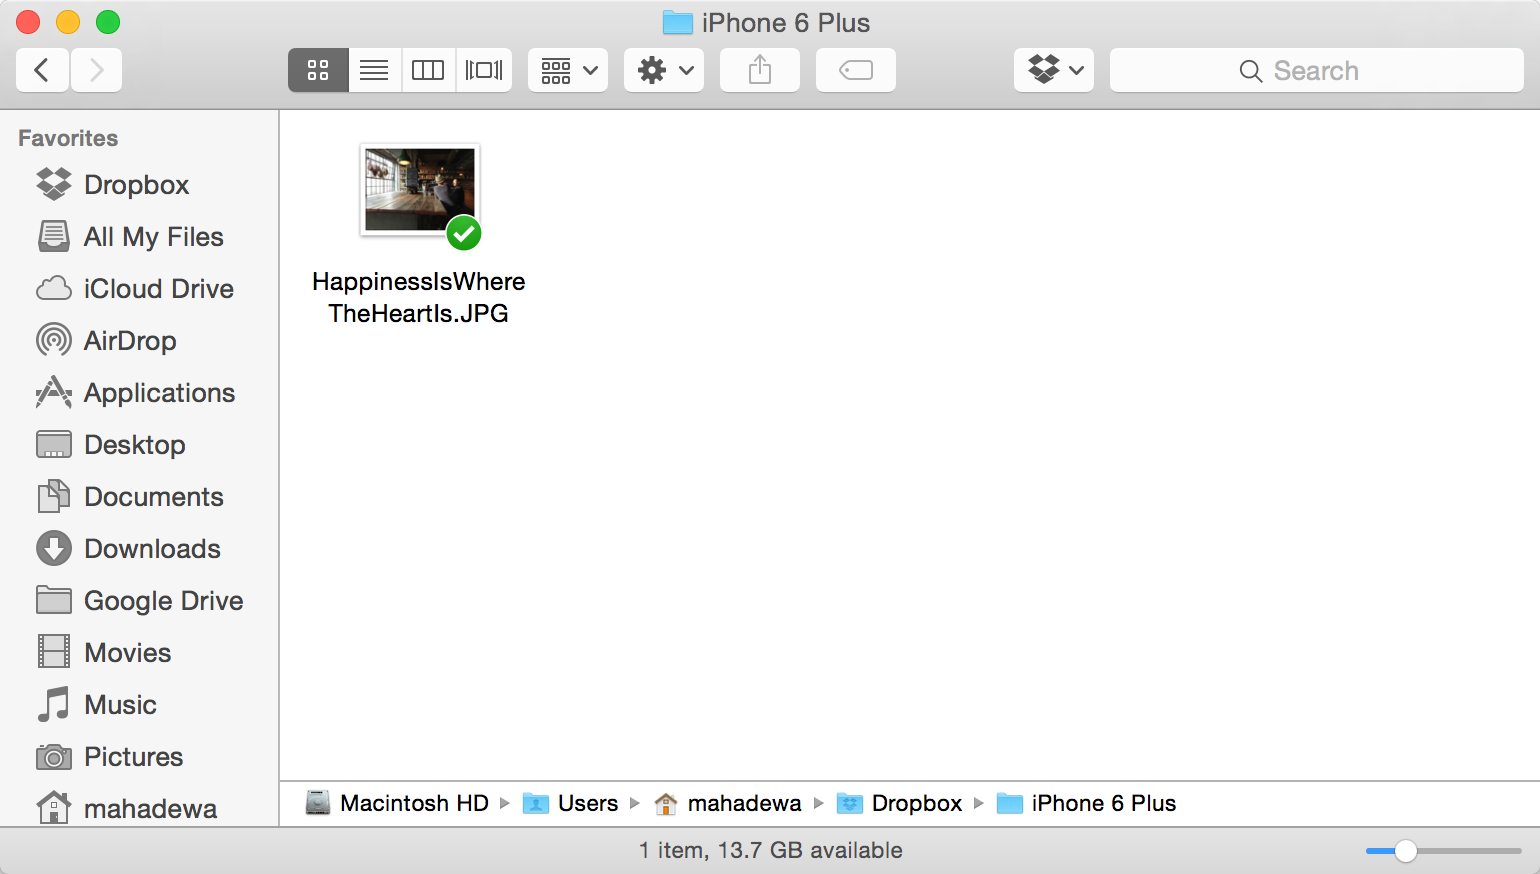
Dropbox upload photos via Desktop app
And then when the photo is finished being uploaded to the cloud you can then use the cloud mobile app to download them back to your smartphone.

Dropbox Mobile App – Browse Folder

Dropbox Mobile App – Download to Camera Roll
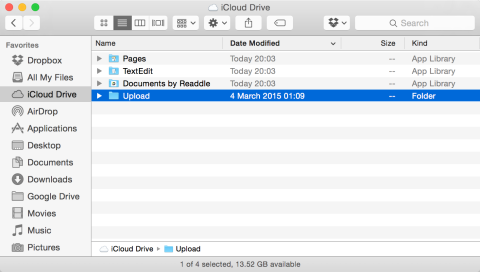
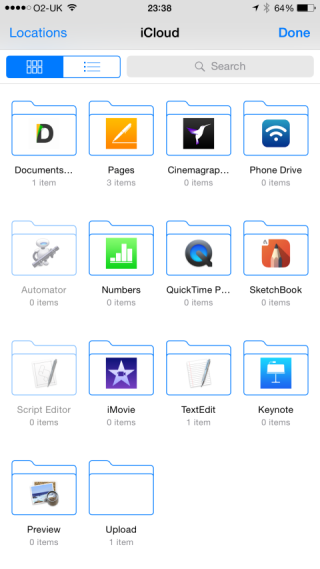
3. iCloud Drive
iCloud Drive is the new cloud storage service by Apple that replaced the old iCloud when iOS 8 was release. To use this service you need to turn-on iCloud Drive on your iCloud Preferences window (you need to download the software to your Mac or PC). If you use a Mac, you need to upgrade your OS to the latest OS X Yosemite. And then your mobile devices, where you want the photos transferred to need to have iOS 8.

iCloud Preferences
To upload photos to iCloud Drive just open Finder in Mac or Explorer in PC, and open the iCloud Drive folder. You can then just copy the photos directly on this folder, or if you prefer create a new folder and copy the photos there instead.
-

- iCloud Drive Folders
-
- iCloud Drive upload to a folder

Now on the iOS device side, you need to have an app that can access this iCloud Drive. Interestingly Apple doesn’t have an official app for this, so you have to rely on third-party apps to download your photos.
My go to app for this is Documents 5. The reason I’m using this app is because it’s free and it works! Using Documents 5 you can access your iCloud Drive and download your photos to the Camera Roll from there.
-
- Documents 5 – iCloud Drive
-
- Documents 5 – Open upload folder

-
- Documents 5 – Download photos

For more info on iCloud Drive check out this FAQ by Apple.
4. Mobile Wireless Storage
I’ve also reviewed some Self-Powered Wi-Fi enabled mobile storage devices before in this blog. Basically, they are standard external hard drives but they carry rechargeable battery with them and most importantly they can create an ad-hoc shared Wi-Fi network.
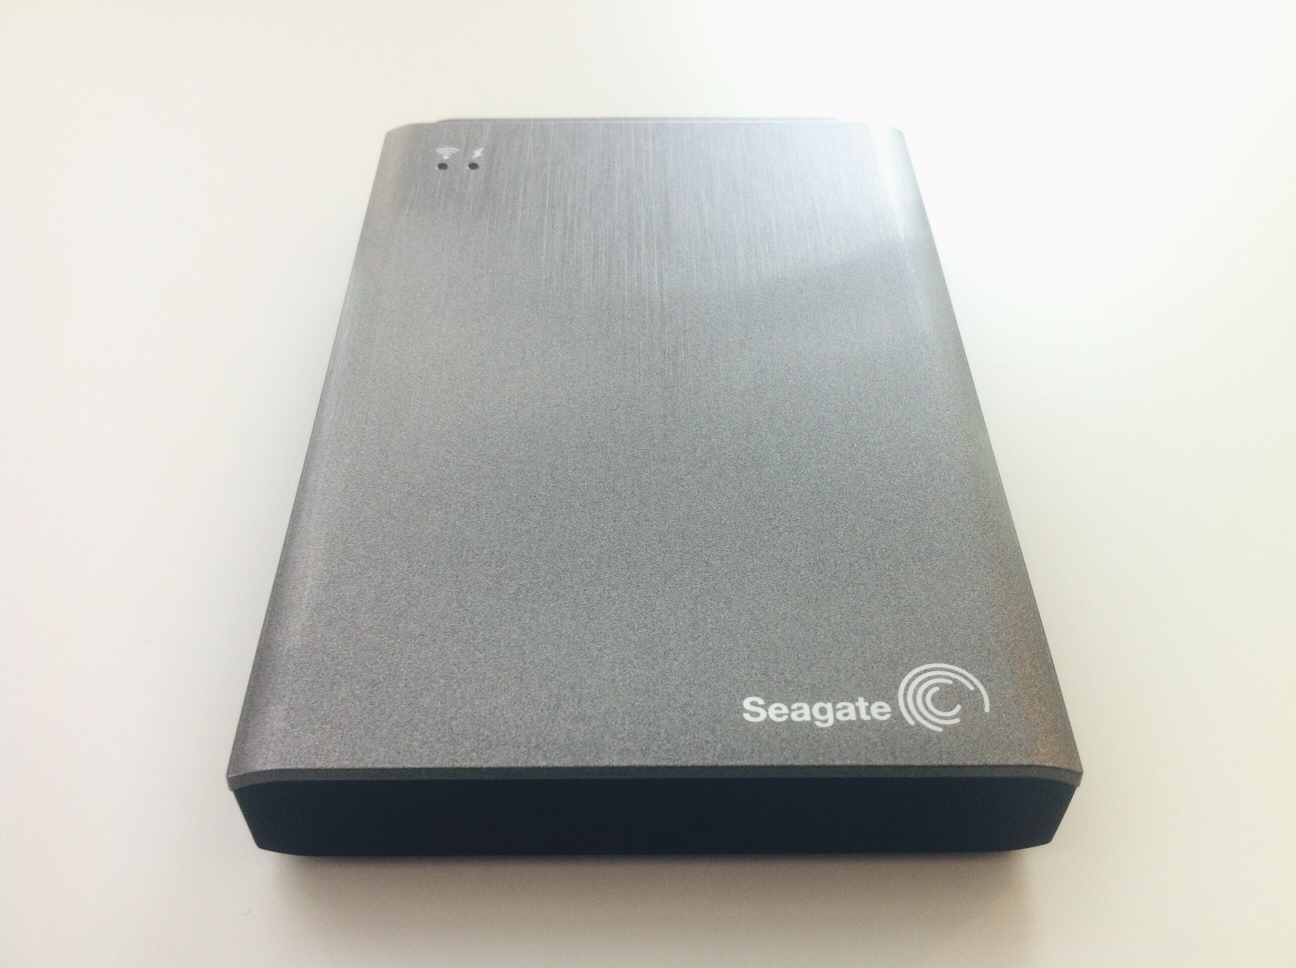
Seagate Wireless Plus
They work just like an ordinary cloud storage, except that you bring this one where ever you go and you don’t need an external Internet connection. Most of the big storage manufactures have their own version of this cool device, including Seagate, LaCie and Kingston. The storage capacity ranges from 500 Mb up to a whopping 2 Terabytes! You can connect to them as a standard external hard-disk, via USB cable, or an ad-hoc Wi-Fi connection created by the device.
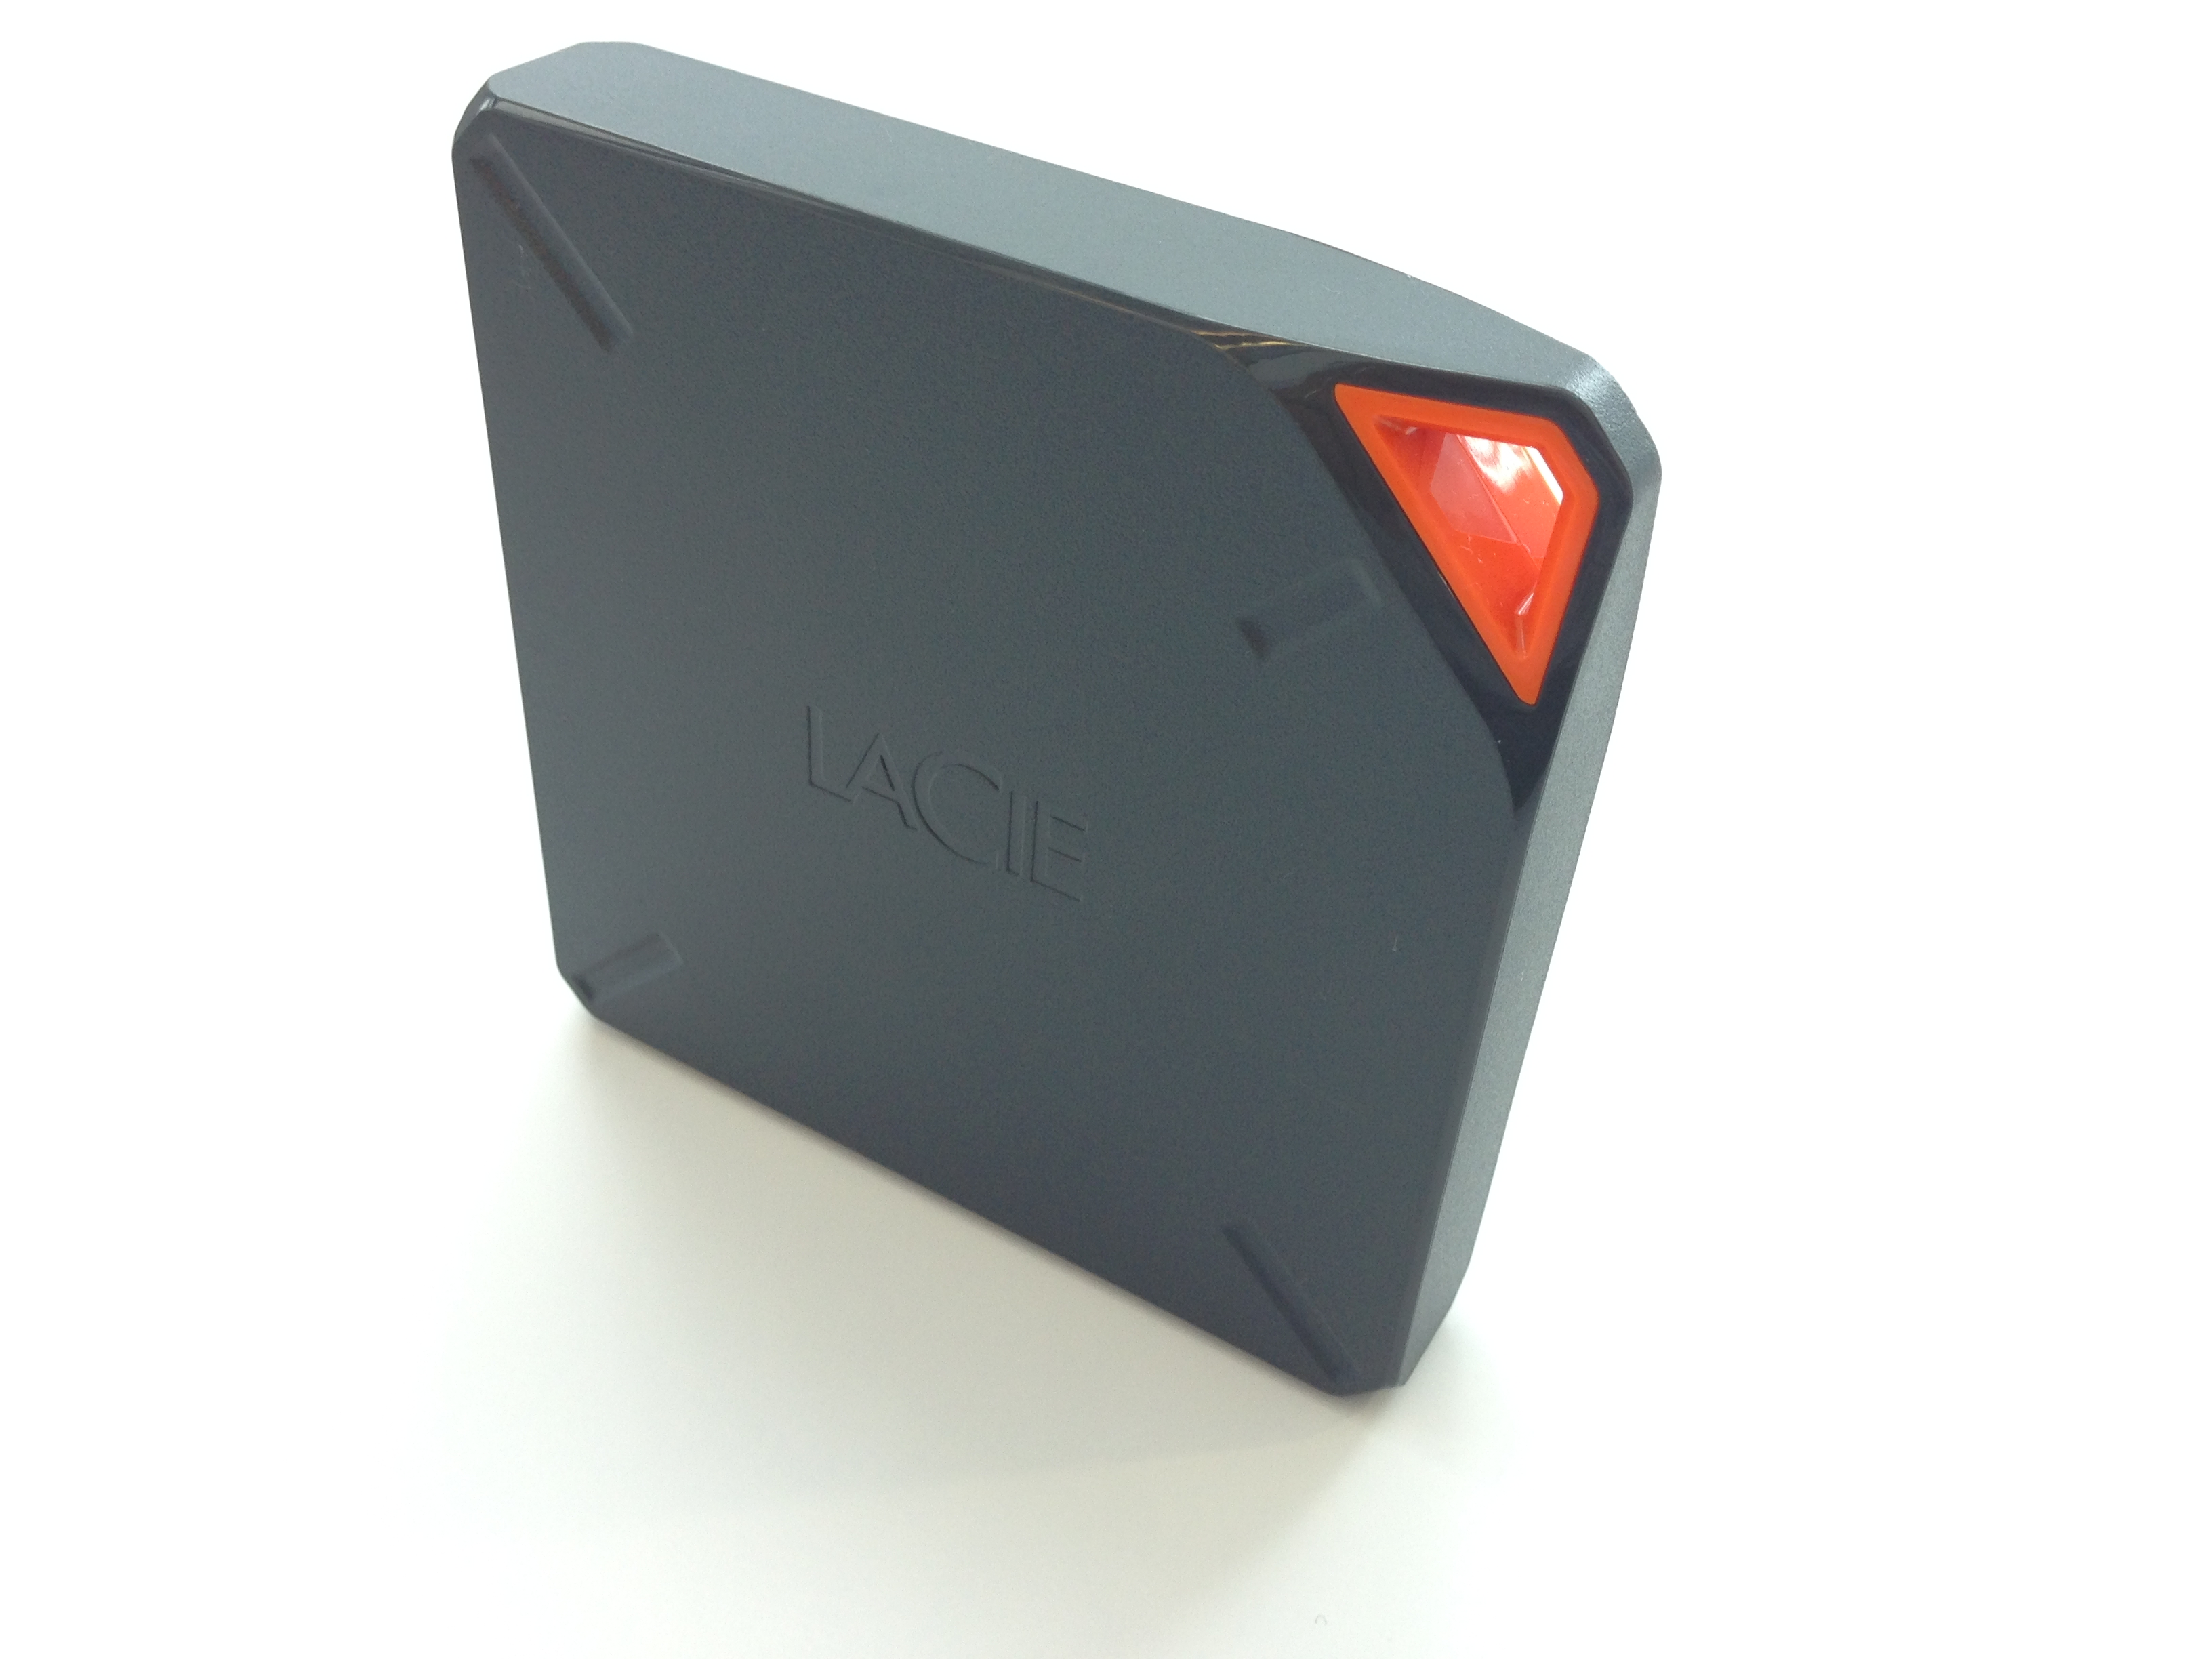
LaCie Fuel
To transfer photos just upload them to the device and then download them back to your smartphone using their mobile app.
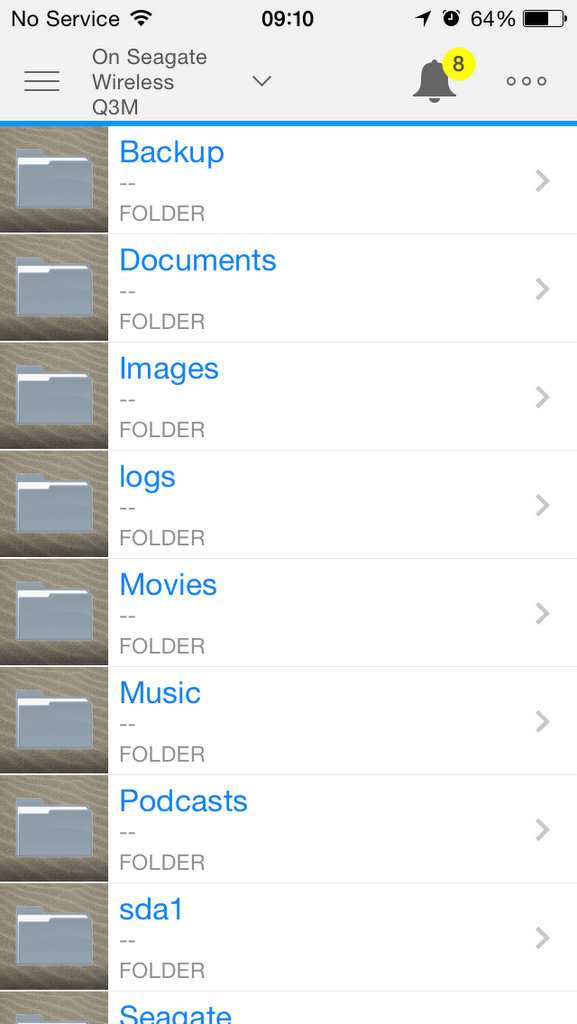
Seagate Media App
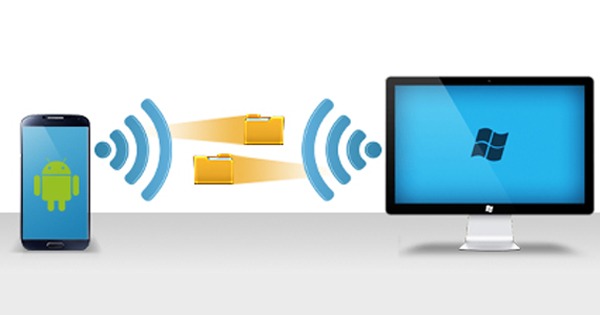
5. Direct Wi-Fi Transfer – Mobile App
So far we are talking about how to transfer photos indirectly, i.e. we need to use a ‘temporary‘ medium to transport our photos. Now let’s talk about how we can transfer them directly.
The first direct method is by utilising the local Wi-Fi network and with the help of third-party apps.
First you need to install the app. There are a few apps in the App Store that can do this, you can use any of them. I myself is using one called Simple Transfer.
The idea is the app will use the local Wi-Fi network to make a connection between your mobile device and your Mac or PC. The caveat is that your Mac or PC needs to be on the same Wi-Fi network as your mobile device.
When you run the app in the mobile device it will act as a ‘server’ and will publish an IP Address. You can then use this IP Address to connect your Mac or PC to the device.
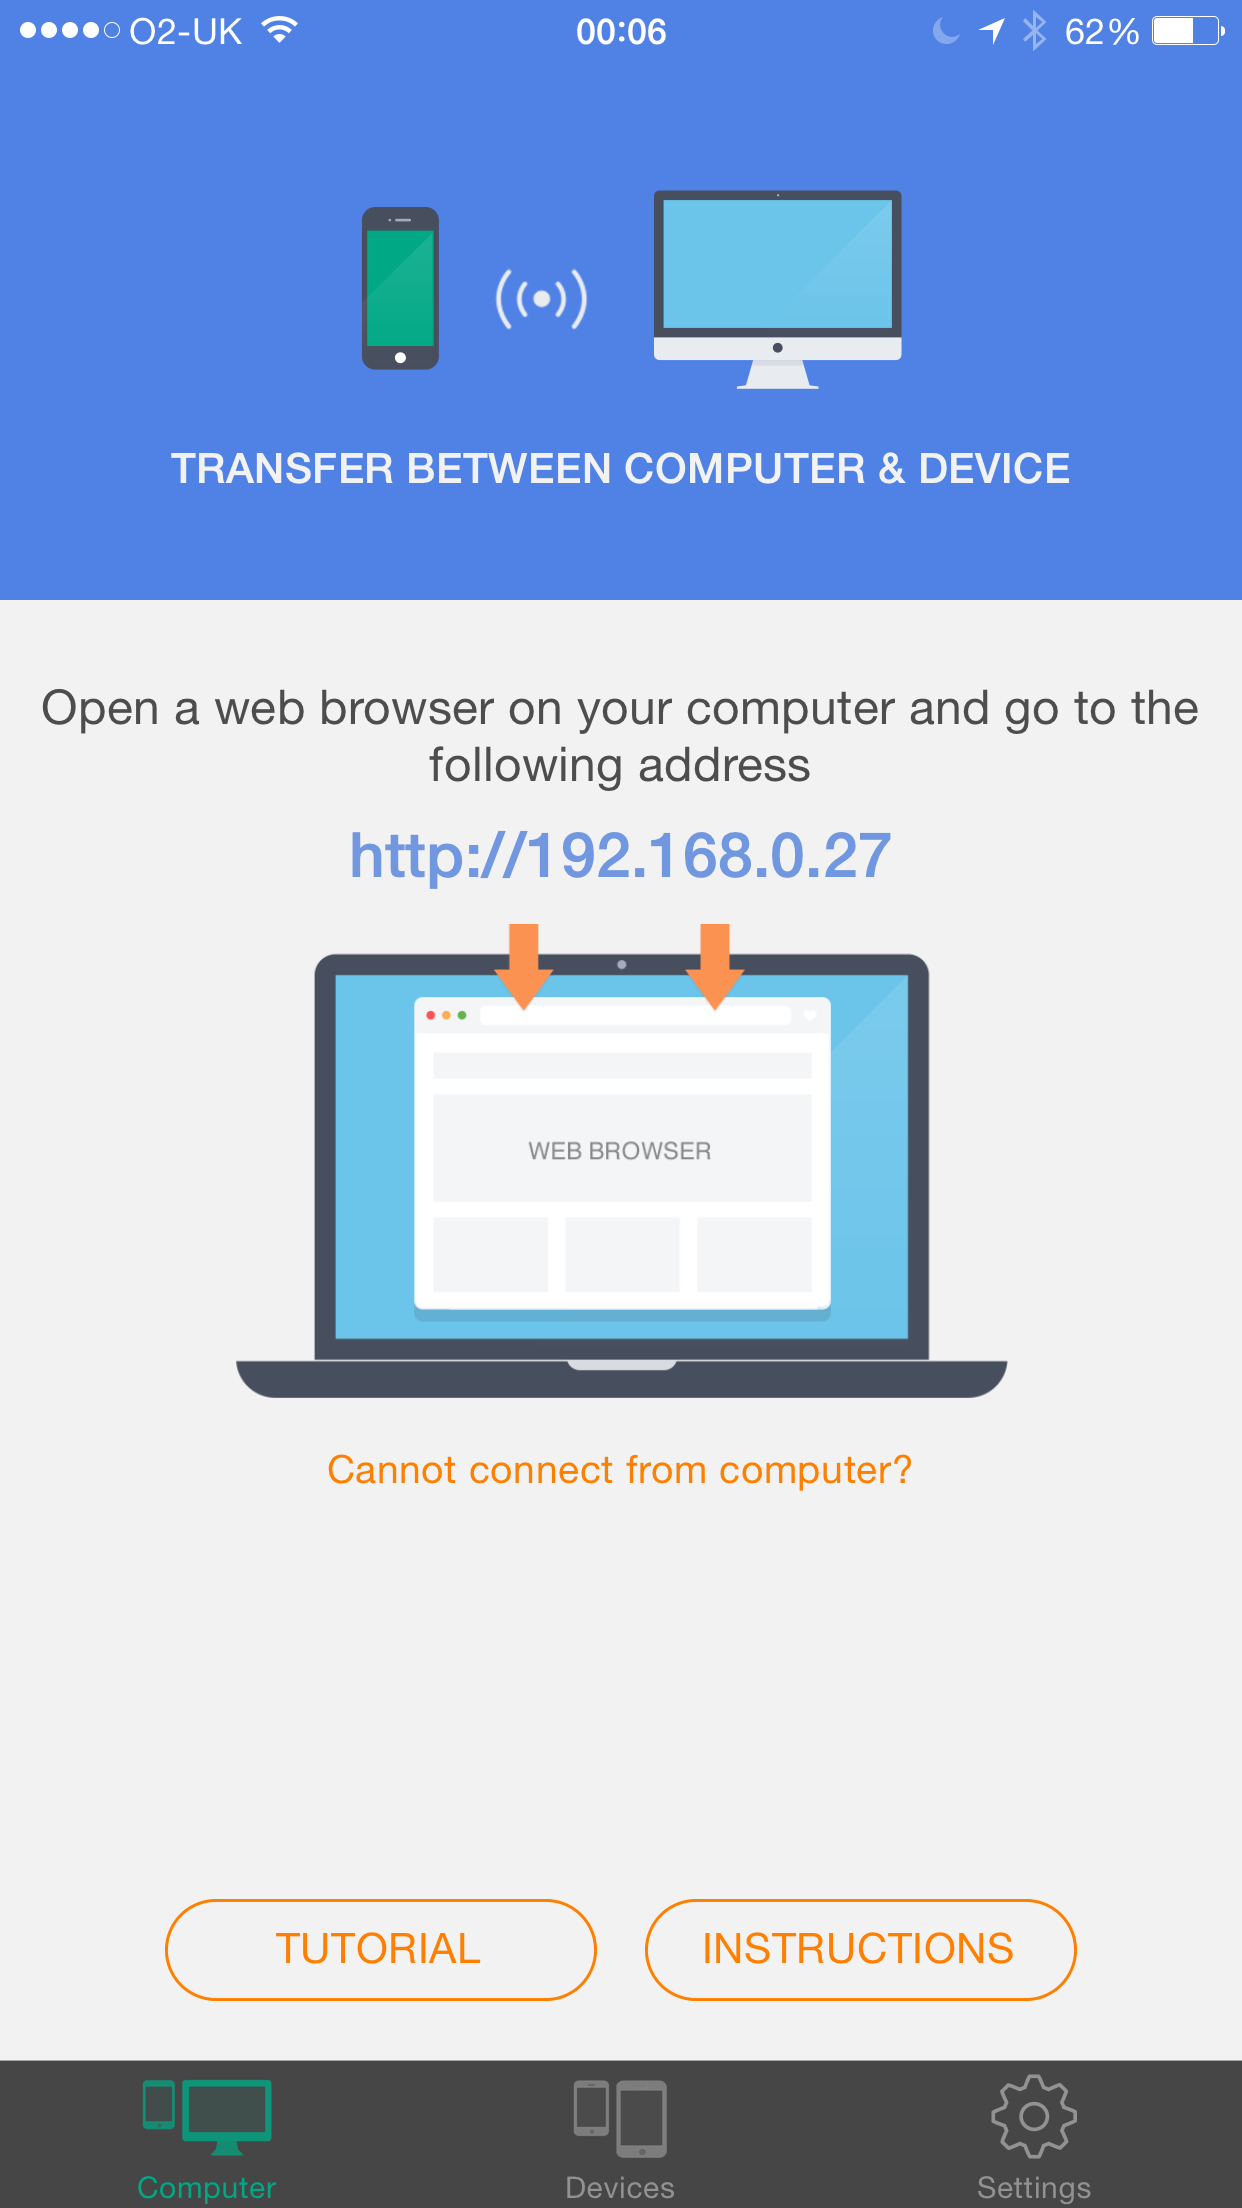
Simple Transfer – Open Server
Just type in the IP Address in any Internet browser and you are connected.
Simple Transfer – Web Browser
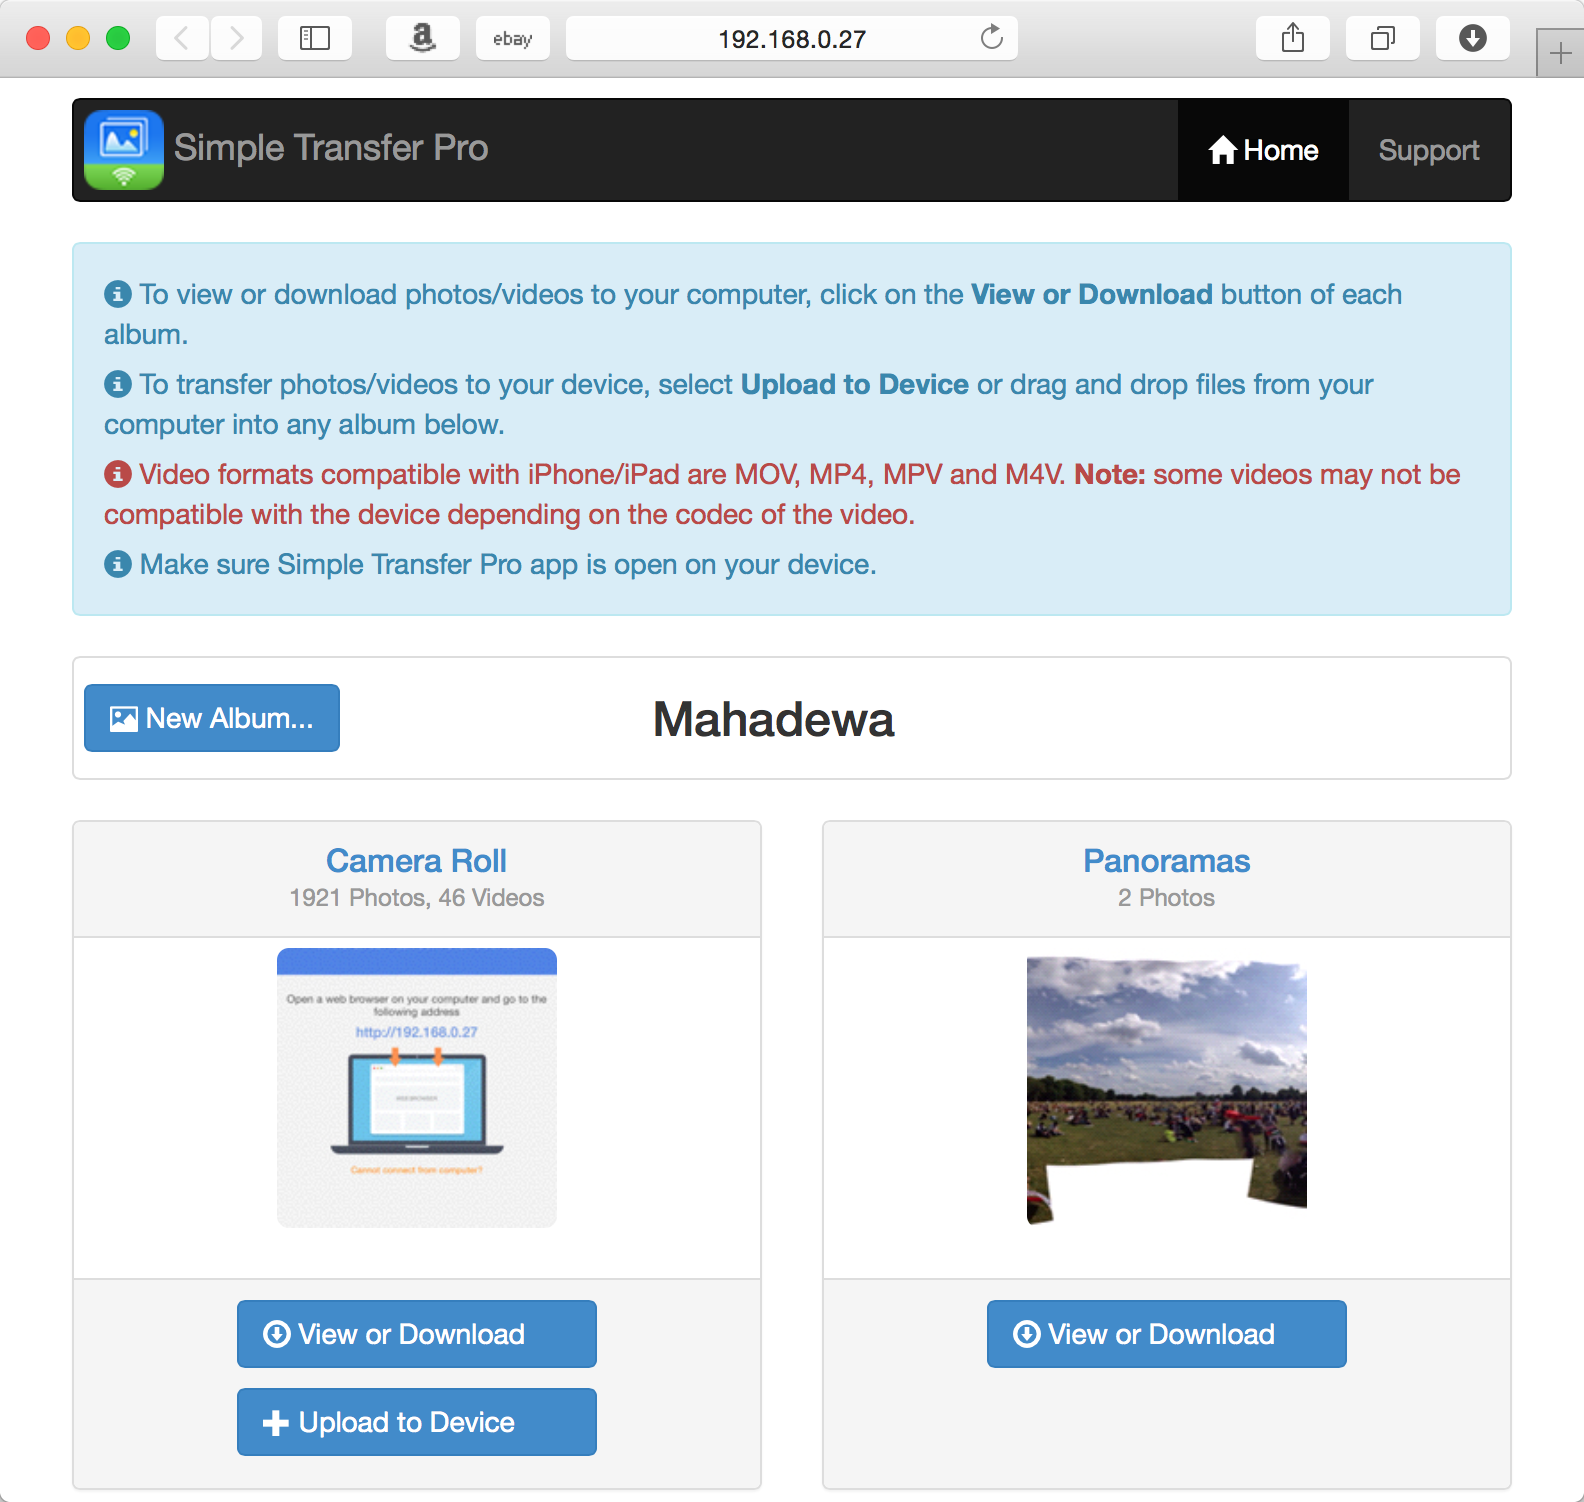
From then on you can browse your local folder, pick the photos and upload them to the device.
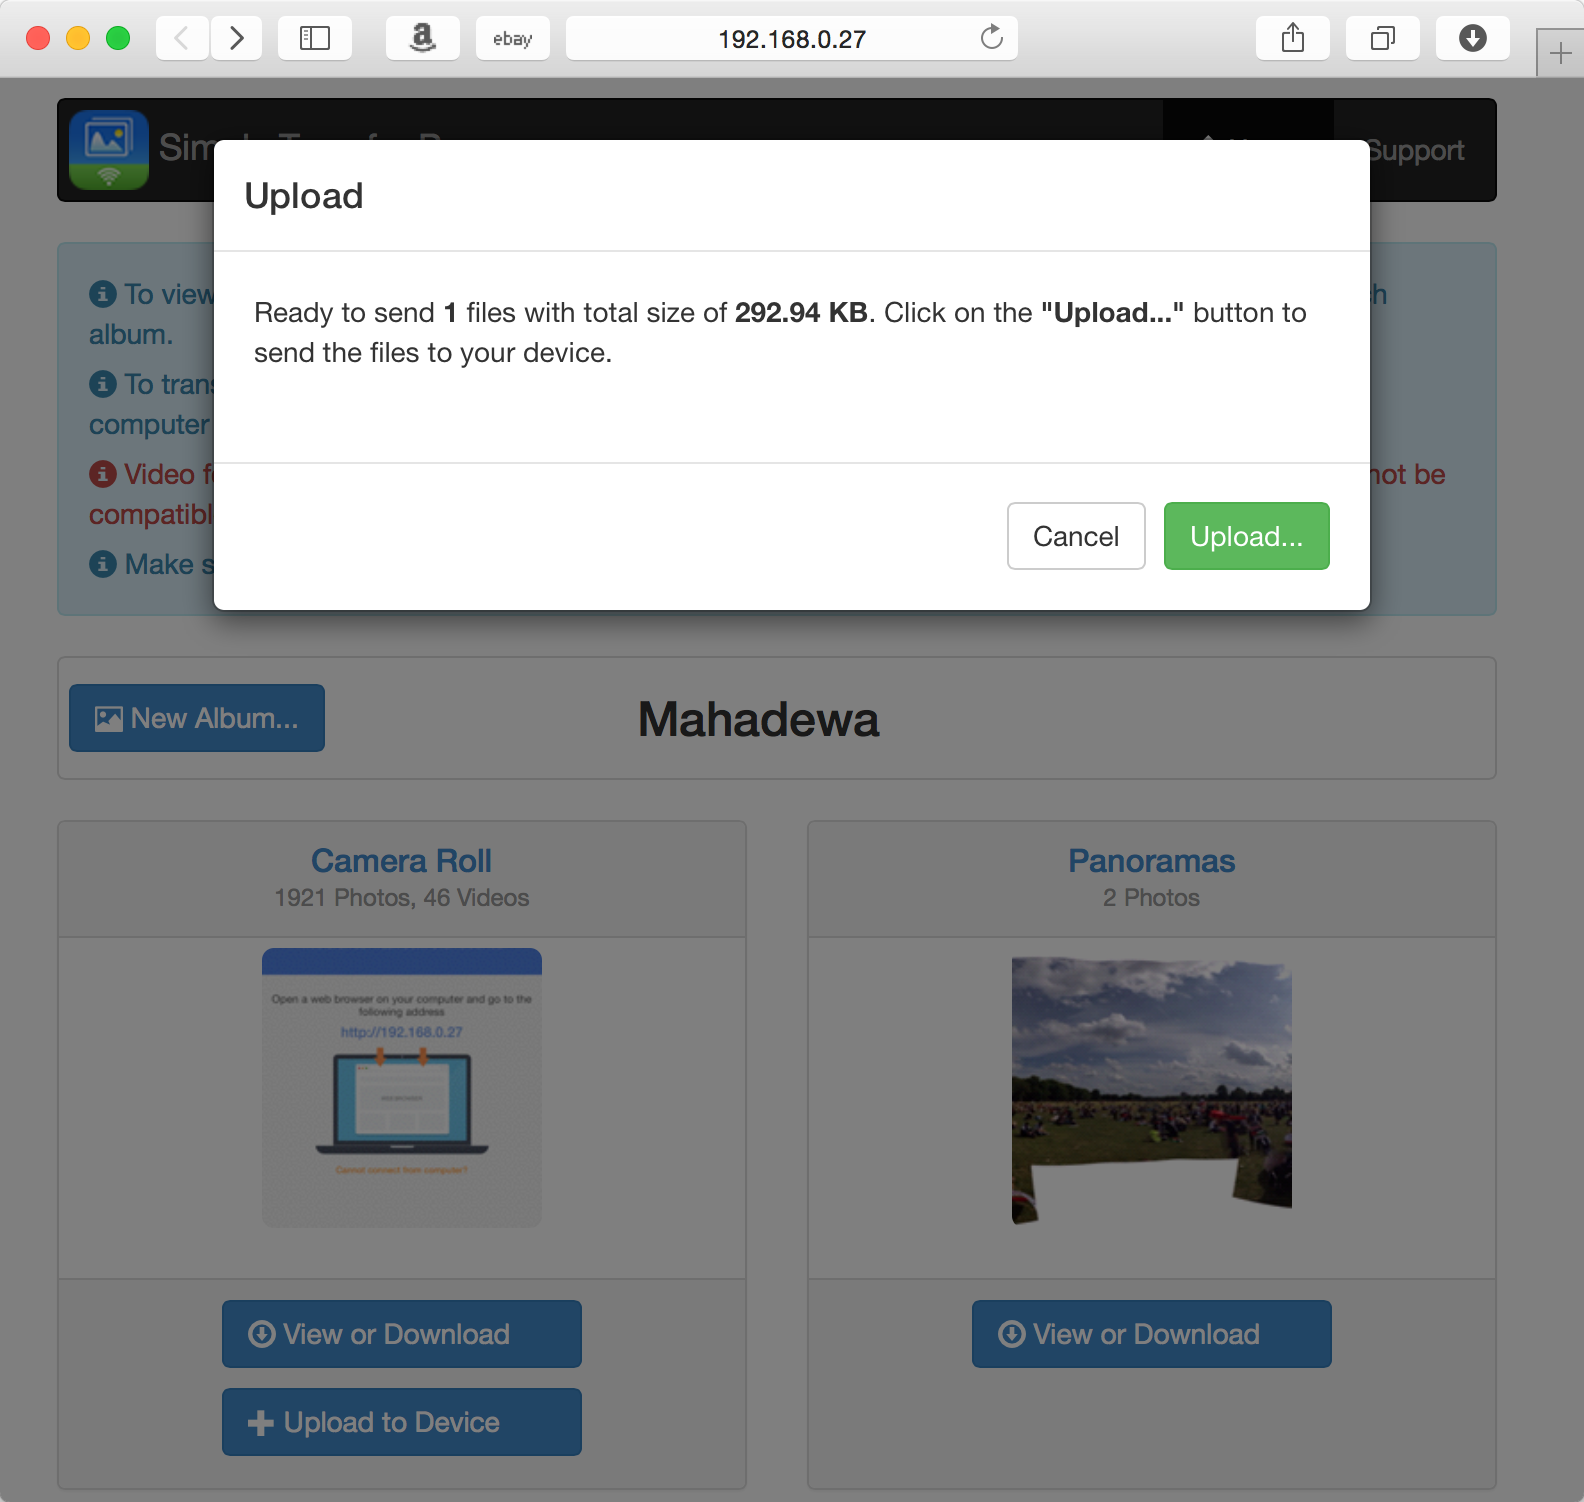
Simple Transfer – Ready To Upload
The photos will be transferred directly to your device and be stored in the Camera Roll.
-
- Simple Transfer – Transferring

-
- Simple Transfer – Transfer Successful

-
- Simple Transfer – Photo is in Camera Roll

6. AirDrop (Mac Only)
One of the new features coming out from Cupertino was what is called the AirDrop. AirDrop reminds me of the old days when sharing files between two mobile devices was as easy as turning on the Bluetooth connection between the two. The earlier iPhone didn’t have this, but since the release of AirDrop, not only that you can transfer files between mobile devices but also between a Mac to iOS Devices or other Mac.
There are obviously particular system requirements which you need to know to find out whether your devices support AirDrop. These requirements are:
- your iOS device needs to include a lightning connector
- your iOS device needs iOS 7 or later installed
- your Mac needs to be a 2012 or later model with OS X Yosemite installed
- Your Mac and iOS device both need bluetooth and Wi-Fi turned on. You do not have to be connected to a specific Wi-Fi network.
If your devices fulfil the above requirements then you can start transferring your files.
First you need to turn on AirDrop on your iOS Device.
-
- AirDrop – Preference

-
- AirDrop – Turn on for Everyone

-
- AirDrop Turned On

Then in your Mac, check if you can ‘see’ your device, ready for AirDrop.

AirDrop Connected
The browse to the folder where you want to upload the photos. Select the photos and click on the Sharing menu. Select AirDrop to start the upload process.

AirDrop Ready to Send
As soon as you click on the AirDrop recipient, the photos will be sent immediately. When it’s finished uploading you can see your photos at the destination in Camera Roll.

AirDrop receiving
I think AirDrop is really cool, and as I mentioned before, it not only works between Mac and iOS Devices but also between iOS Devices. You don’t even need a connection to the Internet.
Unfortunately it only works for a Mac. I haven’t heard any news from Apple if they are going to extend this capability to PC.
7. iTunes Photo Sync
Another way of transferring photos directly is via the iTunes Photo Sync. Many of you might’ve never open let alone used iTunes before, so this is probably a good excuse to do it.
Download and install iTunes if you haven’t and open it. Then connect your iPhone to your desktop Mac or PC via the USB cable.
If everything goes ok, the iPhone icon at the top bar will be activated. Click on this icon and you will see some more menu on the left side-bar. Select the Photos menu item to open the Sync Photos screen.
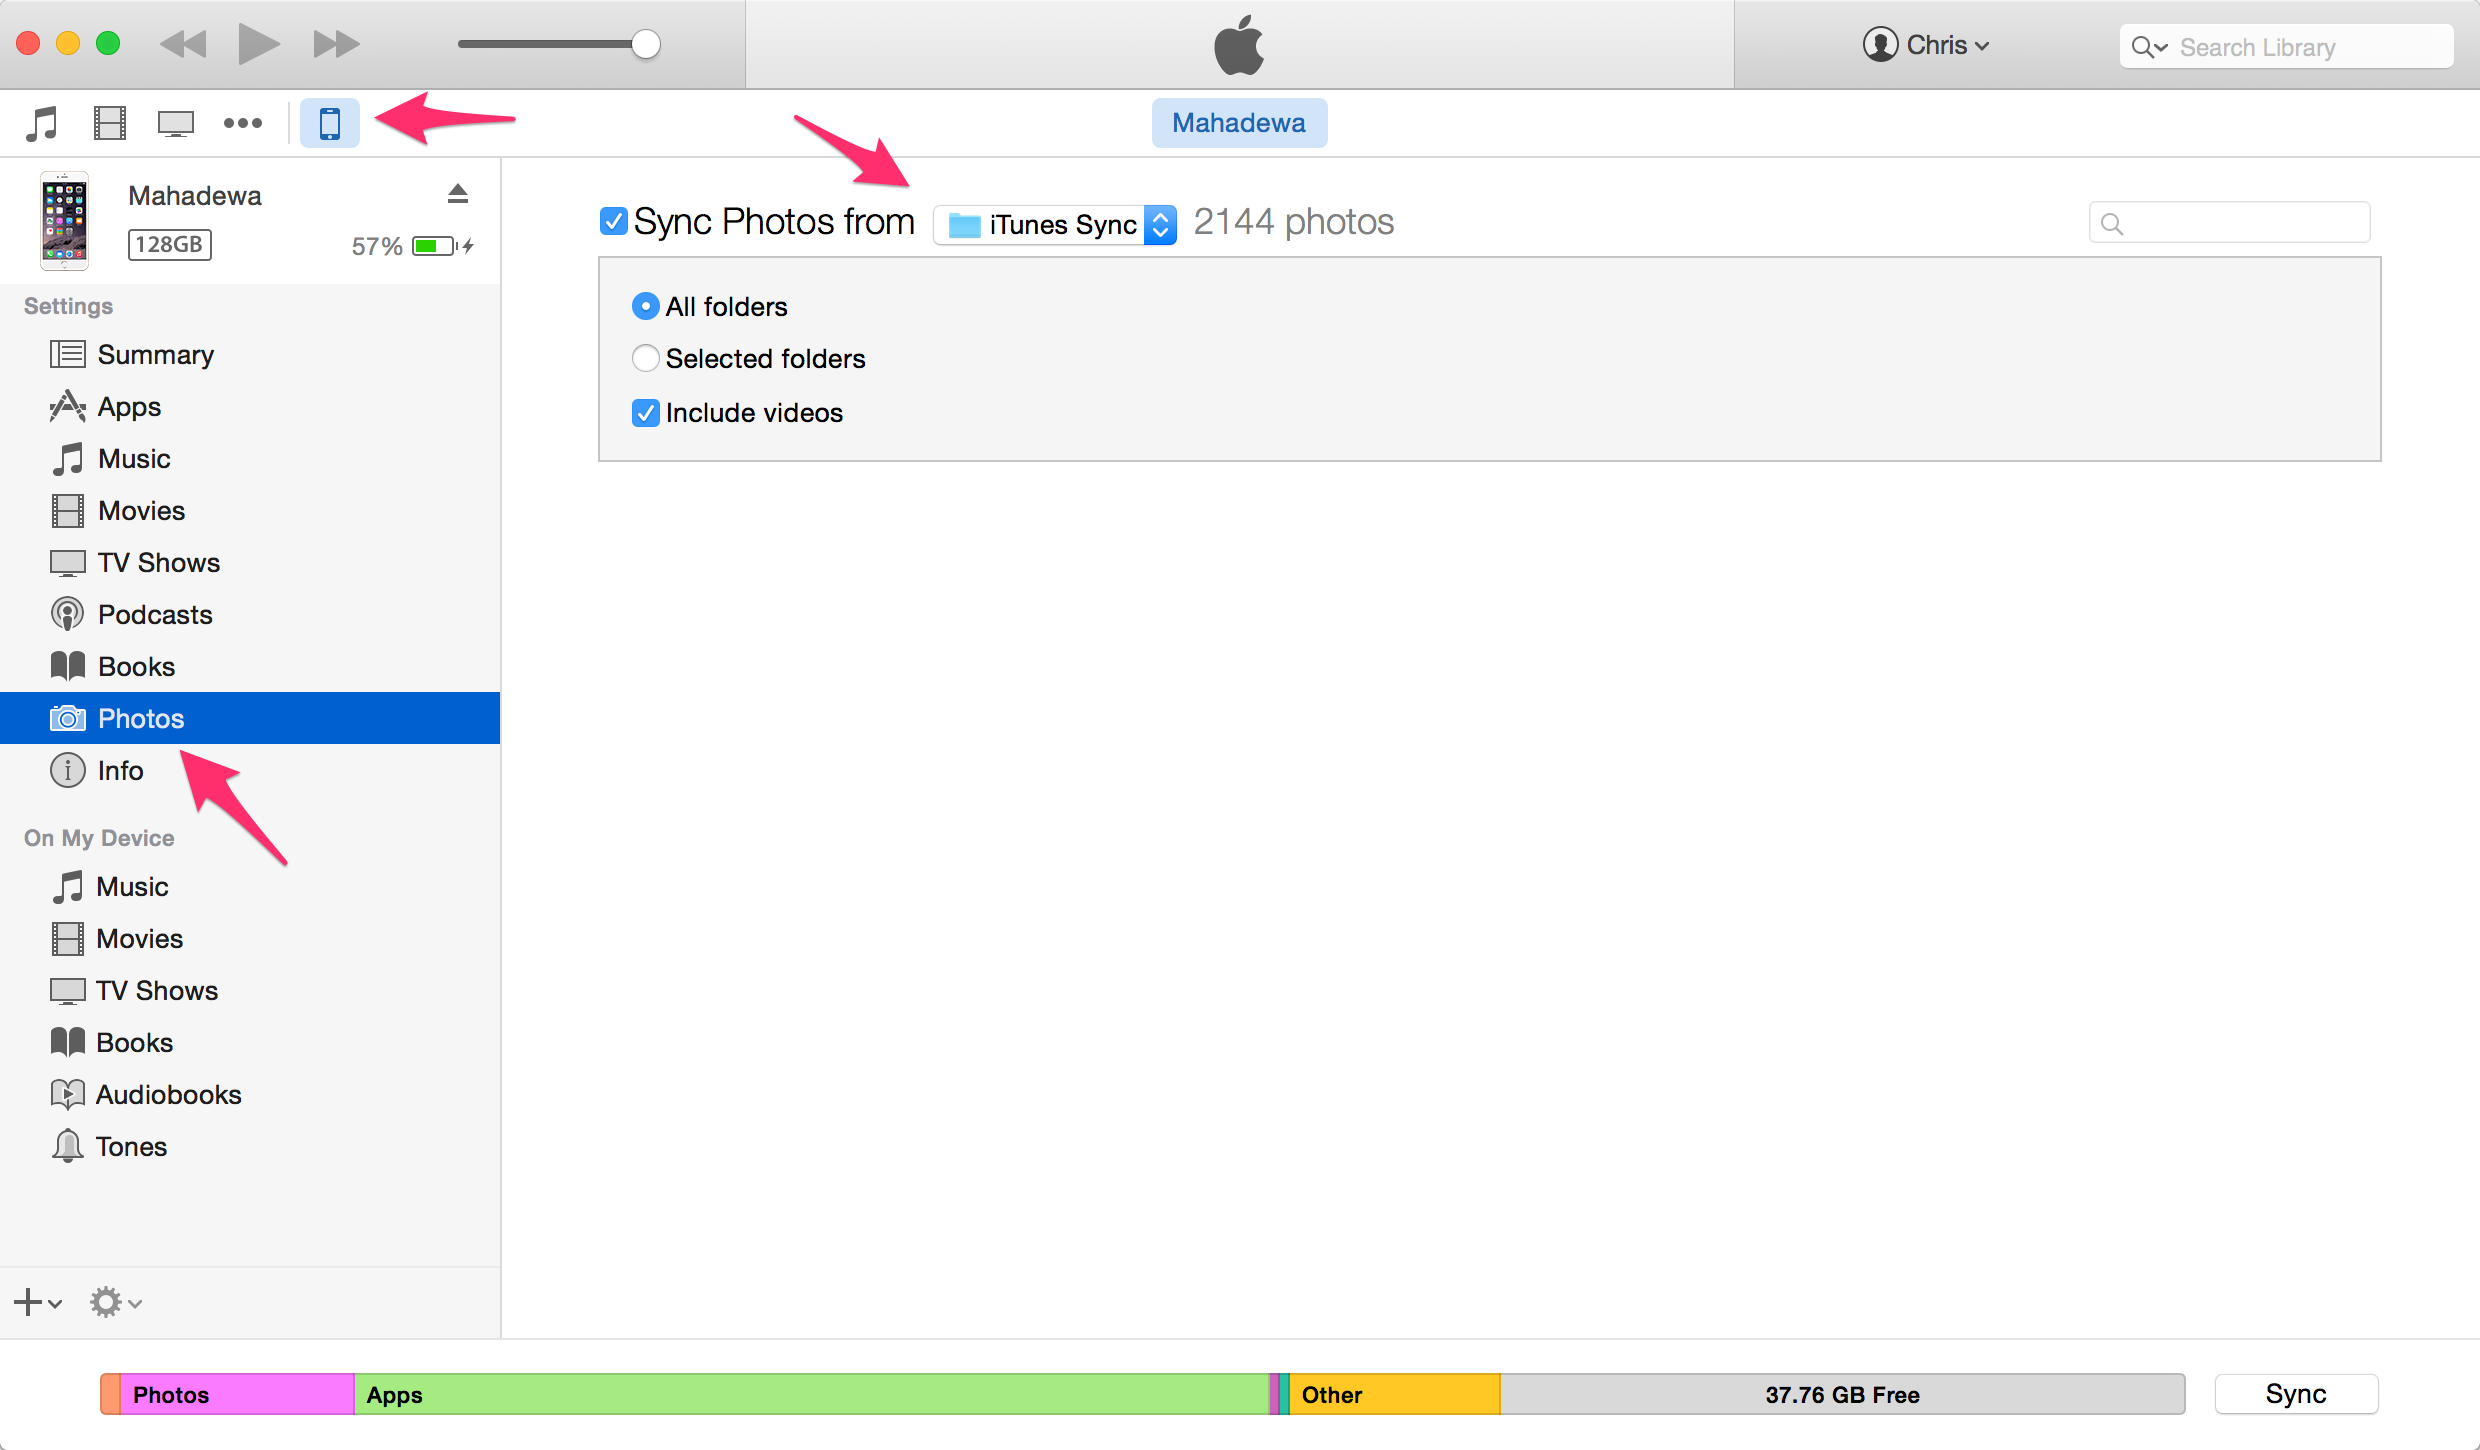
iTunes Photo Sync
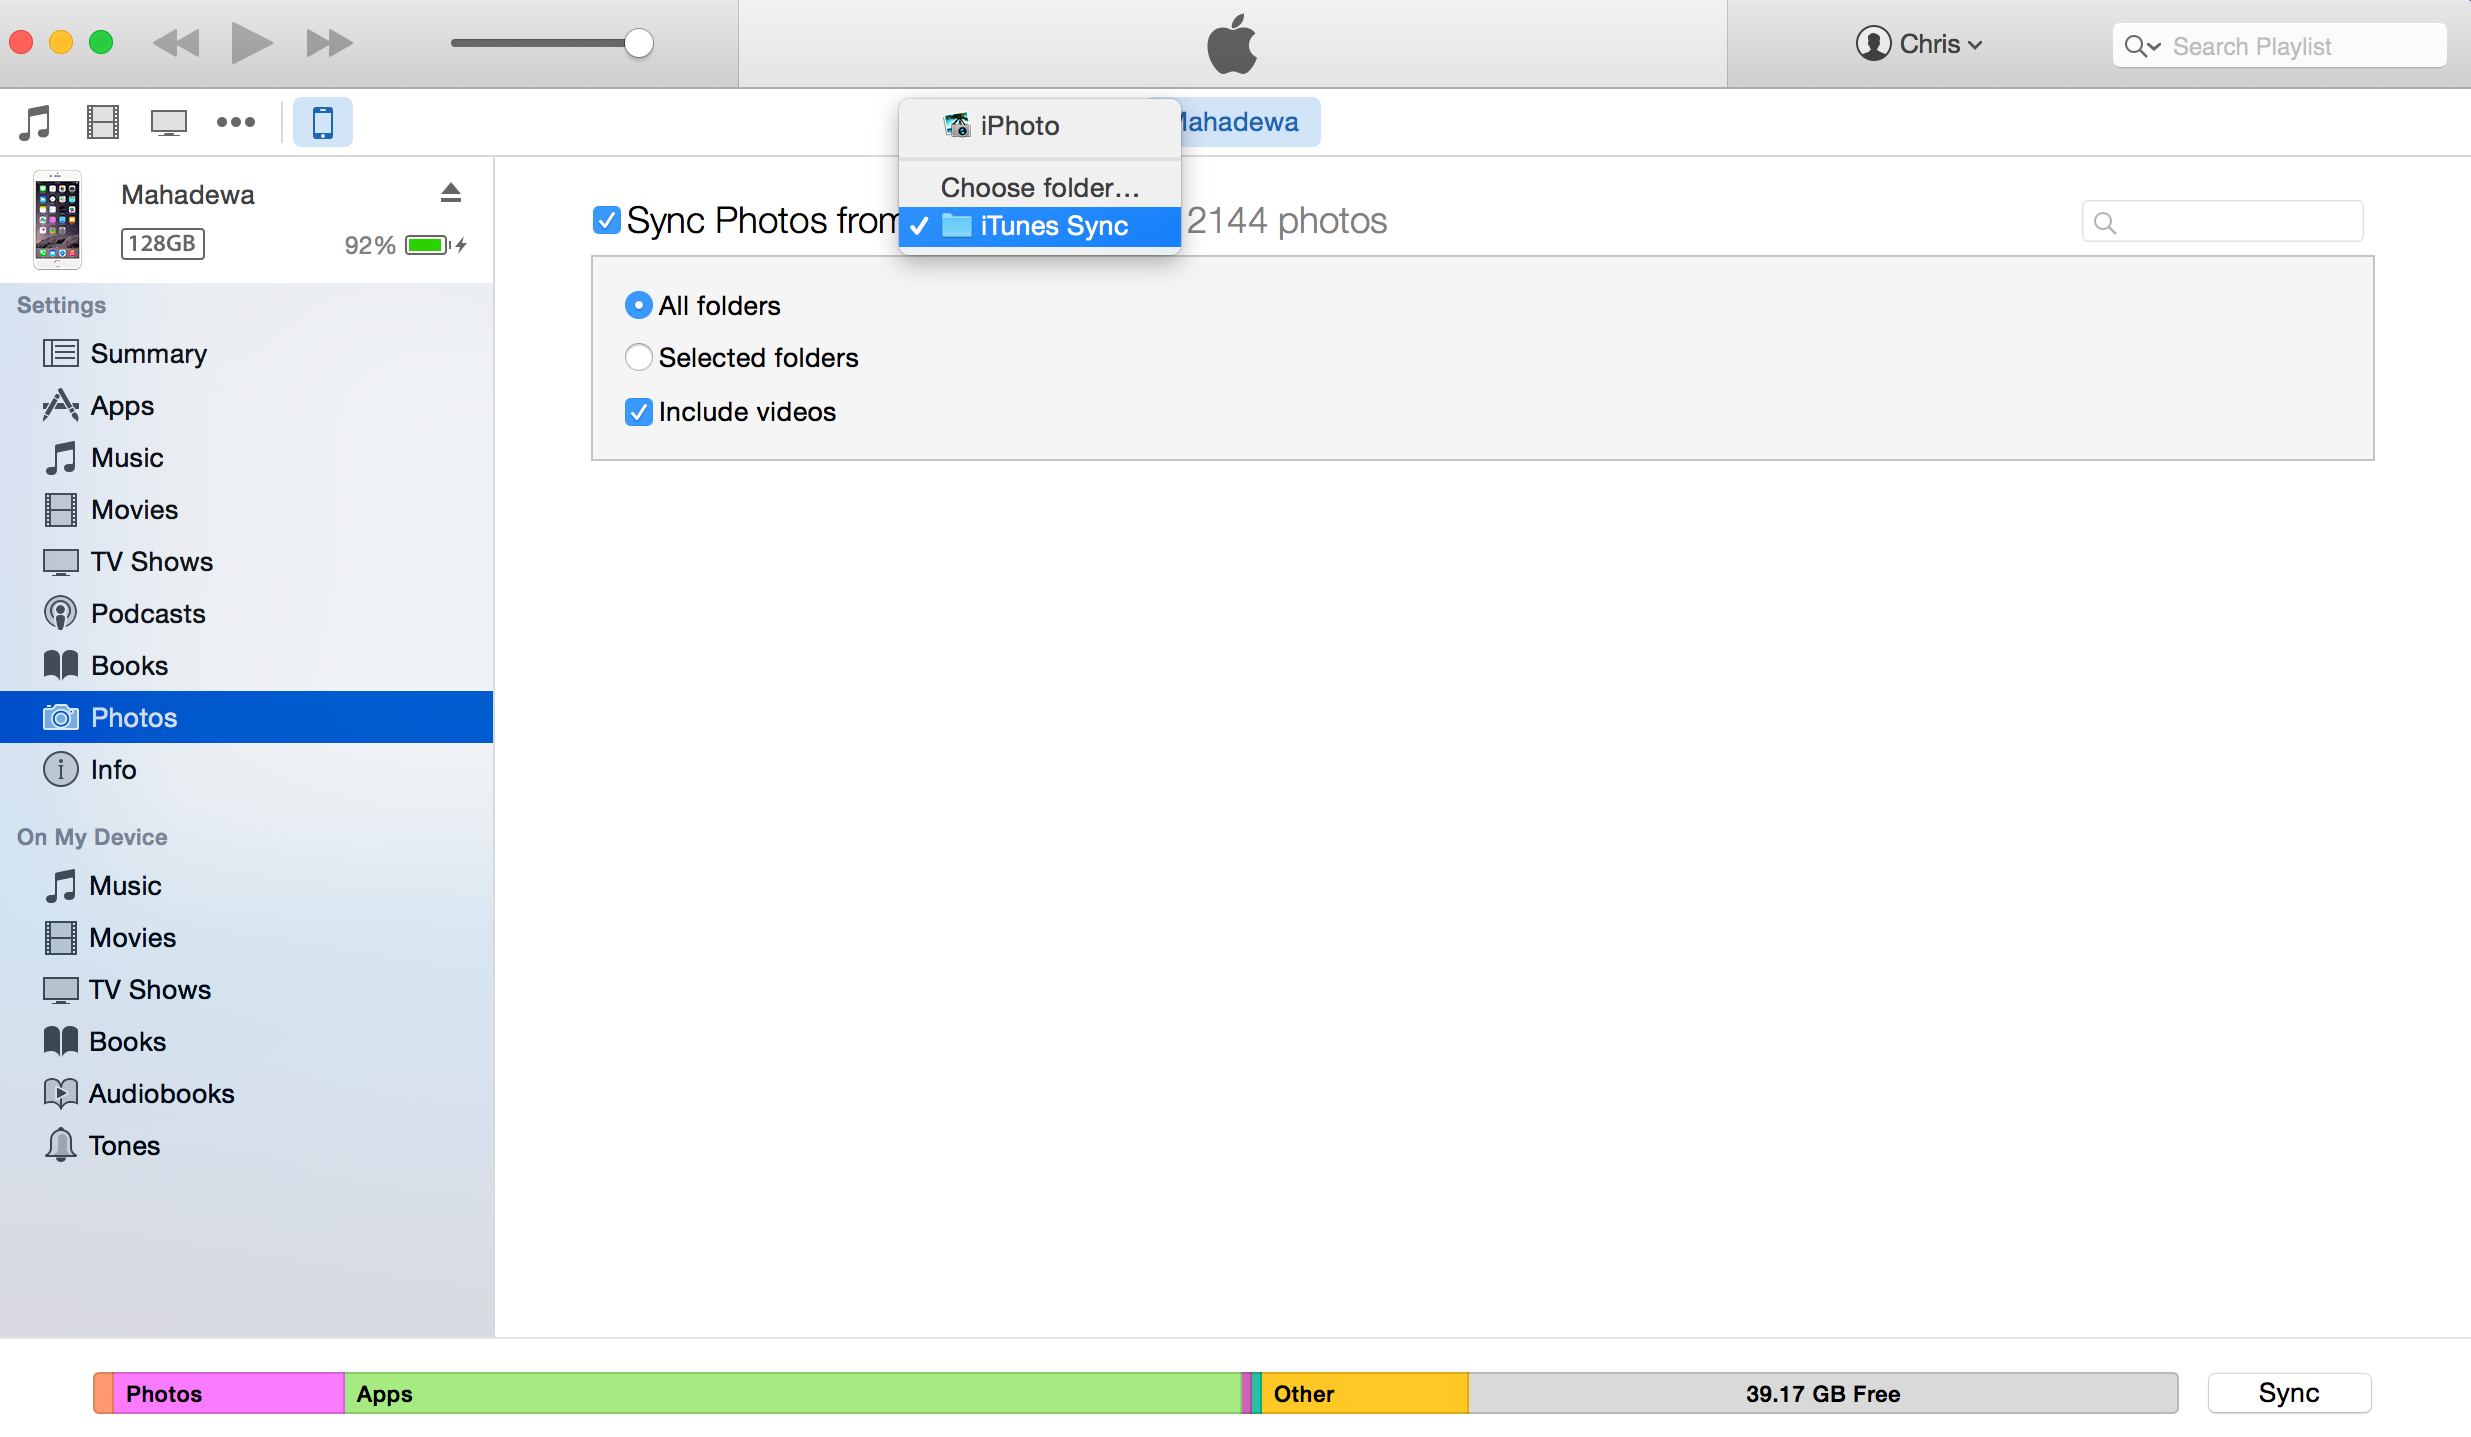
Tick on the Sync Photos from checkbox to allow iTunes to sync photos from your desktop. Then from the drop-down next to the checkbox you can select which folder you want to sync from. In my case I pick my ‘iTunes Sync’ folder (which I created myself).
iTunes Photo Sync Menu
You can then choose whether you want to sync the whole folder, along with its subfolders, or select individual folders. And you can choose whether videos would need to be synced as well.

iTunes Photo Sync – Selection
You can also, instead of choosing a local folder, select to sync from the iPhoto. Here you can then further pick which Albums of Events to be included if you wish not to sync the whole content of your iPhoto.
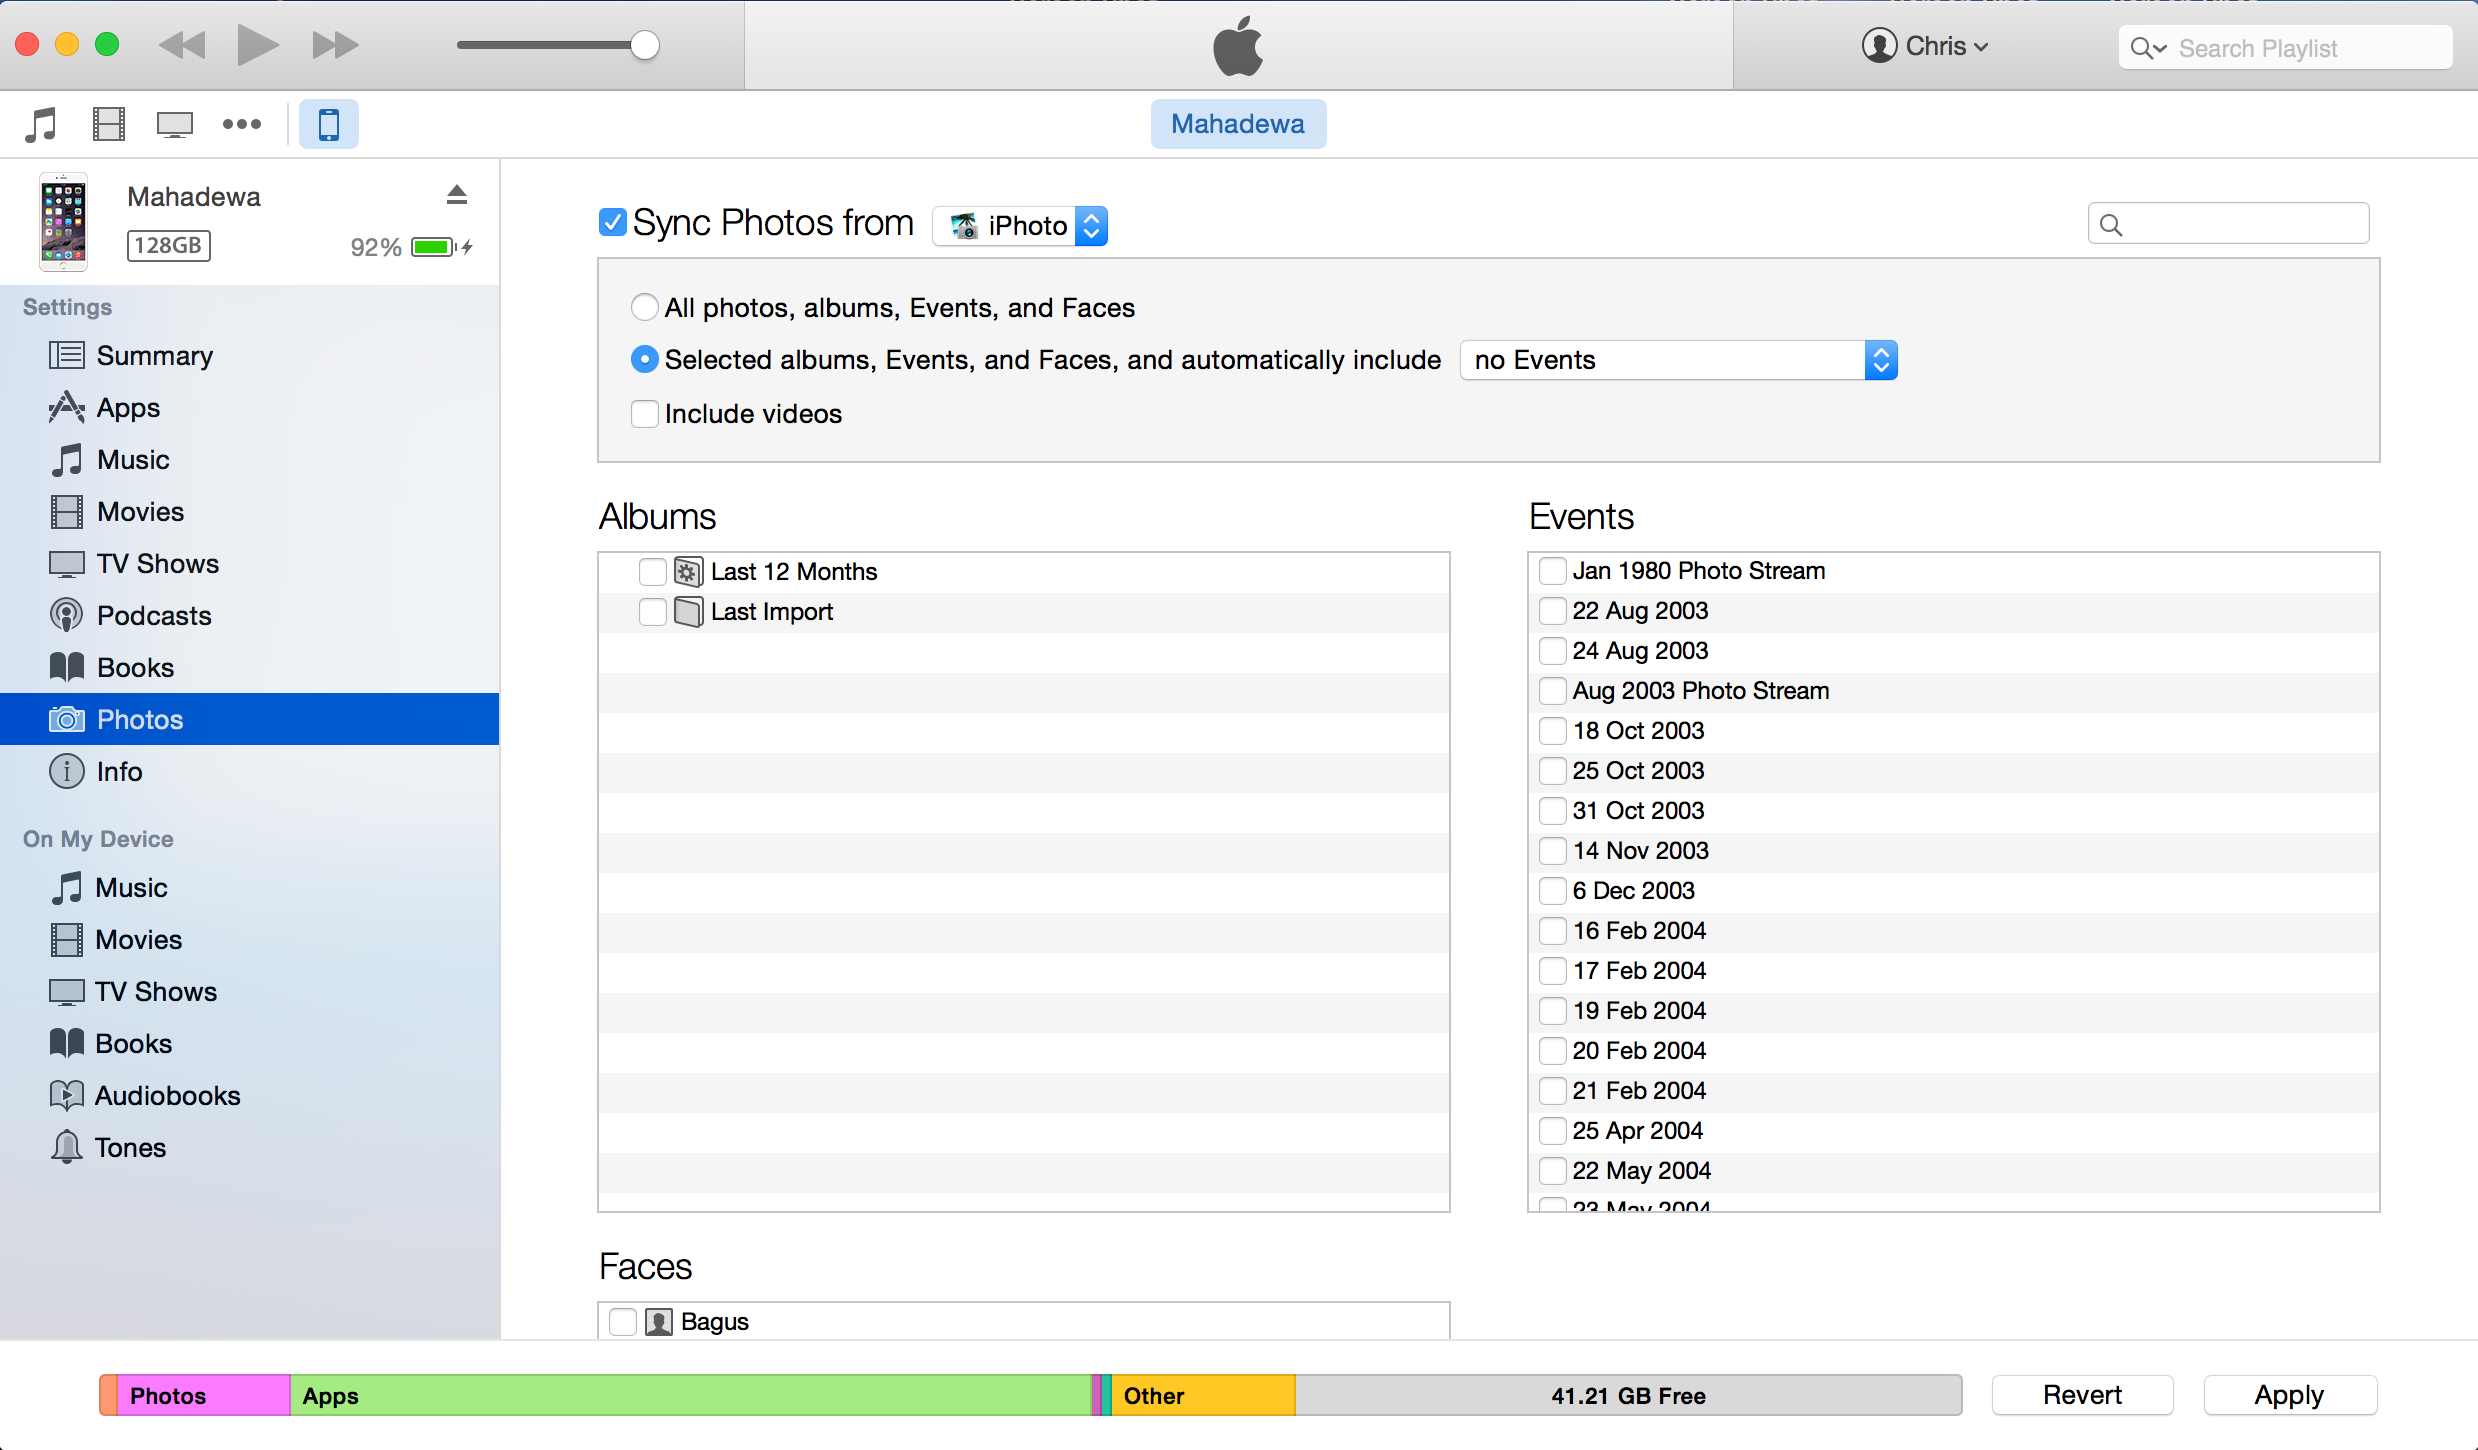
iTunes Photo Sync from iPhoto
When you finish your selection click on the Apply button and iTunes will start syncing your photos to your iDevice.
This method of using iTunes to transfer photos/videos are very suitable when you want to transfer a big number of photos and videos. And since it’s not using either the Internet or wireless connection, the transfer rate would be pretty fast and reliable and free.
Bonus: Third-Party Apps
If you, like so many others, never use or hate using the notorious Apple iTunes, there is another way and that is to use third-party apps.
Many software makers had recognised that iTunes was just too hard to use and rose to the challenge to develop an alternative app to iTunes and create a better experience to the uses.
Here are some third-party apps that you might want to have a look and try:
Wondershare TunesGo Retro
Wondershare is a Chinese software company that has about 50 odds apps actively developed and sold. One of these software is called TunesGo Retro.
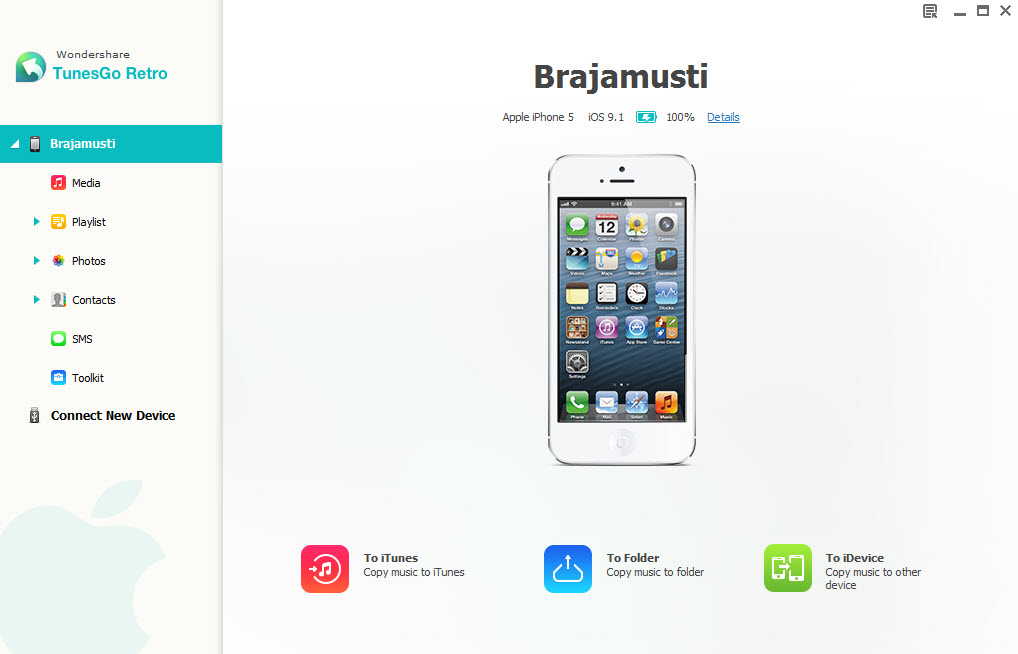
TunesGo allows you to access your iPhone data without using the notoriously bloated iTunes. These include your Songs, Photos and Videos, Contacts and SMS.
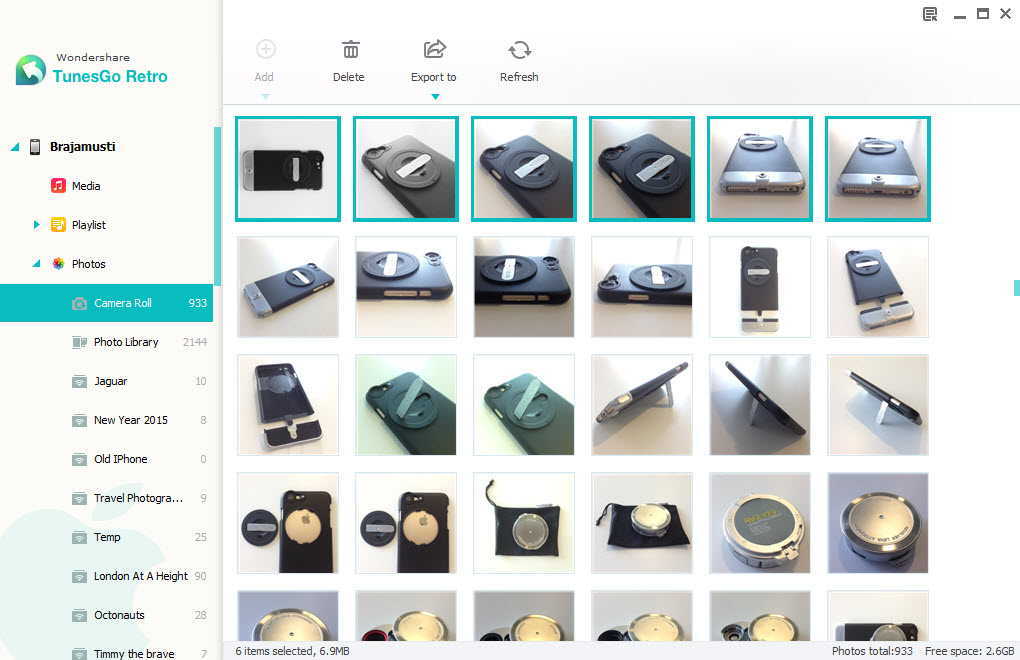
For photos, not only that you can download them from the iPhone to your PC or Mac, but it also works vice-versa!
You can add photos directly to your iOS Device!
I’ve tried this myself, and it does genuinely work.
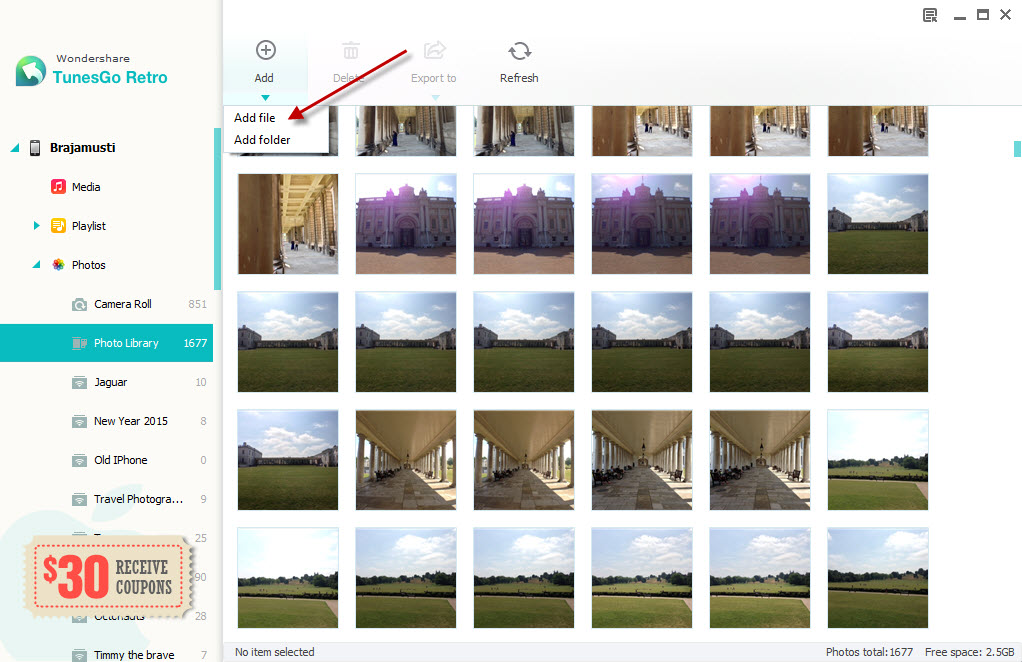
By the way, as you can see in the following screenshot, downloading photos is not the only thing that TunesGo is good at.

TunesGo Retro is Free to try. There is a version for PC and for Mac. If you decided to keep it, the license costs $19.95 per year, or $39.95 for a lifetime (for 1 user).
Final Thoughts
People say “Many roads lead to Rome” – this is indeed what we have learnt today. Some road take a direct route, others went around the mountain first before reaching the final destination.
Which ever road you choose would depend in the situation you have at that moment. But what ever situation that is, I hope I have given you enough ‘directions’ to choose which ‘route’ to take.
If you you think there are more method to transfer photos from desktop to iDevices that hasn’t been covered here, please let me know in the comment, I will definitely put it up and give you attribution.[/fusion_builder_column][/fusion_builder_row][/fusion_builder_container]


7 Ways to transfer photos/videos to #iPhone or #iPad from desktop PC/Mac http://t.co/kZJGS5mZpN http://t.co/X6B7sZ3r5L
nih @sisl http://t.co/f8yTgWf33s
7 Ways to transfer photos/videos to #iPhone or #iPad from desktop PC or Mac http://t.co/zns5lxdDYV
7 Ways to transfer photos/videos to #iPhone or #iPad from desktop #PC/#Mac http://t.co/kZJGS5mZpN http://t.co/G9jVs1uZI0
Chris, I’d like to get your authorization to repost these great tips on our website http://www.shutterplex.com. Our customers are enthusiasts and hobbyists using their iPhones for photography and videography. Please let me know if you’d agree.
Thanks,
Joe
Hi Joe,
Glad that I could help out. Please feel free to report the article! Just don’t forget the link back 🙂
Chris
Flick. is a great way of using the local wifi to transfer files. Works with iPad 2 where Airdrop doesn’t. Also works both ways
Is that an app? I can’t seem to find it in the App Store.
7 Ways to transfer photos to iPhones from desktop PC/Mac – Moblivious http://t.co/csyiAunu9b
Another way is to use the iStick, a USB and lightning storage device. A lot of pro photographers and journalists are using this as you can backup your photos and videos whilst offline, ie. poor coverage area or abroad without 3/4G … check it out at http://www.theistick.co.uk Thanks!
Thanks for the tips. Would you send me one so I can review in this blog?
Another way is to use the iStick, a USB and lightning storage device. A lot of pro photographers an… http://t.co/e94gnTjEBK
7 Ways to transfer photos to iPhones from desktop PC/Mac – Moblivious https://t.co/tvUighRd8P
Hi Chris,
Thanks for this post – just one quick question… I have a lot of photos to move to a new device, so the iTunes sync seems perfect, but it completely randomised the photos one the iPhone (or ipad). They all seem to be there, but when opening the photos app while all the Events are there they are in no discernable order, it seems completely random. Similarly the “faces” are not in alphabetical order.
Are you aware of a fix for this?
Hi Dan,
They should be in the Date/Time order. If you go to Collections in the Photo app, you should see them categorised by Place and Time
Hi Chris,
Thanks for replying. You are right that they are in the correct order in Collections – but in Albums they are not. Within the Albums section, it automatically sorts the photos into “Events” as organised in iPhoto, but those Events are in a completely random order (and similarly for “Faces” within the Albums section).
A couple of other points:
1) They are in the correct order in iPhoto on my Mac. As this is an Apple product (as opposed to a 3rd party photo organiser) I would have expected consistency?
2) All other apps on the iPhone do order them correctly. For example in Facebook if I go to upload a photo, the screen then does order all the events in the correct order – it is literally only the Photos app that randomises them.
I’m quite happy to e-mail screenshots if that will help make any of this clearer.
Thanks again for your time.
Dan
Hi Dan,
Send me the screenshot. I have a couple of Events I imported to my iPhone and the photos seem to be in the correct order. I never uploaded Faces, so I can’t help you with that unfortunately. You’ve got the email I’ve sent you, right? You can reply from there.
Did you try Flowr App? Transfers all your Photos of your Mac/PC to your iPhone. Designed for Giant Photo Library (100,000+ photos). Stores up to 20,000 photos per GB.
Have a look, it’s free: http://itunes.apple.com/app/id945833470
I find your way of transferring via WiFi is too complicated. AirMore ( http://airmore.com/ ) is much easier way to transfer photos to iPhone from PC or Mac. It needs no installation or USB cable. Open its webpage to scan the QR code. Then you can transfer photos in a very easy way.
It probably would if I could just install the iOS App, which I couldn’t seem to find in the App Store.
Some users might not use iCloud or Photo Stream to transfer photos from iPhone to computer. I have another way, here is the guide:
You are on the wrong article. May I suggest commenting on this one: http://moblivious.com/tips-tricks/import-iphone-photos-videos-to-windows-7-pc/
http://www.facebook.com/beego.cc/videos/881749658531118/
Here is another way to transfer Photos & Pictures from Mac to your iPhone, iPad and iPod touch.
Chris, thanks for your post to tell us the tips and details about how to transfer iPhone photos to computer. Actually, I don’t like use Email or some other online social sites to store my photos and then transfer them to my computer, especially when I have a lot pics.
In addition, I hate iTunes because it always brings some new sync problems and may erasing data on my iPhone.
That’s why my teammates created AnyTrans.
Chris, this comment is not advertise! Thanks for reading.
If you send your software to me I could do a review in this site.
Thanks for reading.
Nice article. I suggest a couple of updates: 1. AirDrop, of course, now works with (most) iOS devices; 2. I srongly recommend that AirDrop be turned on for Contacts Only. I’ve read about people in public places having pornographic pictures AirDropped to their devices when Everyone was enabled.
Thanks, I will update the article.
7 ways. 7 FUCKIN WAYS. And i still cant do it!!! bout to commit suicide.
Tell me the issue, we’ll see if I can help.
Wake up Mac users! Apple is fleecing you! On a PC you can drag-and-drop by simply connecting your device. Why not so on Mac?
The same way why the Mac user can do drag and drop images from websites to the desktop to download it. Just the way this world works my friend.
I use a simple method to transfer from my PC to my iPhone or iPad and vice-versa. I upload my files as an email attachment and save it as a draft. Now it is available on any device anywhere, with out using cloud storage. The only limitation is file size restrictions. I call that a Mikey Hack!
You didn’t mention just plugging the charging cable from your Apple device into the USB port on your PC. (works on Win 7, not sure about others) Doesn’t get much easier.
It would be nice if one could just do that, unfortunately copying images from PC to iPhone via USB cable doesn’t work. You can download images but not uploading. I would be glad if you can prove me wrong.
That works to download files from the device, but due to copyright limitations files cannot just be dragged and dropped into the device.
Genious! But how to get it from the email onto the phone?
You just tap on the attachment image and it will be downloaded to your photo album. Done.
Thank you so much for the reply, Chris. I’m using iphone4 – dinosaur. I don’t seem to have the options I see that others have when I tap on the image. There’s no ‘download’ icon like the iphone texting app has, for instance.
What version of iOS do you have?
(no ‘reply’ link on your last message) I’m using iOS 7.1.2
J, check out this forum thread, maybe you can find something: https://discussions.apple.com/thread/5329656?start=15&tstart=0
According to this thread, you should have the ‘tap to download’ overlay on top of each image. But there seems to be some settings that you need to turn on. Try the Mail -> Settings menu. Also try to tap and hold.
Great article! Enlighten me please with this one:
“5. Direct Wi-Fi Transfer – Mobile App
…The caveat is that your Mac or PC needs to be on the same Wi-Fi network as your mobile device”
I have an Acer Aspire One 722 laptop and an ipad mini 2 wifi only, and if I want to transfer epubs and pdfs from laptop to ipad mini, how to set both on the same wifi network (is it simply turn on the wifi on both? without another wifi ‘hub’?
Many thanks
It means that both the PC and the iPad must connect to the same WiFi (the same source, the same name). For example I have an Internet at home and I have a WiFi router, my PC and my iOS devices normally would be using Internet connection via this same router when I’m at home.
Nice sharing! And there is another alternative called FonePaw iOS Transfer which is a data manage software. You can transfer photos, contacts, videos, messages etc between iPhone/iPad and Mac. Faster, easier and more convenient!
Great work you do!!! Any ideas on how to drag and drop photo albums from a pc to an iPad?…and have them show up in the iPad photo app as a full album??
Thanks in advance,
Tony
I don’t think the way 7 –
iTunes Photo Sync works for now. Opened iTunes > Photos > Sync Photos but there is no option to sync photos from iPhone to computer. It can only sync photos from computer folder to iPhone fow now.
what about if I want to share music or video? Is the same process for music and videos?