
Have you ever wondered how do celebrity pictures on cover of magazines always seem to have unblemished, perfectly coloured and wrinkle-free skin? If you guess that they must’ve had found a ‘fountain of youth’, well … you are not actually far off. Although the miracle doesn’t exactly come from drinking enchanted water from some mysterious pond in a hidden location worthy of Indiana Jones movie. But it rather comes from the aid of modern Digital Image Manipulation ‘sorcery’ helped by some magic ‘wand’ – often called ‘Photoshop‘ or something similar like that.
It is not a secret that professional image retoucher today would frequently ‘fix‘ celeb’s photos; whiten their teeth, ironing out some wrinkles, remove blemishes, spot, etc., change the skin colour to suit the mood, put on virtual make-up, and even alter their physical shape (higher cheek-bone, wider smile, smaller nose, etc). Despite of the deceptive nature of it, you must admit that this manipulation method and tool are the closest thing we could get our hands on the proverbial Fountain of Youth, unless you are Indy of course 🙂
Now, what if I tell you that you can have this miracle of ‘virtual’ Fountain of Youth in the palm of your hand without going through a treacherous trail and getting shot by indigenous tribe? Or at least without costing you an arm and a leg, and months of training?
What if I tell you that you can do the same magic that they do to Pimp and Tune-Up those celeb’s photos, by using only your iPhone?
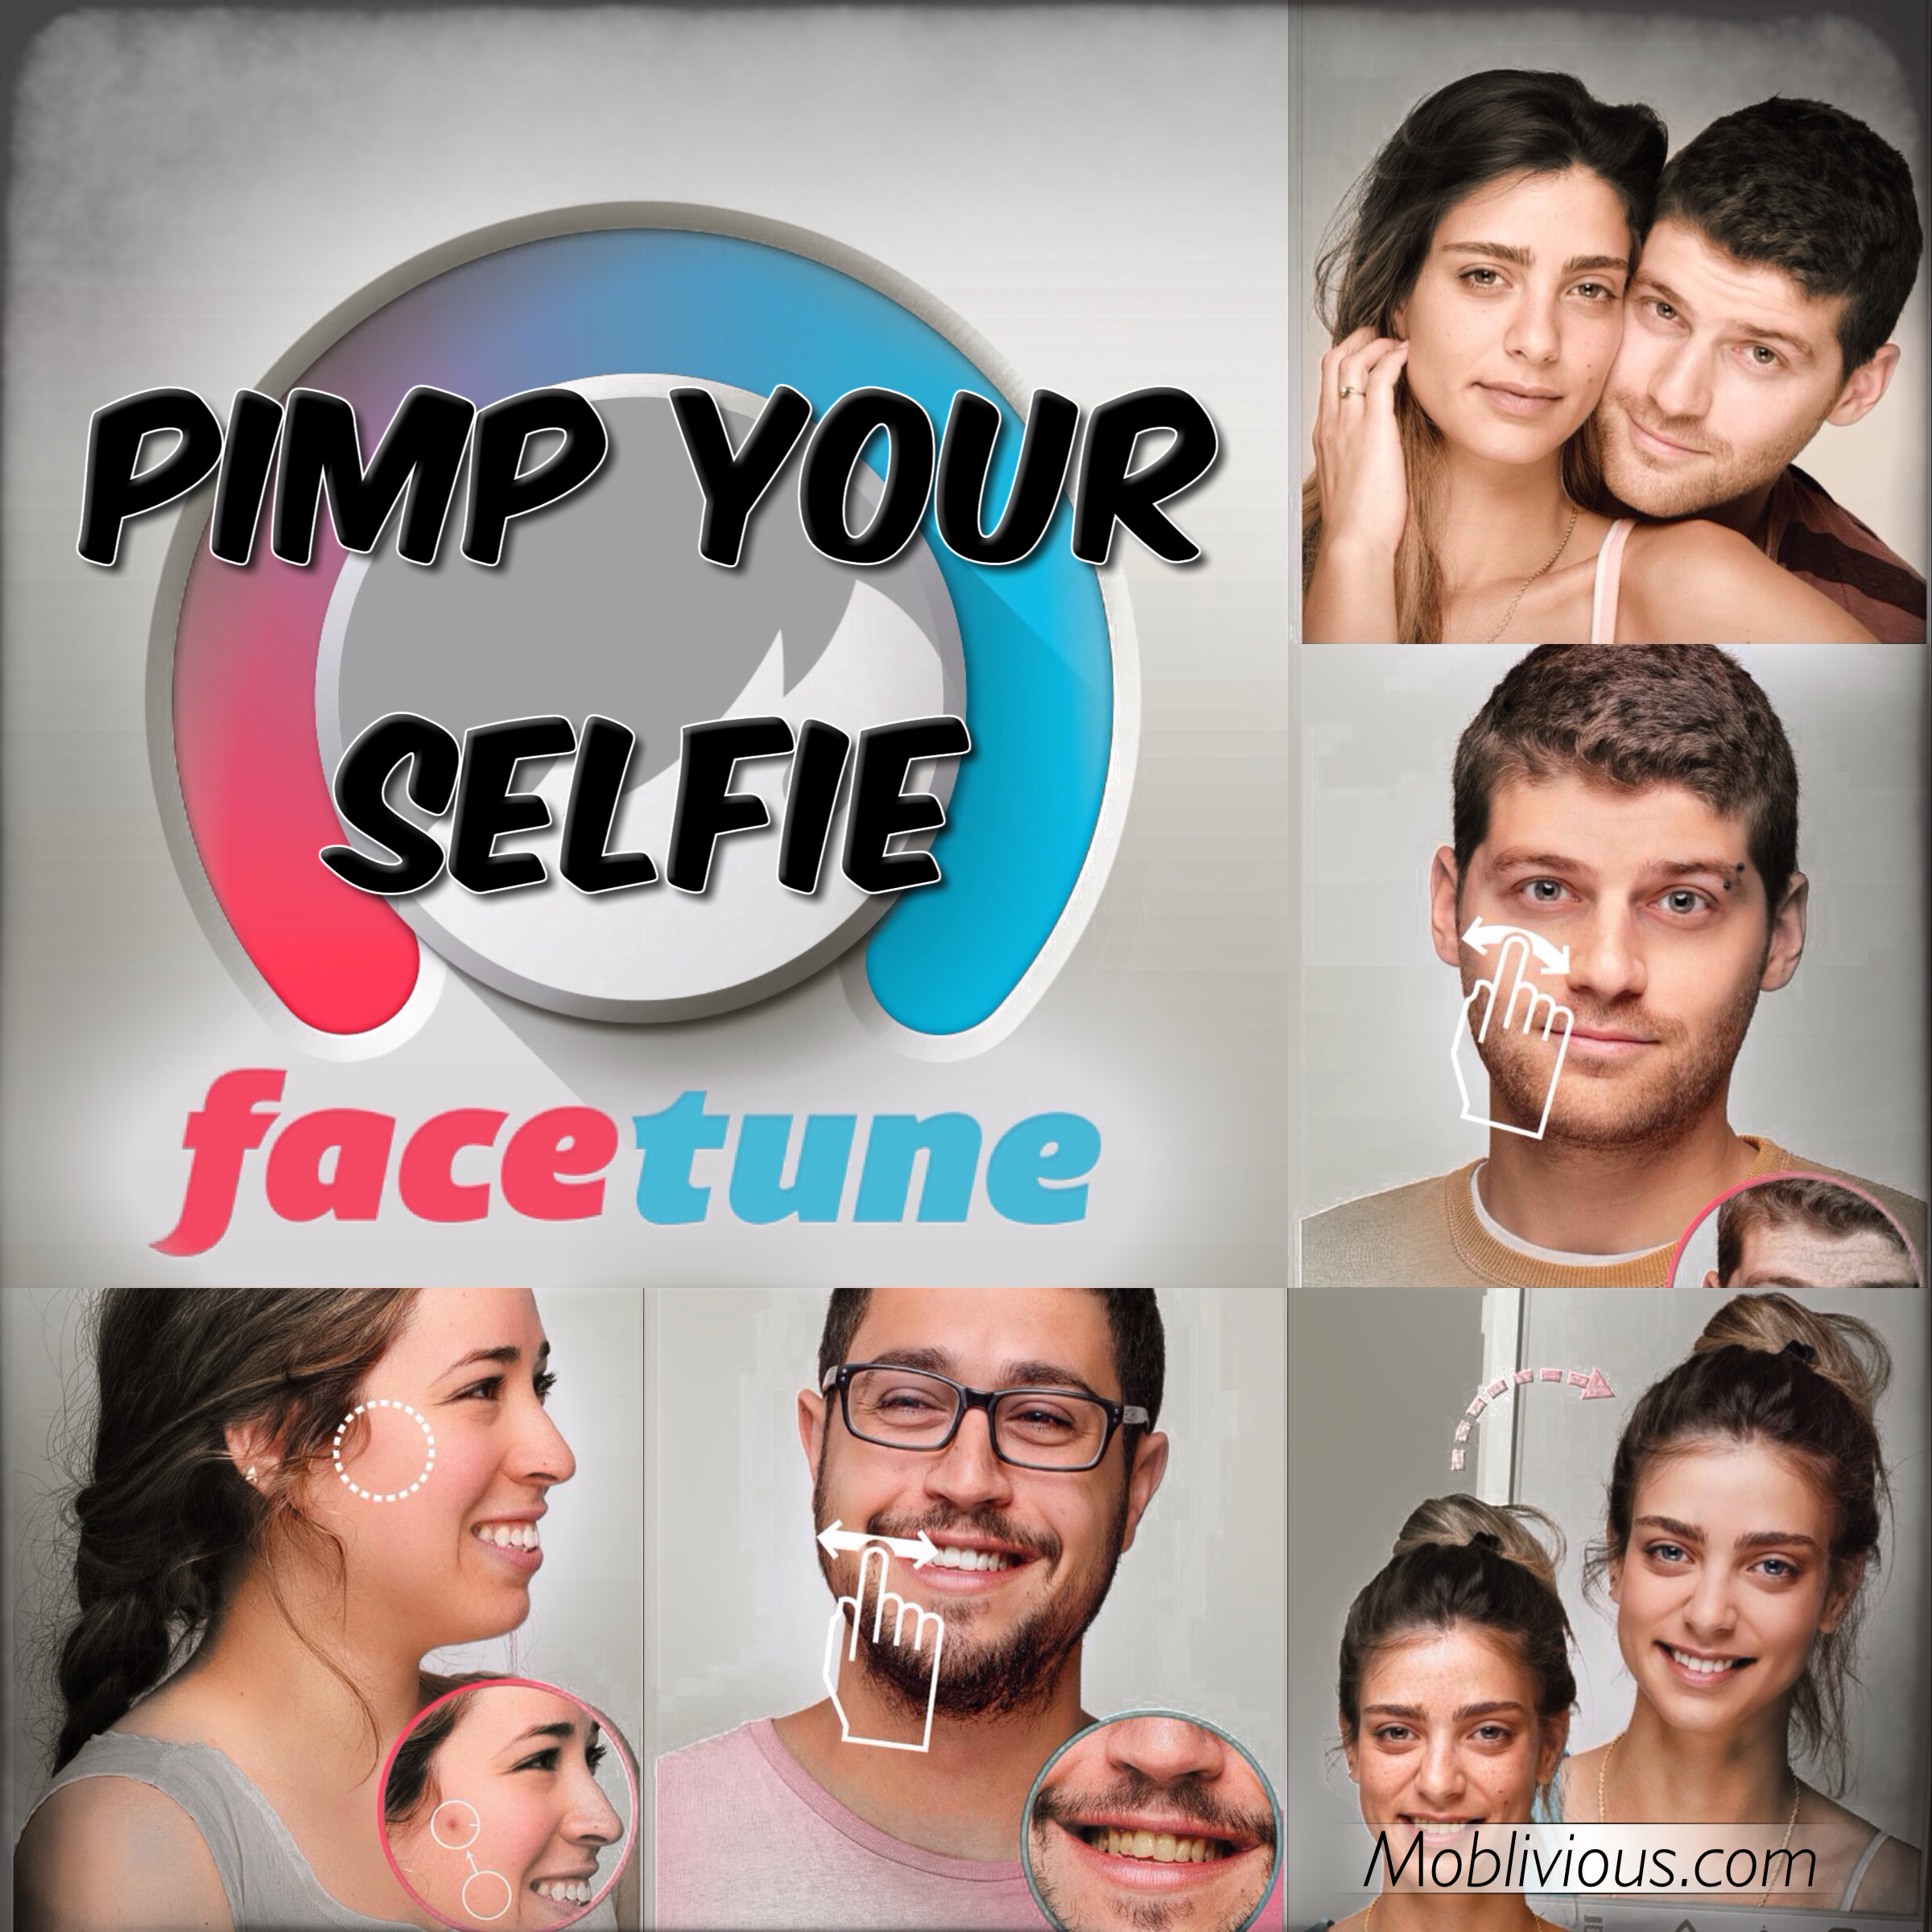
Introducing Facetune
There have been a number of apps you can find in the App Store that have taken the theme of somewhat in the line of Face Makeover/Beautify/Virtual Make-Up/Photo Retouch etc. But after using it myself, Facetune seems to be one of the most feature-complete and most versatile in the methods of image manipulation it provides.
Let’s briefly go through what you can get with Facetune (taken from the app description at the App Store):
Perfect Smile
• Emphasize your smile, make it wider or gentler.
• Give your teeth a bright and natural shine. (Who needs a dentist!)
Skin as smooth as a baby’s bum
• Smooth and rejuvenate your skin.
• Remove temporary imperfections like pimples and blemishes.
• Brighten dark circles under your eyes.
• Improve your skin tone.
Penetrating Eyes
• Emphasize your eyes for a penetrating gaze.
• Change your eye color. (I wonder how I look like with blue eyes)
• Remove red and white-eye effects.
No More Bad-Hair Day
• Turn back time and color over grey hair. (Who needs a hairdresser!)
• Fill bald patches.
• Remove stray hairs.
Reshape Facial Structure (A.K.A get me that model look!)
• Refine jaw lines.
• Heighten cheek bones and brows.
• Reshape your nose.
• Totally transform your face into alien or other fun shapes – if you must.
Vivid Makeup
• Apply any shade of blush and eyeshadow. (Could be one way to find out if that new colour will suit you)
• Add volume to your lashes and shape your brows.
• Add intensity to your lip color.
Photo Enhancements
• Focus the photo on you, by defocusing the background. (A.K.A Depth of Field or Bokeh!)
• Improve lighting. (Fixing Exposure).
• Add unique textures, paper effects and frames.
• Filters can be applied to the whole photo or to specific areas. (i.e. Masking)
If you have any experience in image retouching using Image Editing software like Photoshop, all of these would be very familiar for you. It will even feel more familiar when you start using Facetune’s various editing tools because there are a lot of similarities between these tools and their desktop counterpart. The difference is that Facetune has made them easier to use and less overwhelming for beginners, though by no means less powerful.
Now, all of the above sound very impressive on paper, but how does it fair in practice? Well, I took the plunge and did a ‘tune-up’ myself, with my ‘own selfie’. I figured if something went wrong it was just my ugly mug-shot that would had been ruined and not others 🙂
How I Pimped my own Selfie!
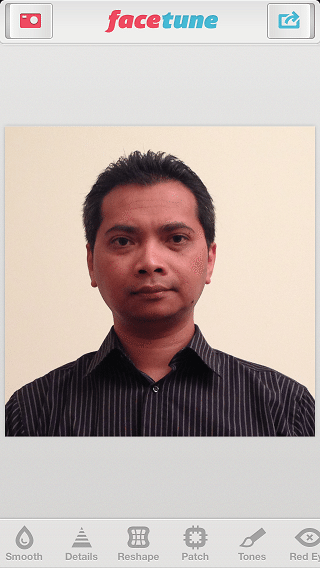
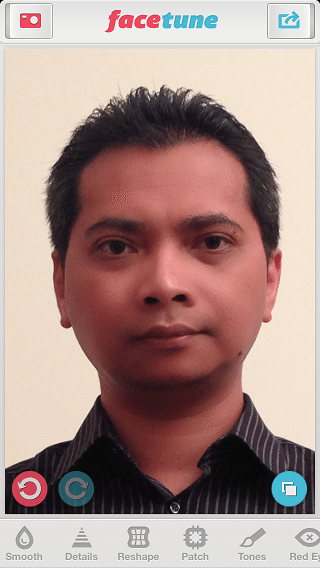
First let me show you the before and after photos so you know what to expect. As you can see from these two pictures, I’ve managed to iron out some wrinkles, get rid off my eye-bag and some more, brighten my eyes a bit and widen my smile. Not too bad for half an hour work, on my iPhone!


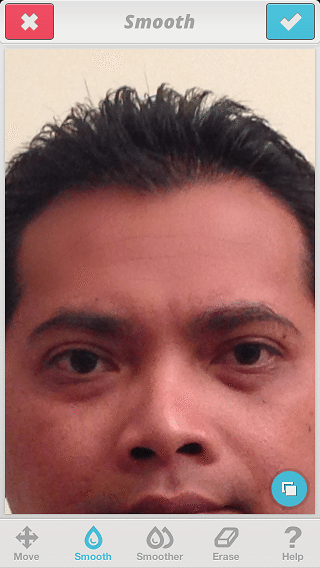
Let’s start by opening my original selfie.
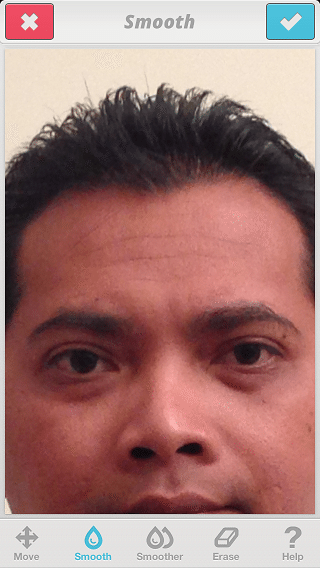
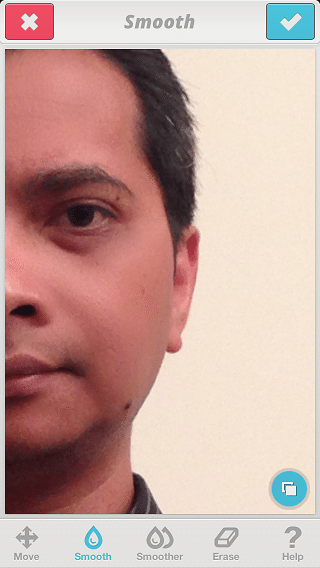
First I wanted to smooth all my wrinkles, the bag under my eyes and generally get rid off all blemishes. I picked the Smooth tool and started ‘Swiping Away‘ all the offending stuff.
While I was doing this, I discovered some things that I am going to share with you in a series of Tips in between the steps.
Tips 1: You can do the Pinch gesture to zoom in or out your image.
Tips 2: Use the Move tool to move around the image without fear of accidentally destroy the image. Alternatively you can use two-finger pan.
Tips 3: Try to swipe along in one direction when you smooth, rather than brushing back and forth.
Tips 4: If the Smooth tool is not strong enough, try to use ‘Smoother‘ Tool 🙂
Tips 5: Facetune is obviously better utilized if you have an iPad (there is even Facetune for iPad), but even using iPhone I was doing fine, so don’t worry too much.
Tips 6: Even better if you have a Stylus. I was using my Cosmonaut to do this edit.
Ok, now that all the smoothing was done, let’s check the final result. Looking good I think.
-

- Before
-
- After
-
- Before

-
- After
-
- After all Smooting
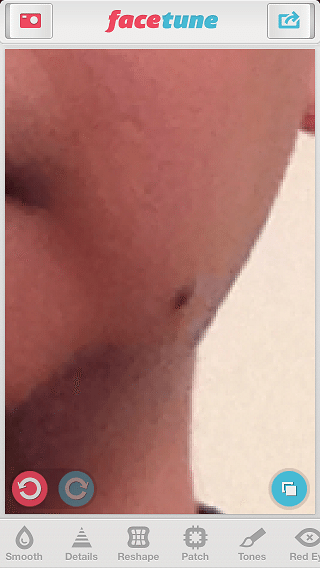
Basically the Patch tool works by ‘cloning‘ the part of image from the ‘source’ circle to the ‘target’ circle. You can move the source and target circles independently.
Tips 7: Do a Pinch to make the circle bigger or smaller.
Tips 8: Try to find a source area that has more or less the same colour as the area surrounding the target.
-
- Now you see …
-
- Now you don’t!
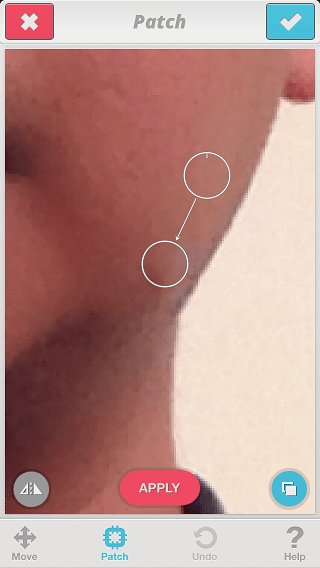
Ok, the mole’s gone now.
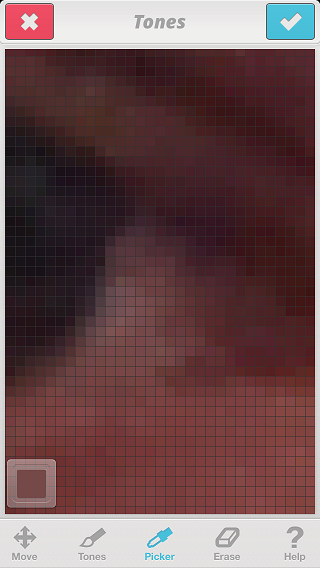
Next I wanted to clear a little bit the ‘white’ part of my eyes. I picked the Tones tool for this task.
The Tones tool is basically the tool to use when you want to ‘re-colour‘ part of the image. Here you can see from the screenshot that Facetune allow you to Zoom in amazingly detailed down to the pixel level!
Tips 9: Use the Picker tool to ‘pick’ a colour from the surrounding pixel.
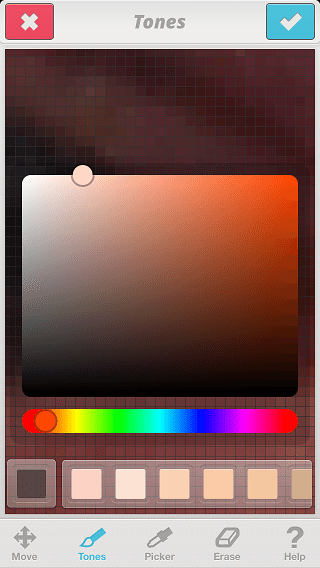
Tips 10: Or tap on the Colour box and Facetune will show you Colour tool where you can pick any colour you want.
Tips 11: If you make any mistake use the Erase tool.
-
- Down to the last pixel
-
- Colour Picker
Ok, now my eyes looks a bit brighter.
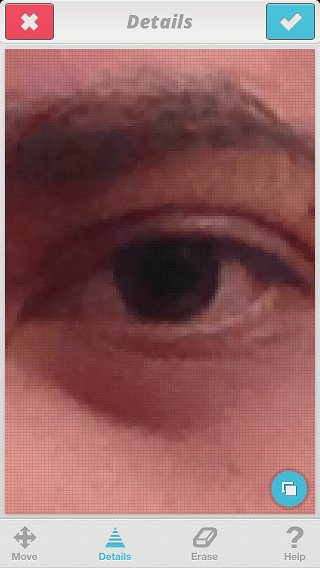
But what about the Pupil? It needs to be ‘fixed’ as well as they looked very ‘muddy’. For this task I used the Details tool. Technically, the Details tool will add ‘Local Contrast’ to the area of the image that you apply the effect to. It’s similar to putting Clarity or HDR effect, albeit only on the affected area.
-
- Muddy
-
- Clear
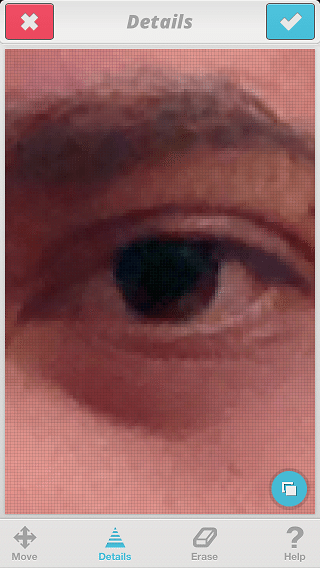
Cool, my eyes look less ‘sleepy’ now.
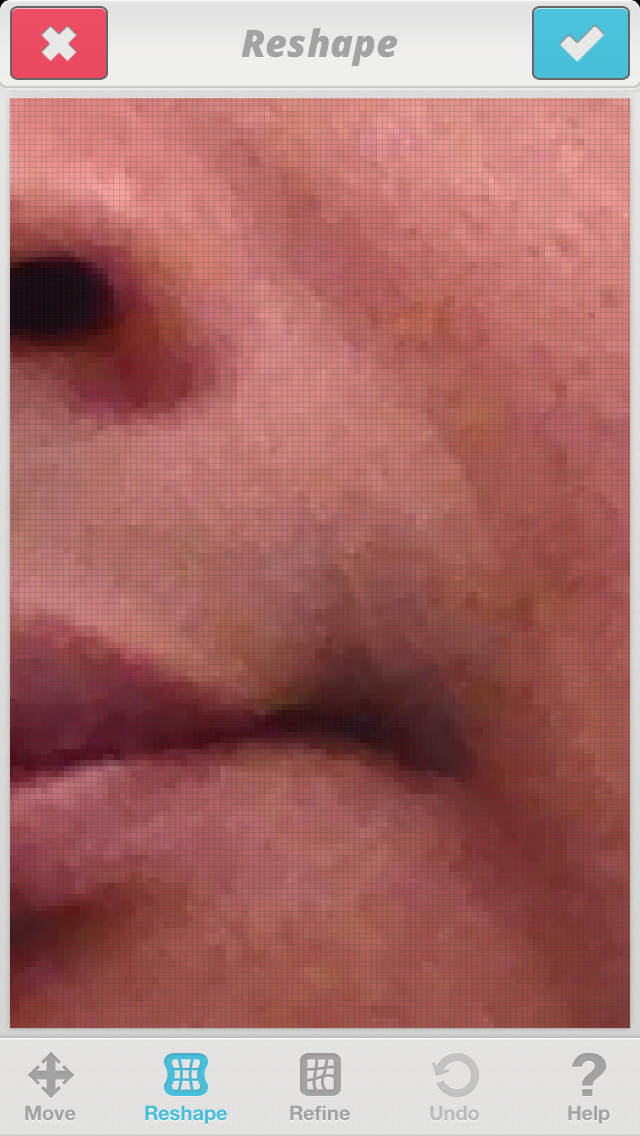
Last but in no way the very least, I didn’t look very happy in the photo. So to add a bit of ‘smile’ I chose the ‘Reshape’ tool. Tugging my mouth a touch to the left and right and finally I am looking like I wanted.
By now the retouching part is finished, but Facetune offers more than just smoothing here and there. It also come with additional enhancement tools like Filters and Frames. I’ve added some Lighting and Texture effects to create my final image as follows:

What do you think?
Obviously what I’ve shown you here is only a fraction of what Facetune can do. Judging by watching a few Tutorial Videos, made by Facetune, there are indeed many other things that you can achieve with this powerful app.
When I asked Lightricks, Facetune’s creator – which consists of 5 PhDs in CompSci, about the reason why they created this app, they explained:
We decided to create this app because we want to bring true photo editing to the mobile platform. Most mobile apps are subpar because a lot of companies that do image processing are meant for a desktop (like Photoshop). We wanted to bring these professional quality tools seen in photoshop to the convenience of a mobile app. We believe this app provides people with a wide range of pro-quality editing tools that are easy to use, and don’t come with an expensive price tag.
Indeed with the price tag of a mere £1.99/$2.99 (iPhone version) it is light years cheaper than even the cheapest Desktop Image Editor you can find that has similar features.
Apart from the iPhone version, Facetune has also just released the iPad version (£2.49/$3.99) which judging from the video below, it does have a bit more feature than its iPhone brother.
Facetune has practically lowered the bar on Digital Image Retouching previously reserved only for the Pros and made it accessible to the ‘mere mortal’.
If you are one of the experts who’s been using Photoshop or other Imaging software for a long time, I would really like to know what you think about this app. Ping me in the comment!

Pimp your Selfie and Give yourself a Celebrity Makeover like the Magazine Cover http://t.co/Lh89P6mtBl
Pimp your Selfie and Give yourself a Celebrity Makeover like the Magazine Cover http://t.co/cf4CjfNg8v
The celebs do it so why shouldn’t you? RT @mahadewa: Pimp your Selfie http://t.co/V9OYIKS0HH
The celebs do it so why shouldn’t you? RT @mahadewa: Pimp your Selfie http://t.co/wxVf9TLqLT
IGAccount Photoshops Selfies when asks, Sometimes if You Don’t http://t.co/HsBDOViisb Maybe you should do it yourself http://t.co/036y2YwDyV
IGAccount Photoshops Selfies when asks, Sometimes if You Don’t http://t.co/SZcxbjpgNy Maybe you should do it yourself http://t.co/U29vmUUBnZ
[…] using these apps; like some I’ve reviewed here – Tadaa 3D, Facetune, Fotor HDR, ProCamera 7; I can see the complexity of tasks that it must do, often indicated by how […]
[…] Facetune – Pimp your Selfie to give yourself that Celebrity Makeover. Waterlogue – Turn your photos into beautiful Watercolour Sketches. Brushstroke – Create beautiful painting from your mobile photos. […]
This thing is the worst never seen anything worse I wanted 2 do me not a weirdo
I’m sorry, what are you trying to say?
เบอร์มงคล
Pimp your Selfie and Give yourself a Celebrity Makeover like the Magazine Cover – Moblivious