Whether you are trying to build a YouTube empire recording how-to videos or you just want to make some fun videos to share with friends, knowing how to record your iOS screen is a skill you need. Luckily, it is not very difficult as there are some great software options you can use to help make your video.
We introduce you to using iPhone Screen Recorder from AceThinker, but the general steps we show will work with most other recording software. There may be a few slight variations, but in general, you should be able to follow our instructions using whatever software you prefer.
Keep in mind that quality can vary. It might depend on several factors. You may need to play around with things and try different options to get the quality that you want.
The bottom line is that you will soon be able to create videos using your iOS device and a Mac or PC.
How to Record Step-by-Step
Here is the long story short, if you want to record your iOS Screen and make a video off it, this is one easy way of doing it.
So here are what you need:
1. An iOS Device with AirPlay Mirroring enables.
2. A Mac or a PC to mirror the device’s screen and record it.
3. A WiFi connection of which the iOS Device and the Mac/PC should be connected.
4. A copy of iPhone Screen Recorder from AceThinker
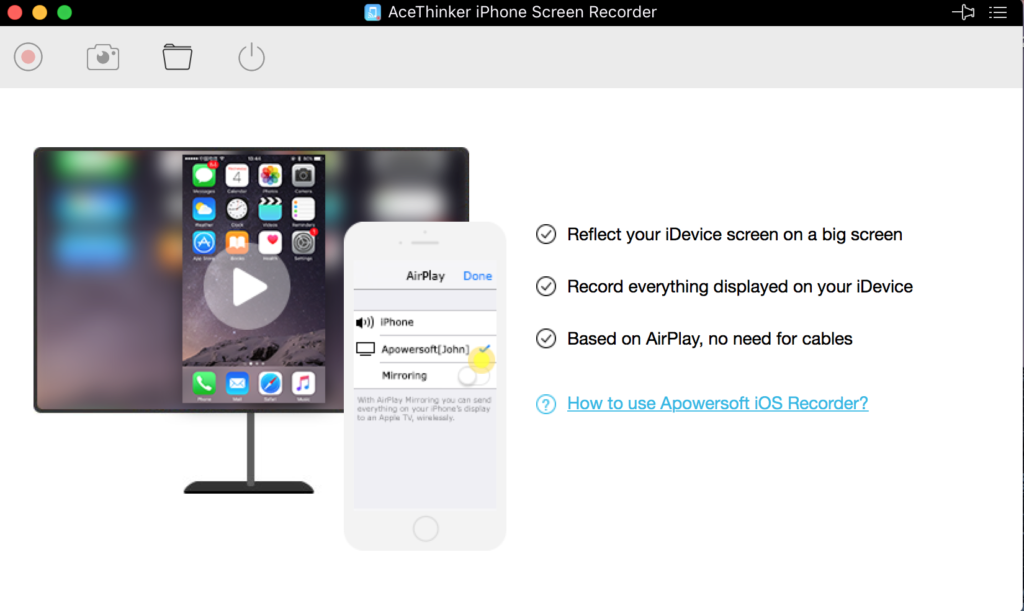
After you download and install the software, find the app and run it. You should see the main app window as follows:
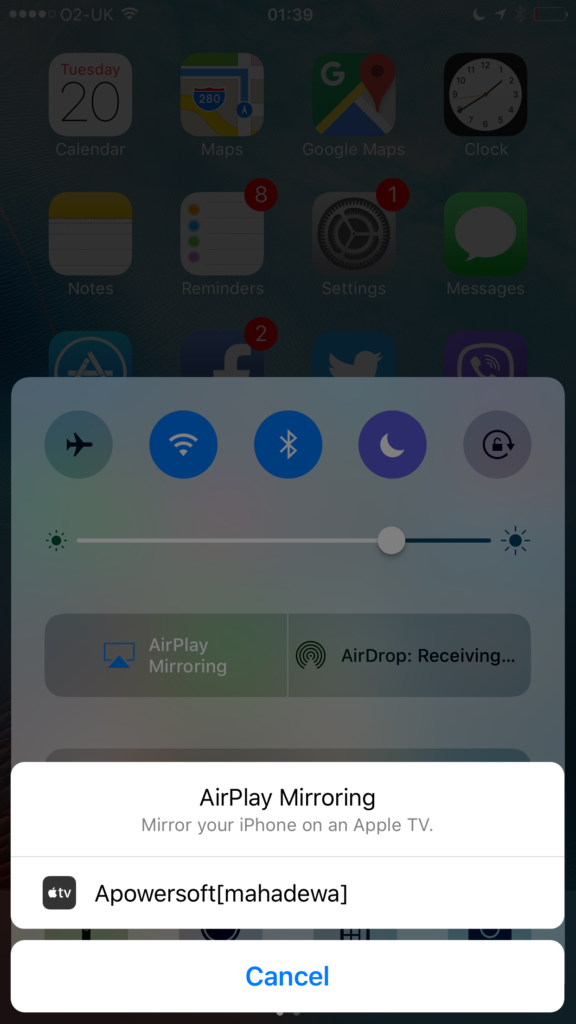
Now open Control Center on your iOS Device (swipe up from the bottom of the screen).
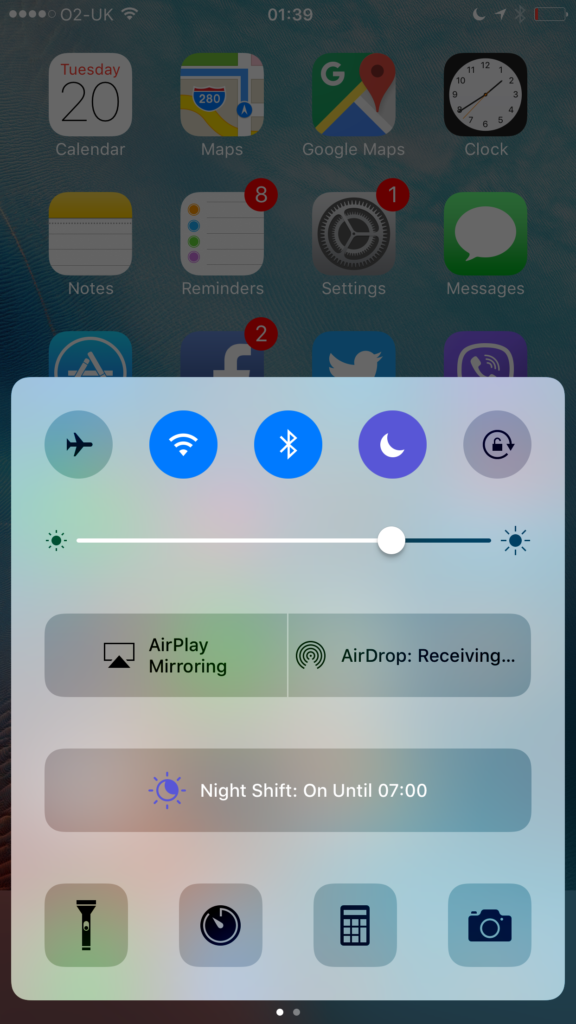
Tap on the AirPlay button. Then turn on Mirroring. Then tap on Apowersoft link to initiate the AirPlay Mirroring with your Mac/PC.
You should see your iOS Screen being mirrored on your PC/Mac screen.
From here you can proceed to record video or take a screenshot of your screen.
Here is an example of a screenshot I took using the app:

And videos!
And it works on Landscape mode too, including the sound!
Now you might be wondering why the video quality is not as good as you expected to be. I’ve talked to AceThinker about this and they said that this only happens on the Mac version. They said that the PC version wouldn’t have this issue and assured me that they will improve the Mac version in the future.
That’s not the only difference between the Mac and the PC version unfortunately. While both version can output to either 720p and 1080p resolution, you are limited to mp4 file format only in the Mac version. In the PC version you can choose among many file formats including avi, wmv, mov, flv and even gif!
Apart from this slight problem, this app is really easy to use and it works quite well as advertised.
Check out the following video for more details on the software.


Leave A Comment