

Geotagging is a process of adding ‘geographical information metadata‘, i.e. location data (latitude, longitude, etc.) to a media, in our case to images taken with our mobile phone. Ultimately this will enable software that can read the metadata to identify the location where a particular photo was taken.
In an iOS device you can turn on Location Service so that when ever you take picture the Geotag metadata will be added to the photo automatically. You can do this by going to the Settings -> Privacy -> Location Services. In this page you can turn on or off the Location Services in general, or for individual apps.
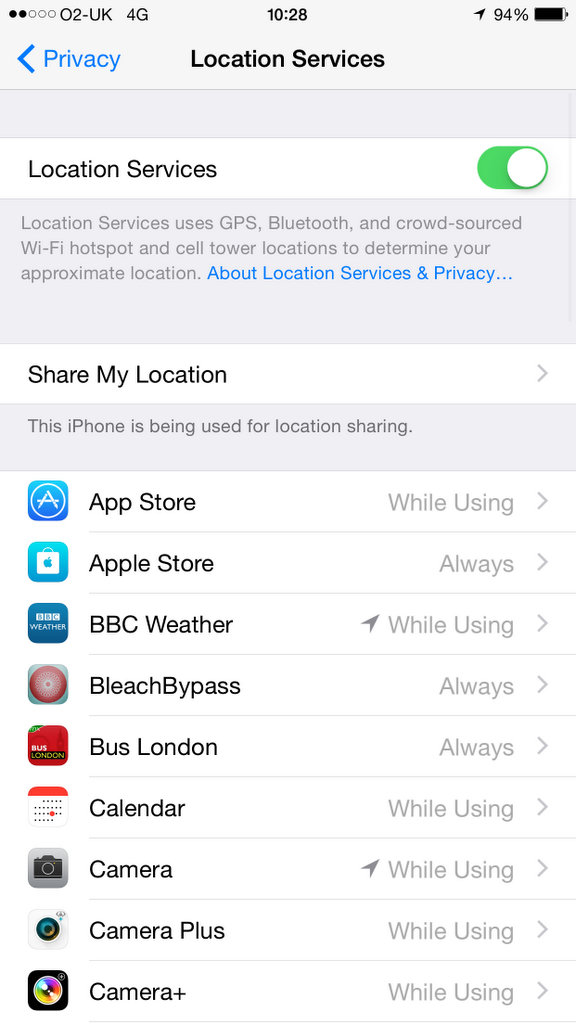
For picture taking purpose, make sure that Location Service is turned on for every Camera App you use, including Instagram.
-

- Turn On Location Service for Instagram

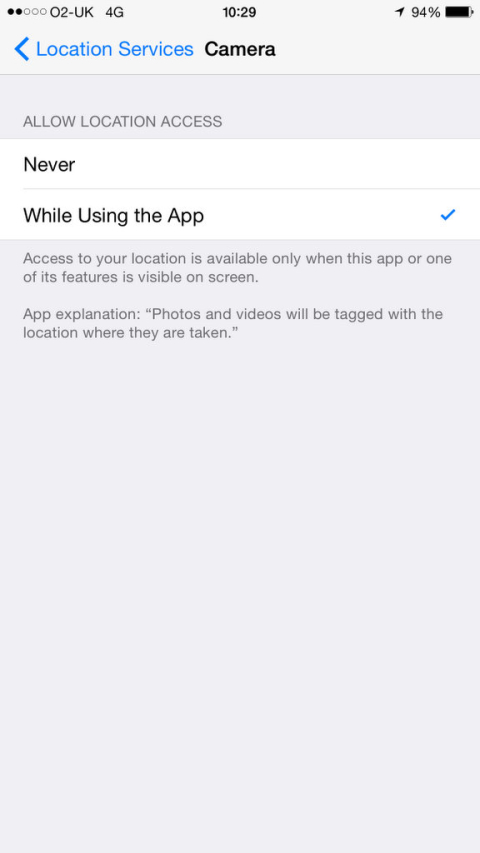
-
- Turn On Location Service for Camera App
In Instagram, if you post a photo that has been geotagged, the app should be able to read the metadata and suggest the location to you when you search for it. It’s not always accurate, but you can type in a name of a place and Instagram will attempt to search it for you.
The issue is that sometimes you forget to set the location when you post a photo, resulting in a blank location field above our posted picture on Instagram.
Fret not! We can fix it!
Fortunately you can add, edit or remove the location info after you post the picture, it’s quite easy to do as well, just follow the following steps:
1. Go to your Instagram Photo or Video (yes it works with video too) to which you want to add location.

2. On the photo page you should see the ‘three-dot icon‘. You can normally find it at the bottom right corner, next to the Like and Comment buttons.
3. Tap on this icon. You should be then presented with a list of menu that you can choose. Tap on the ‘Edit‘ menu.

4. This will take you to the Edit page, where you can edit, among others, the photo caption and the location. If your photo doesn’t have location info, you should see the an ‘Add Location …‘ link at the top left corner, just under your username and next to your avatar. Tap on the link to edit the location.
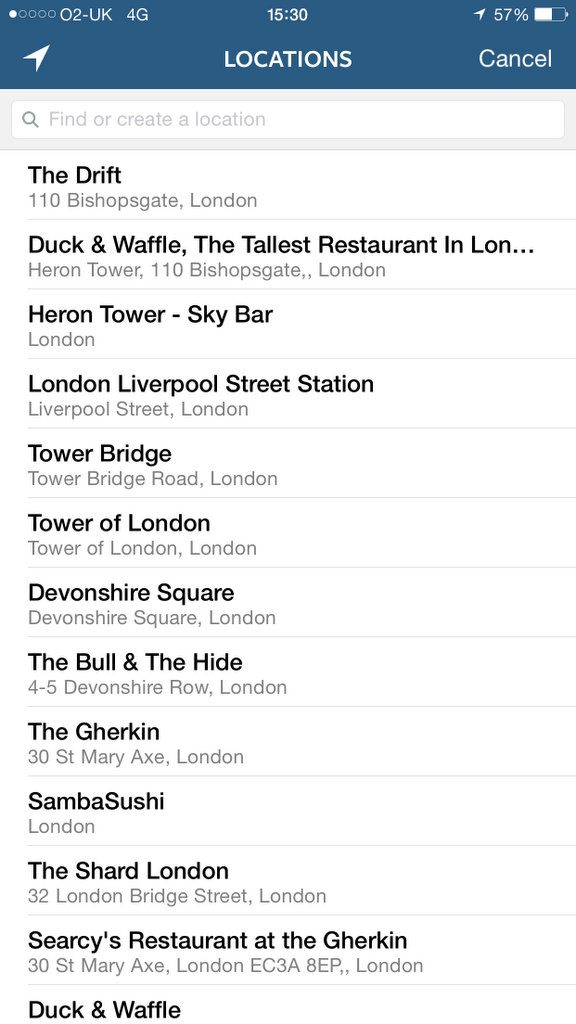
5. The next page should be familiar to you if you often add location to your Instagram photo when you upload. Just pick a suitable location on the suggested list, or if you can’t see the location you wanted you can always search it. When you find the location tap on it.
6. This will add the location to the photo. You should now see your newly added location shown on the photo.

7. Confirm the change by tapping on the Done button.
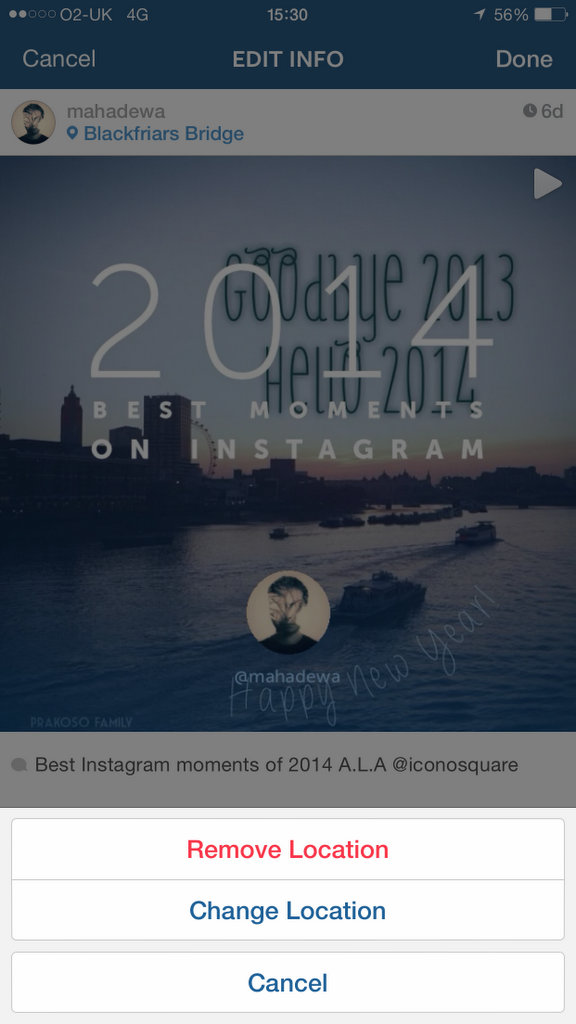
8. You can also change or remove the location info by doing similar process. Go to the edit mode and tap the location info.
9. You should see a list of different menu items which say Remove Location and Change Location. Tap on the Remove Location to delete the location info from the photo, or tap on the Change Location to pick other location.
10. And that’s it.[/fusion_builder_column][/fusion_builder_row][/fusion_builder_container]


How to Add Location to your Instagram Photo after you have already posted it http://t.co/pJjM69sztk via @moblivious http://t.co/3gifPymcNo
How to Add Location to your Instagram Photo after you have already posted it http://t.co/fXzKUxJFjx http://t.co/QYBbL8sdNm
What do you do when the place you are trying to find does NOT come up in the suggested places and the “custom” place you create places you 4 states away??
Not much you can do in this case, especially when the photo has already been uploaded. because the Geotag that presents in your photo seems to point to that location ‘4 states away’. If you have the original picture, check the Location in the Photo App -> Photo -> Moments. Confirm the location on photo.
So do we need to actually be in the location in order to correctly tag it? For example, if I wanted to geotag photos from a vacation I took, am I able to use previous locations I’ve tagged? As I follow your instructions, it seems as if I’m still only able to tag locations in my immediate vicinity. Thanks!
Not really, but when the location is too far away often it doesn’t want to do it, especially when the original photo wasn’t geotagged.
I understand this perfectly, but when I tap the 3-dot icon on a photo, it doesn’t bring up the same menu as described here. It does not have an “edit” option- just delete, share, copy, email, tag.
Any thoughts on why this might be? Thanks!
Are you on iOS or Android? Which version?
I am struggling to correctly tag locations on photo’s I have been sent. Sometimes my assistant sends me a pic to post, no matter what I try I cannot get my location to appear in the list. I seem to be able to find it on some of the pics I take and not others. Even though all taken quite close together. It also shows the actual address and not just the name of the location. Is there a way I can get rid of the physical address and rather just have “XXX Studio”. Where is it accessing this from? My facebook page’s address? I don’t think so as it comes up XXX studio in instagram (with street address) but on Facebook my business is just XXX.
Do you know if it is possible to delete a location that you have previously created? (not remove the geo tag, but delete the location completely) Thanks!
Not as far as I know.
You may use idealshare to download edit video.
Hi, Chris,
I can’t add foreign locations to my pictures on IG. Everytime I upload a picture, it limits the places available to a certain geographical region, such as a local town. Do you have any ideas on what could be happening? I use iOS… Thanks!
I am having a problem with putting location. It shows ‘no results’ I am using iOS. How do I fix this
That means either your location is not recognised by Instagram or you are searching places far away from your locale or you don’t have internet on when you are searching it.
When I try to add s location (before posting or after posting in edit) my location constantly says “no results.” It doesn’t even pull up my location or recognize any major cities, even my own, when I type it in. It just continues to say no results. My location services are turned on in both my general privacy settings and Instagram, and I’m connected to the Internet. Been having this issue for weeks.
Have you tried to reinstall the app.
I am having the same issue.
Hey did you ever resolve it? I’m having the same exact issue
Hey I added a a location on my last post but can’t seem to add one on my latest ig post it just says “no results” I have turned on my location and tried everything and it is a location thag I went to camp.
2 things. Does the picture have the geotag? Or is the location far away from where you are now, like in another country? Instagram can’t seem to resolve the location if you are located for away from the original location.
Hey, Thanks for this article, although have a slightly different issue:
I have 2 IG accounts – on the first account, when I post a photo, it will only allow me to add a location that is close around ( or from close to the geo tag from the photo id the photo has the geo tag info – eg when taken on my phone)
If the photo was not geo-tagged – eg DSLR pic and I am not in that location any more, I cannot add the correct location.
BUT.. when i switch over to my other account, I can ALWAYS select the correct location. (!?)
I tried a test with the same photo ( this photo was not geo -tagged) and my second account I could select anywhere worldwide, but on the first account only my local vicinity.
Have you heard of this – is this just a bug on my first account, or have any others had a similar issue?
Ahh i know the is old.
2018
But now if you have posted it and edit it. the post will be shown less.
better to delete it and post again with everything correct.
Now they are checking if the hashtags is relevant to the photo if not it will be shown less.
Now they recommend only 5 hashtags and that should be put in the caption.
If put hashtags in comment it will be ignored or even not shown in instagram.
Esa