

Don’t get me wrong, as much as I love my iPhone, there are times when a manual camera is better suited for the type of photographic scene I want to create. Our mobile phone camera is by far a sophisticated piece of engineering, and as far as ‘painting with lights‘ concerns it is more than capable to produce excellent quality of images. That is until you want to do some specific things that the manual camera takes for granted, but almost impossible to do with the mobile phone due to its technical limitation.
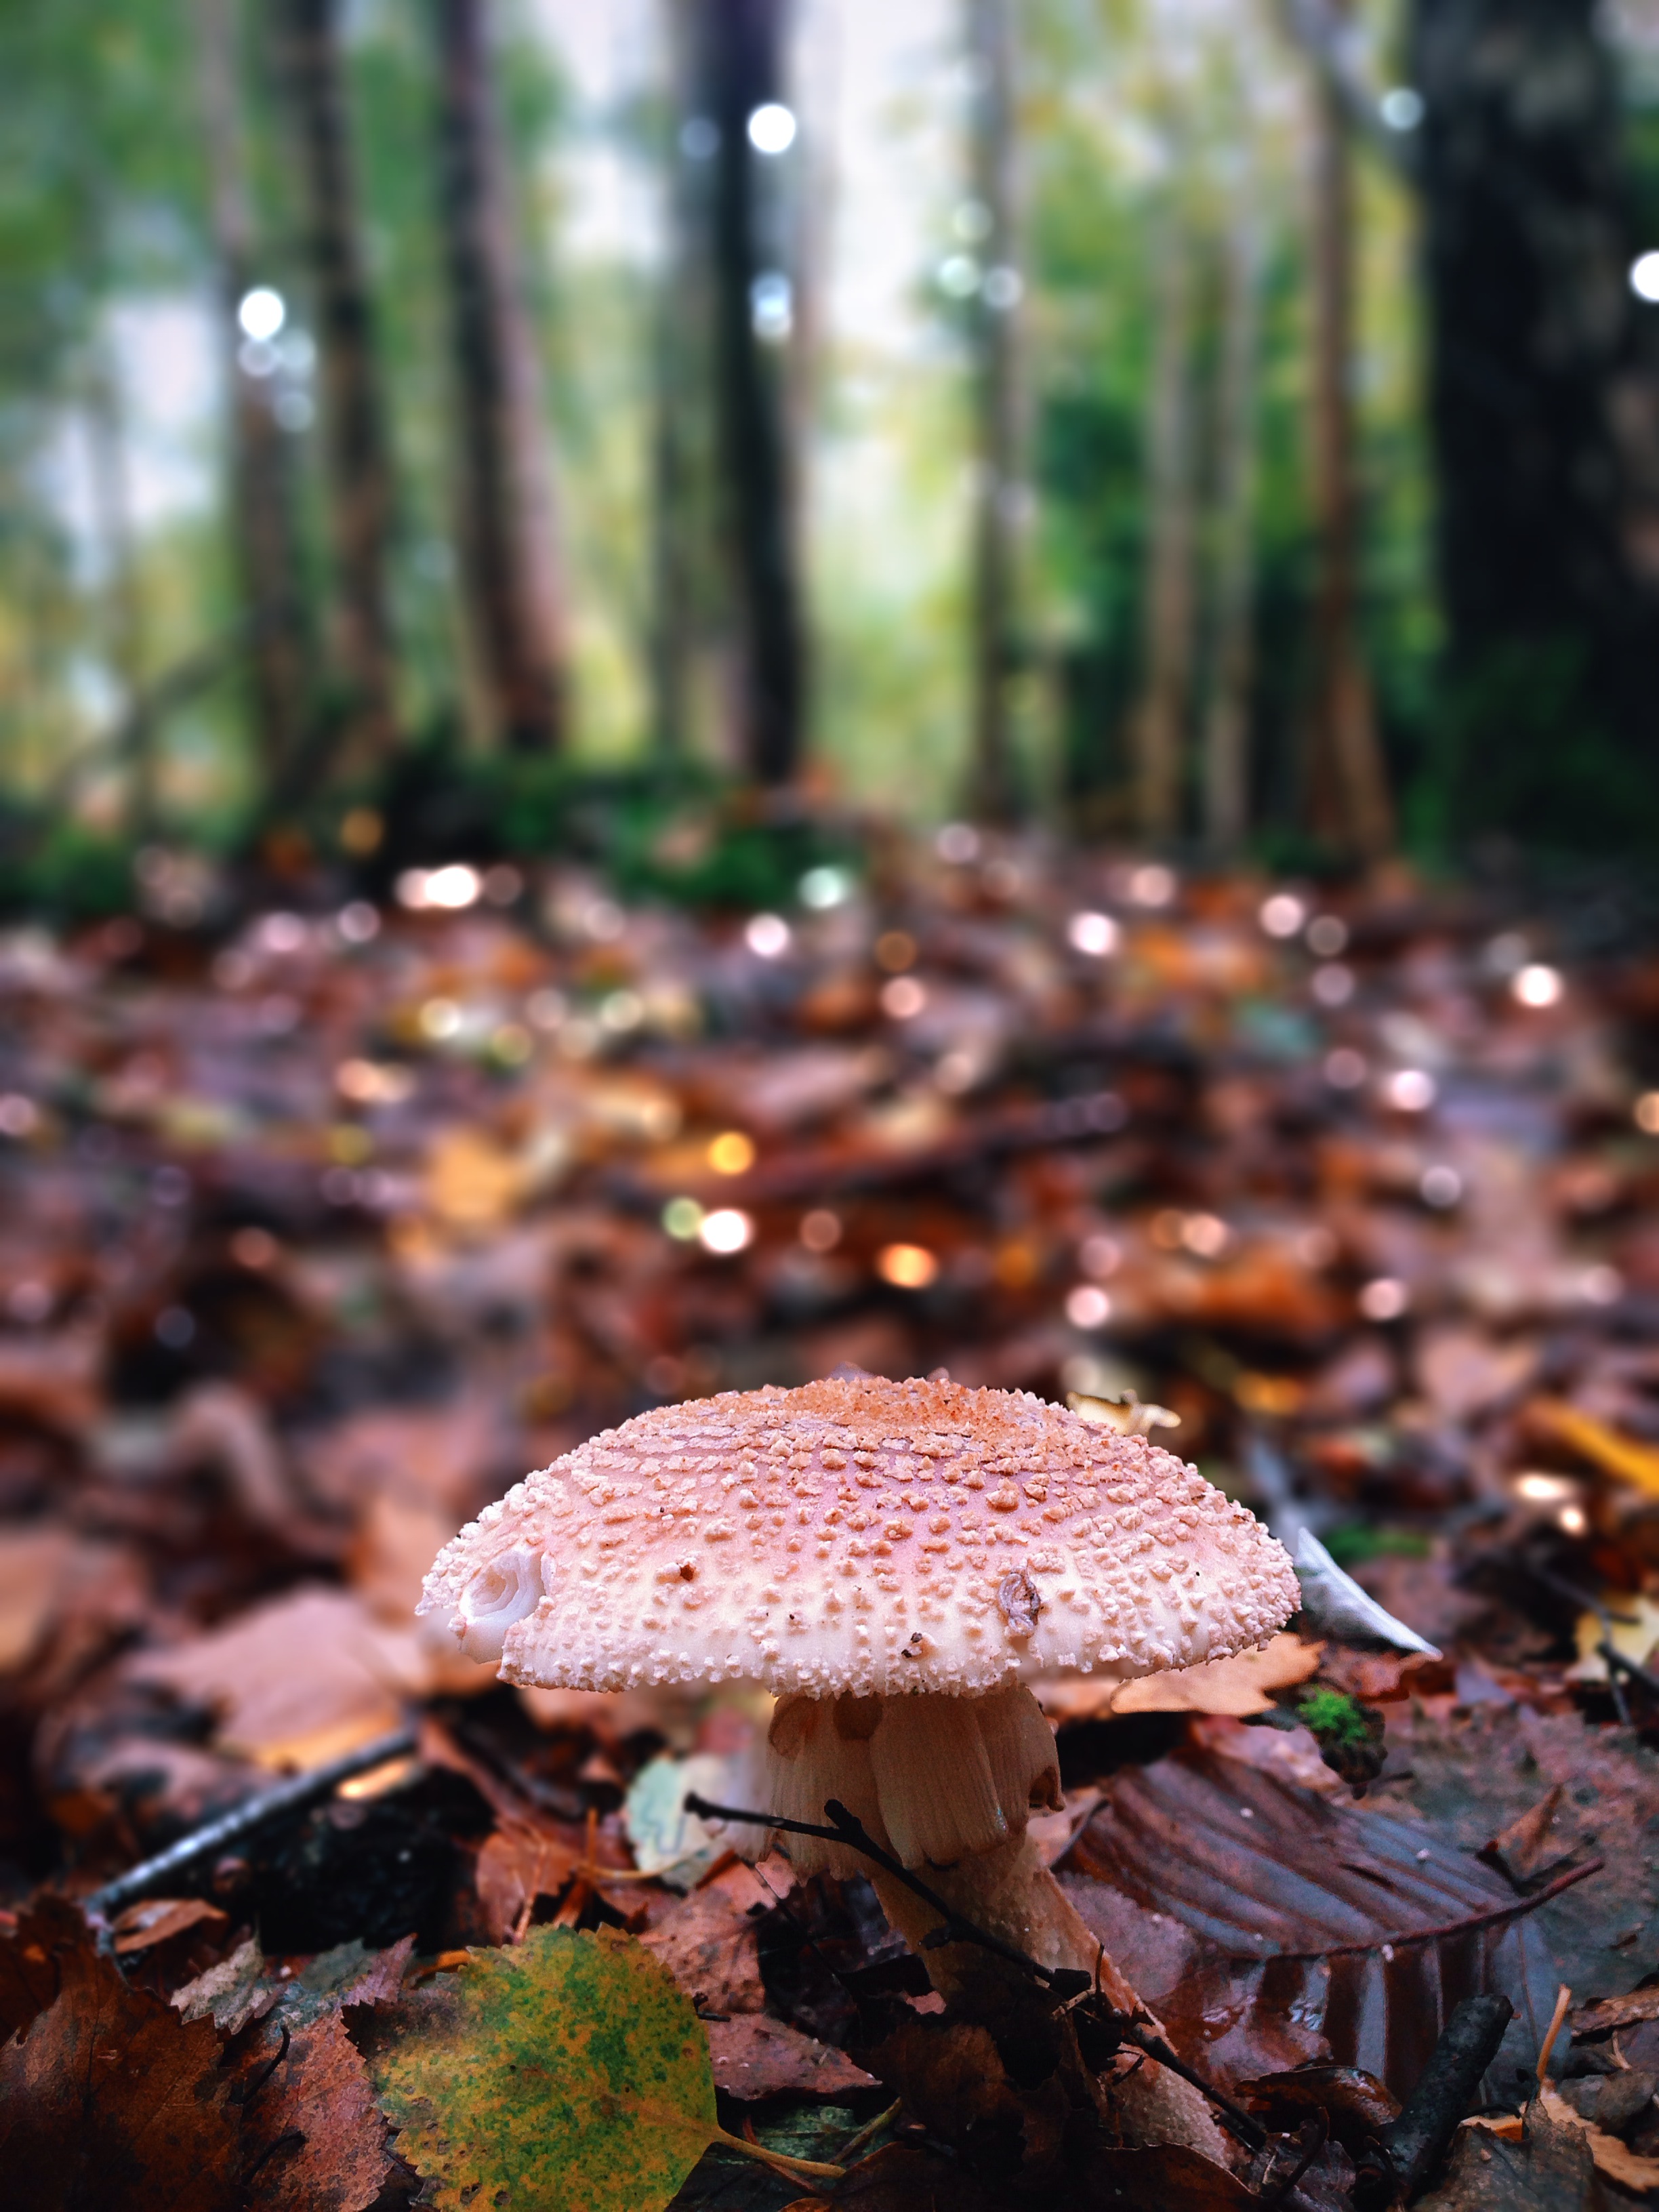
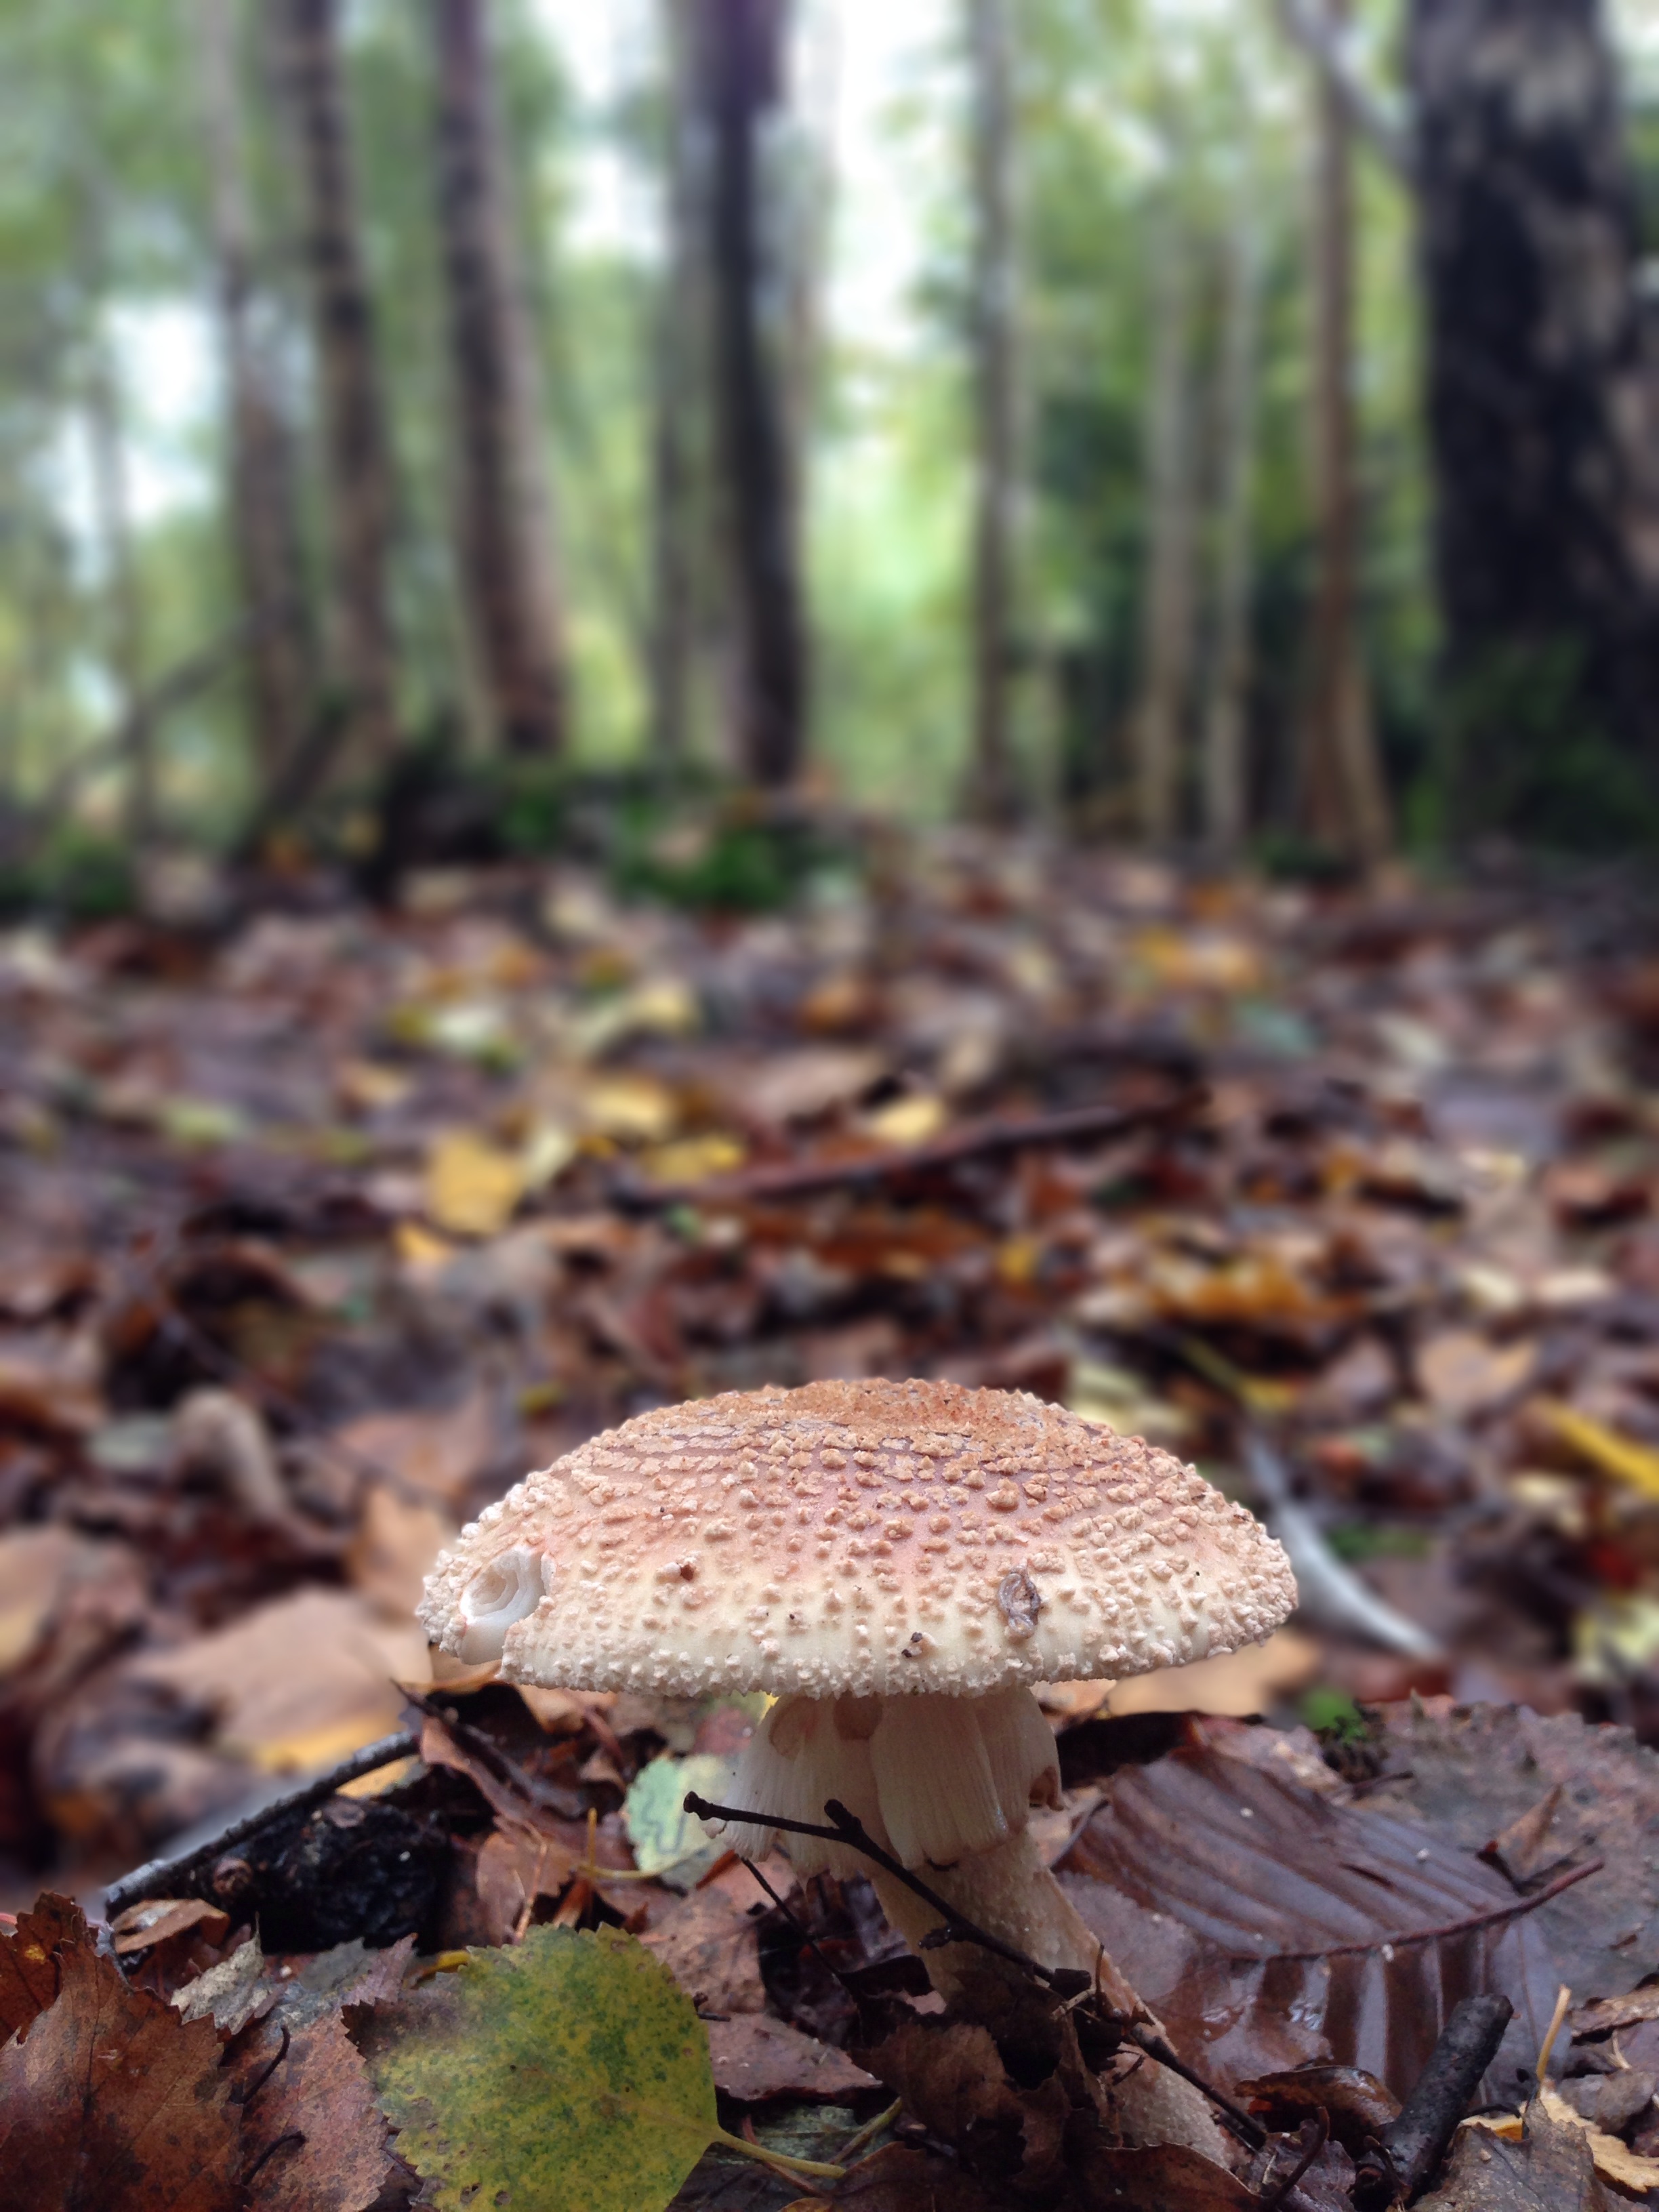
One example of the thing that many of us would love to do with our mobile is to take a photo that has a Shallow Depth of Field (this will be abbreviated to DoF in this post) or more famously known as the Bokeh effect. Simply put, this is a photographic effect where a particular object (often located in the foreground, closer to the lens) appears to be sharp, while the rest of the background is out-of-focus or blur. This special feat is reasonably easy to achieve using manual camera, but with a smartphone camera this is almost impossible to get in a typical scene.
You can try use a technique where you go very close to your object, as close as your smartphone camera focus would allow, and hope that it will create enough Depth of Field to blur the background. To achieve this your background should be in quite at a far distance from the foreground object. Or you can employ one of those Tele or Macro conversion lenses you can widely get in the market. Like this, or this or this. Using this conversion lens, you might get a good DoF. Of course this solution is not exactly the cheapest one, although a real 35mm Zoom Lens is not exactly cheap either 🙂
Alternatively you can use one of the Photo Apps that allow you to create what I call a ‘Pseudo DoF‘ or you can also call it a ‘Fake Bokeh‘.
Many apps can actually create this effect, though quality varies. Basically any app that allows you to blur the background in some way or another can give you a rendition of a Bokeh effect, albeit a bad one. You can use for example the Tilt-Shift feature (use the circular one) in apps like Snapseed, TiltShiftGen or even Instagram.
For the best quality that equals or at least closely comparable to what we get from the real DoF, we need to use apps that was especially created to ‘fake it’. Tadaa SLR is one of these apps.
The team behind Tadaa, a dev outfit from Germany, is not a stranger to the realm of photo app. They created one of the best alternative photo sharing app to Instagram called Tadaa, which has already a feature to add fake DoF included. Recently they also created Tadaa 3D, a very interesting app which gives your photo a cool parallax view effect.
Tadaa claimed that they employ a sophisticated ‘Edge Detection Algorithm‘ to do their Bokeh rendition in the 2 previous apps. This advance mathematical method is the core engine that also drives Tadaa SLR to do its DoF magic.
Mask it!
If you have used Tadaa Classic or Tadaa 3D in the past, or any app that has masking feature in their arsenal, you would not feel too alien with Tadaa SLR. As you might’ve guessed from what I said just now, the way you create the DoF effect is by masking, in a way selecting, which parts of the image that we want to keep sharp. The part of the image that is not masked, i.e. not selected, is the part that will get blurred hence creating the DoF effect.
It sounds like a very simple technique, and in a way it is, but to simulate a real DoF effect takes more than just choosing the foreground over a background. For one, the edges where the foreground and the background, the border where the sharp begins to blur, needs to be calculated carefully otherwise the resulting simulation effect would be too obvious and the blur feels too ‘fake’. Which is the important factor where Tadaa seems to shine, at least according to what the co-founder and developer, Friedemann Wachsmuth, who said:
“Tadaa simulates the physics of a true Tessar lens and renders physically correct bokeh (actually often more realistic then Photoshop’s DoF-Blur algorithm).”
That being said, the actual masking process is really as simple as brushing your finger over the object we want to stay sharp. Tadaa SLR will calculate the masked area and will detect, most of the time correctly, the border between the foreground and the background, and will automagically ‘snap’ the selection to only enclose the foreground object. If you are familiar with Photoshop’s Magic Lasso tool, Tadaa SLR masking would be a familiar ground.
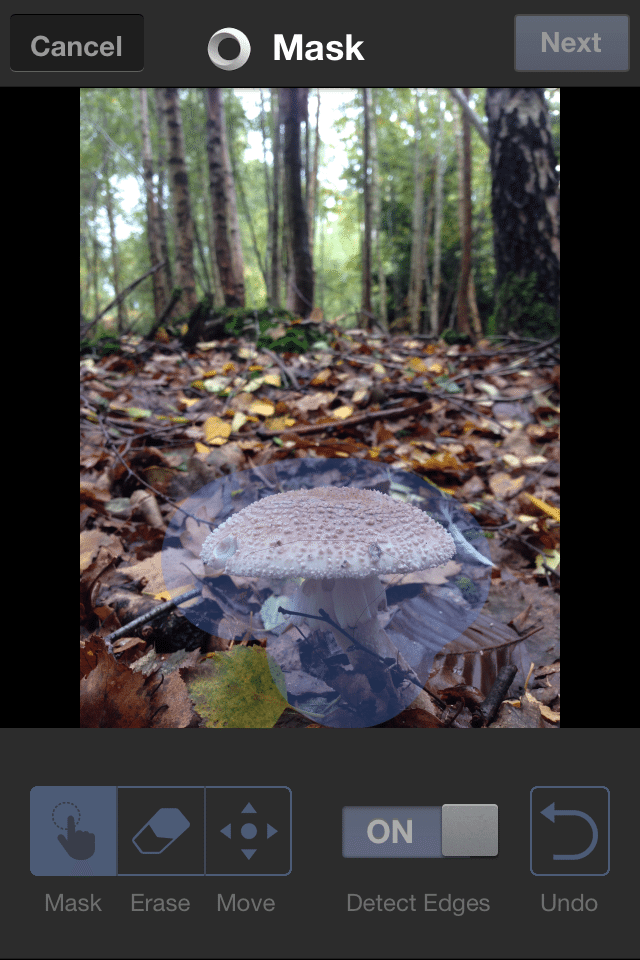
Tadaa SLR provides additional tools to assist you with this delicate masking process. The first one is the Move tool, which allows to zoom in and out and move the image around the screen. Zooming in to more detailed image is actually something you need to do a lot, especially if the object borders are not clearly defined. When you zoom in on to a particular area and apply the mask, Tadaa SLR will be able to detect the edges better.
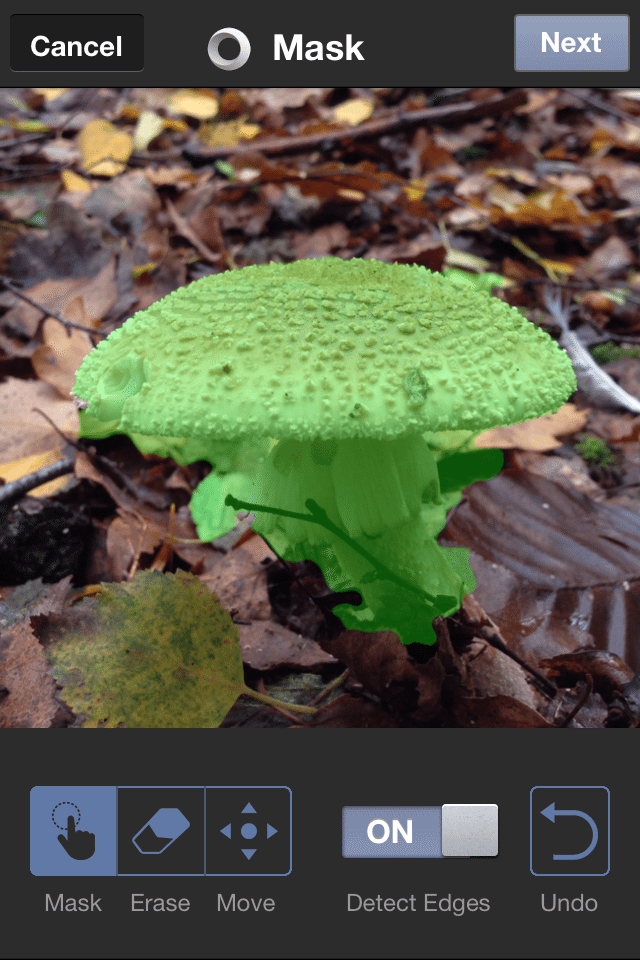
The second tool is the Erase tool. This tool’s function is pretty obvious, it has practically the same function as the Masking tool except that it works the other around, instead of masking an area, it unmasks it. This will help you ‘sculpting’ the mask area. There is also the Undo button which will just undo the last stroke you did, enabling you to start again.
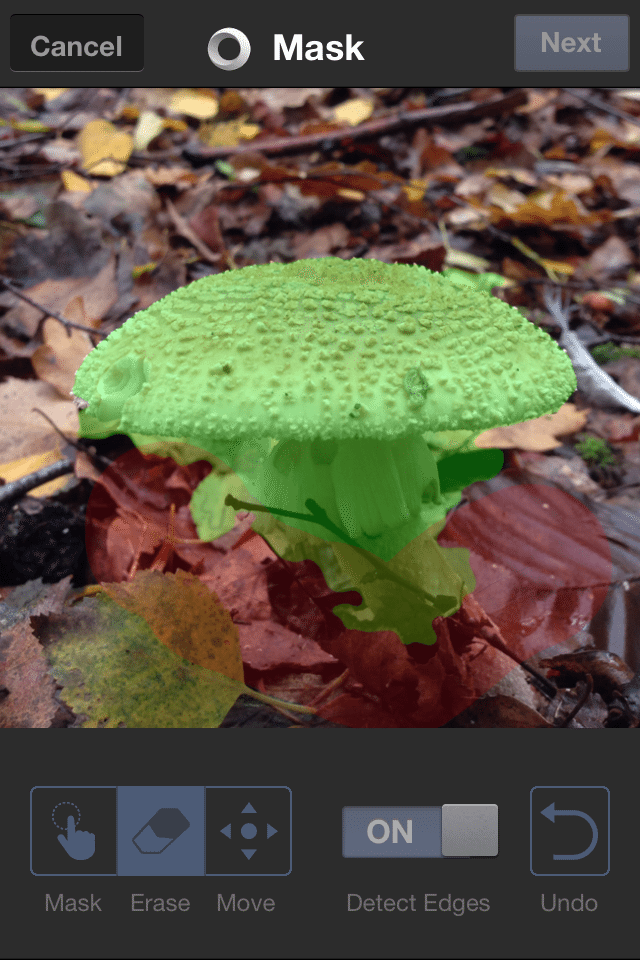
Sometimes the border is just too complicated Tadaa SLR just cannot detect the edges correctly no matter how much zoom/mask/erase you do. It’s time to bring in the big gun. You can turn off the automatic edge detection and go ‘manual‘. This means that every stroke you make on the image will be interpreted as it is, as if you are drawing a line on the area, Tadaa SLR will not interfere with it. This last resort technique is quite useful to iron out those ‘last wisps of hair’ that just won’t mask. For this detailed work I recommend that you use a stylus as it gives your more precision compared to our fat finger.
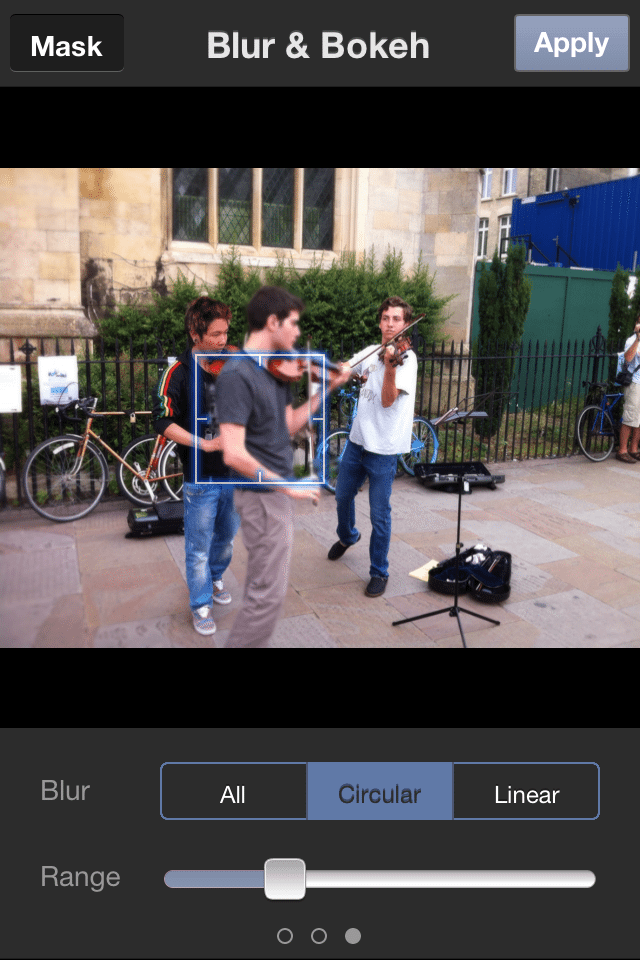
Blur and Bokeh
When you are happy with your mask, the next step is to configure the blur and bokeh effect. In this section you can adjust the followings:
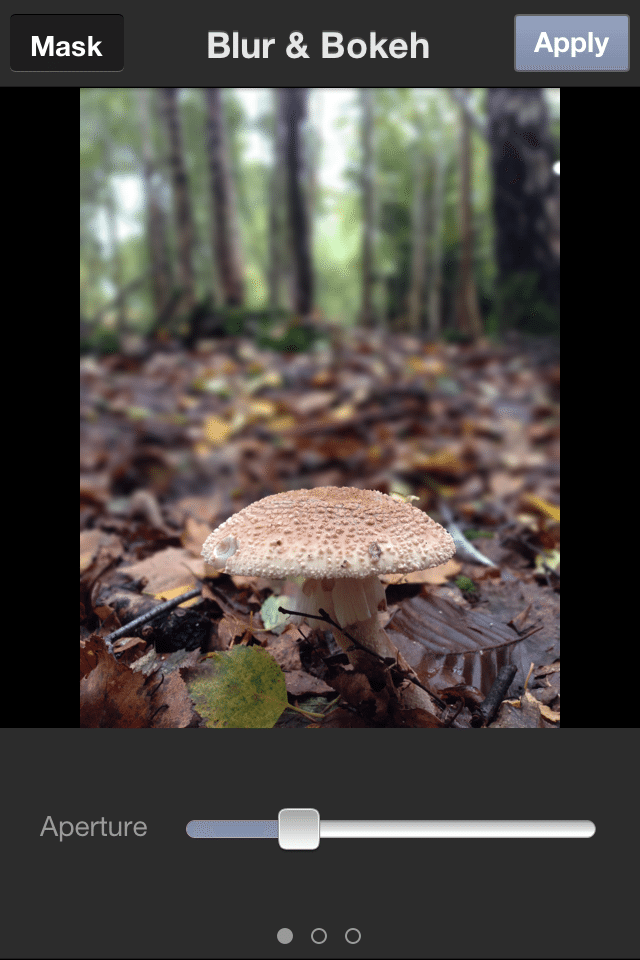
1. Aperture.
One of the technique to create a real DoF effect, the other one being to change the focusing distance, is to adjust the Aperture (the F-stop) of the lens. The bigger the aperture (smaller f-stop number) the bigger bokeh effect you get, i.e. more blur. Tadaa SLR tries to accommodate this effect by providing you with the Aperture adjustment slider. Sliding to the right will give you more blur, sliding to the left will give you less.
-

- Big Aperture – More Blur

-
- Small Aperture – Less Blur
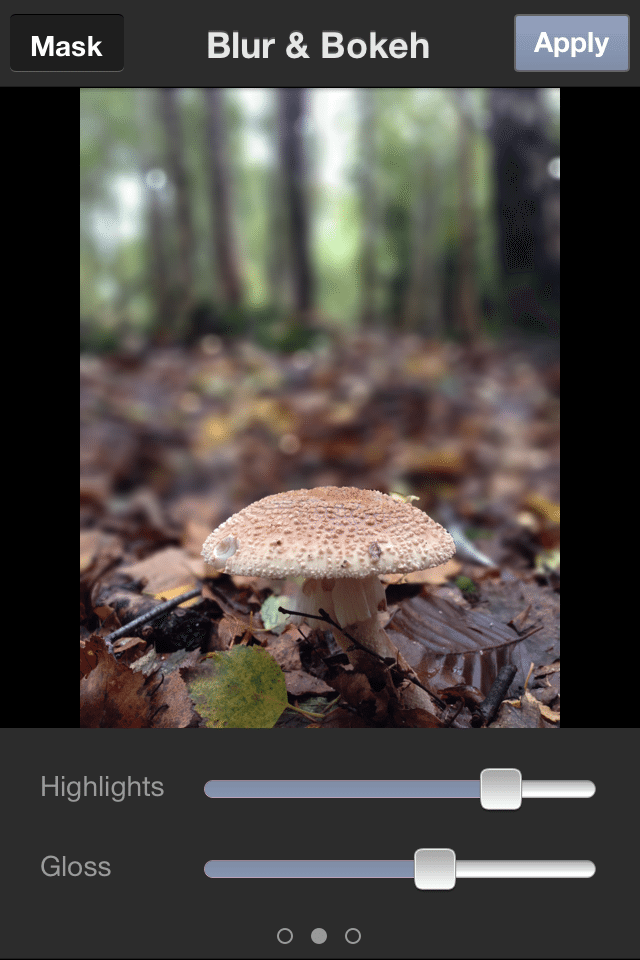
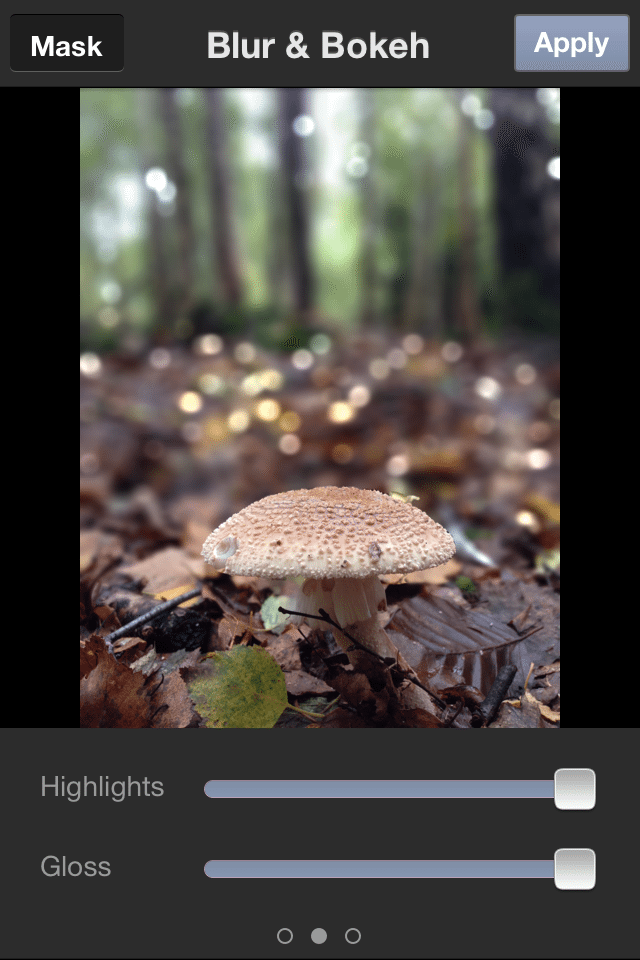
2. Highlight and Gloss.
One of the characteristic of Bokeh effect which you may find in a lot of this type of photos is the existence of highlights, often appear around out-of-focus points of light. To simulate this effect, Tadaa SLR provides you with the Highlight and the Gloss sliders. The highlight slider will create the out-of-focus points of lights, while the gloss slider will control how ‘bling-bling‘ you want your bokeh light to be.
-
- Medium Highlights & Gloss
-
- Maximum Highlights

-
- Maximum Gloss
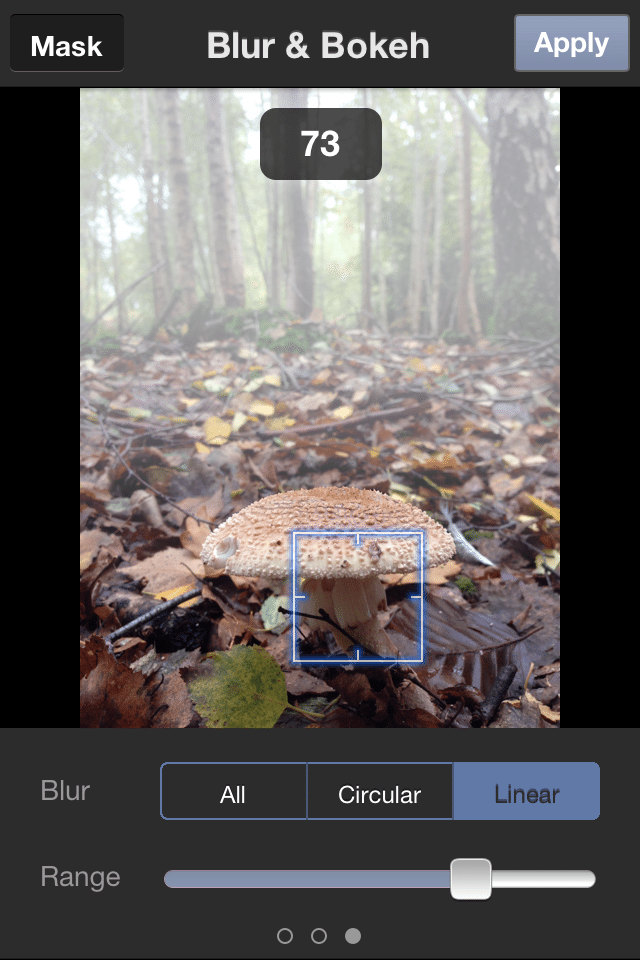
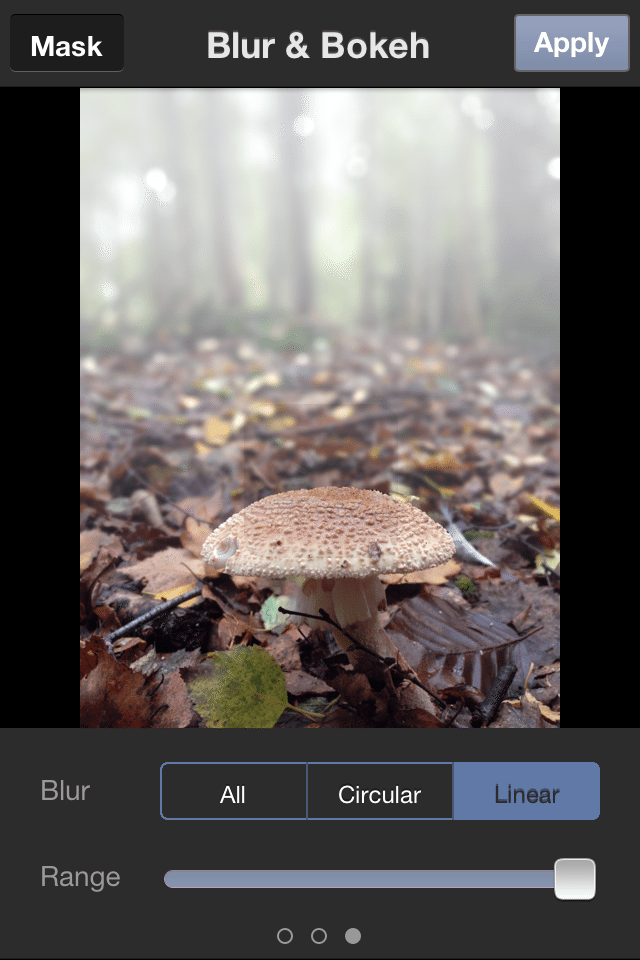
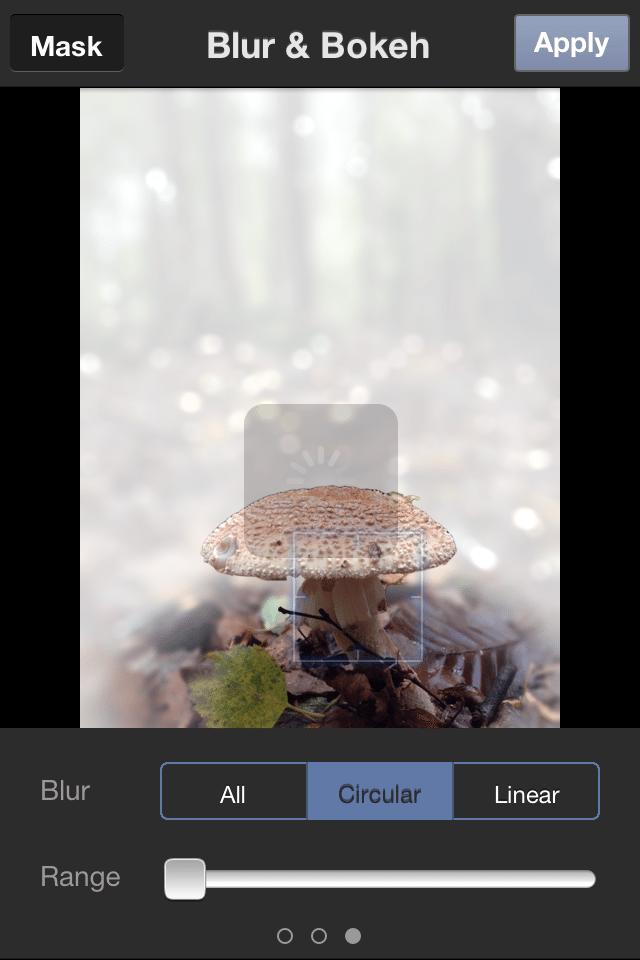
3. Blur and Range.
These 2 tools deal specifically with the blur effect itself. The first tool allows you to choose the blur ‘shape‘ if you like. Choosing ‘All‘ will blur everything apart from the masked area, I wouldn’t recommend this option as it would give your image that ‘fake’ look right from the start. For more ‘natural’ DoF look I would go for either the Circular or the Linear one depending on the scene of the image. These 2 options are similar to the Tilt-Shift feature you may find in other apps (e.g. Instagram or TiltShiftGen).
The second tool is the Range slider. With this slider you can adjust the ‘threshold’ of your blur, i.e. the distance from the masked area where the blur should start to gradually appear.
These two tools are crucial in the creation of a good bokeh effect to mimic as close as the real one.
-
- Linear Blur – Medium Range
-
- Linear Blur – Maximum Range
-
- Linear Blur – Minimum Range

-
- Circular Blur – Minimum Range
-
- Blur ALL – Range disabled

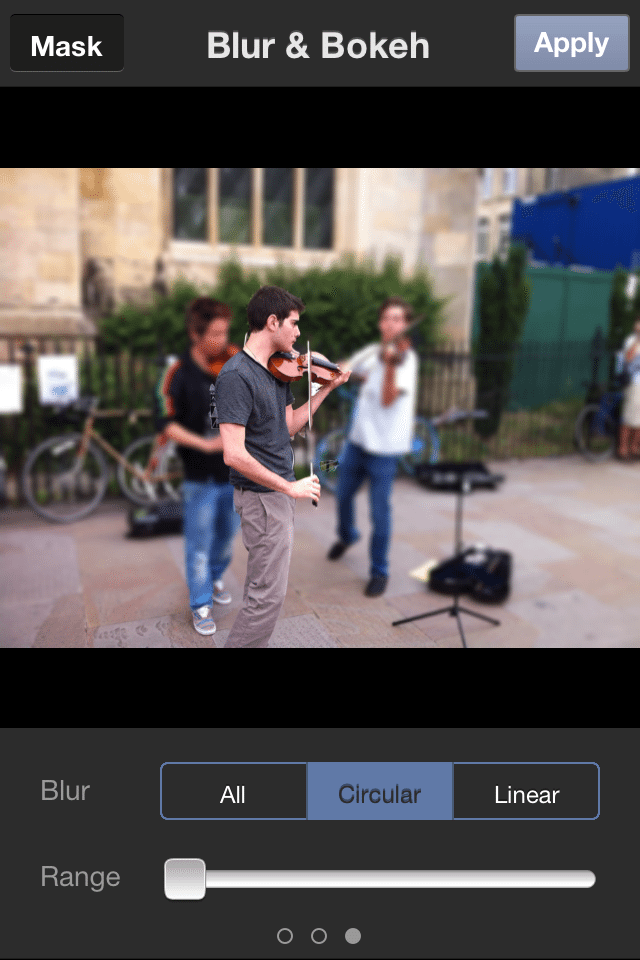
Shoot Now Focus Later
One unique feature of Tadaa SLR is its ability to Refocus the image. If you are familiar with Nokia Refocus feature or the cool Lytro Photography you are in for a little surprise.
Yes, using Tadaa SLR you can change the focus of your image, after you take the photo!
To do this, while in the Blur and Bokeh section, just tap on the area where you want to focus and Tadaa SLR will make that area sharp and the rest blur.
-
- Mask the guy in fron

-
- Will get standard bokeh
-
- Tap on the guy at the back
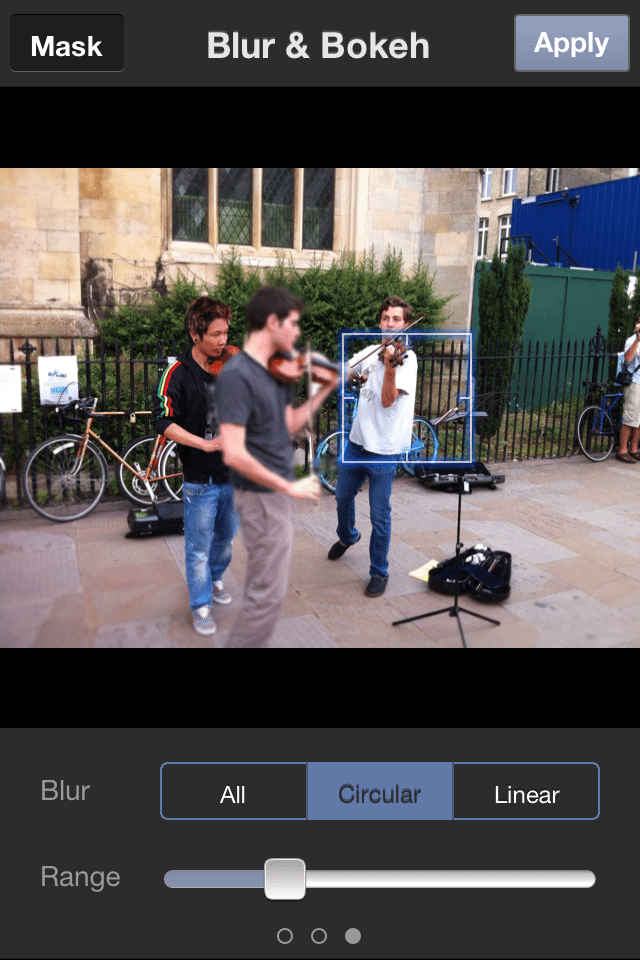
-
- Will ‘Re-focus’ on the background

-
- Tap again on the foreground
-
- The focus is changed!

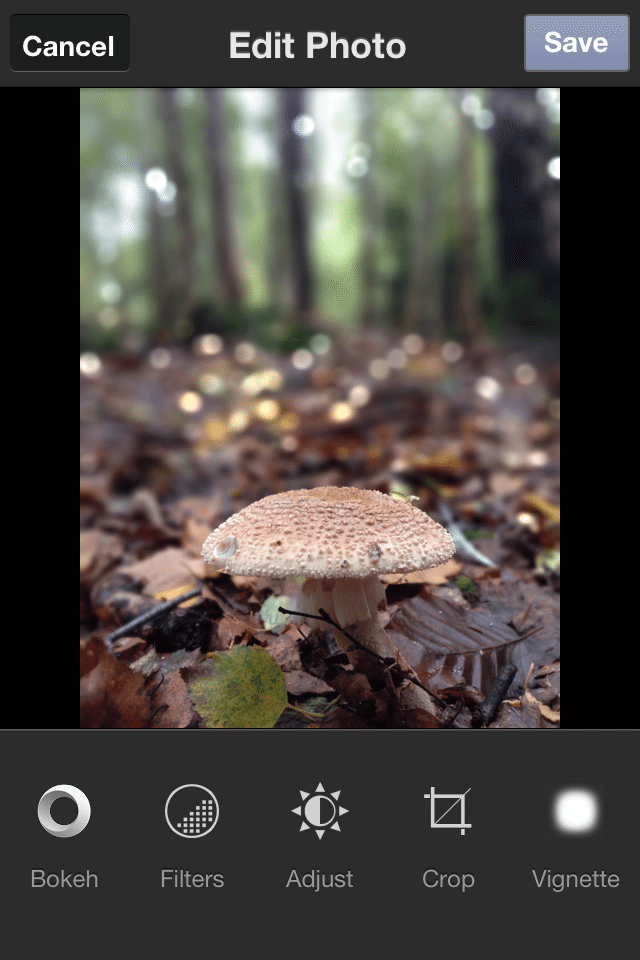
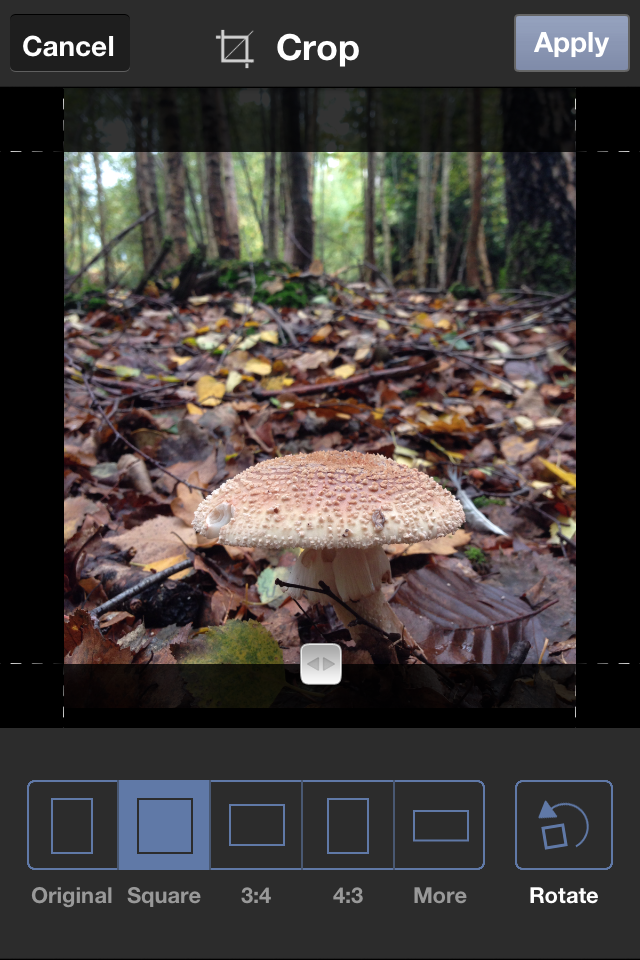
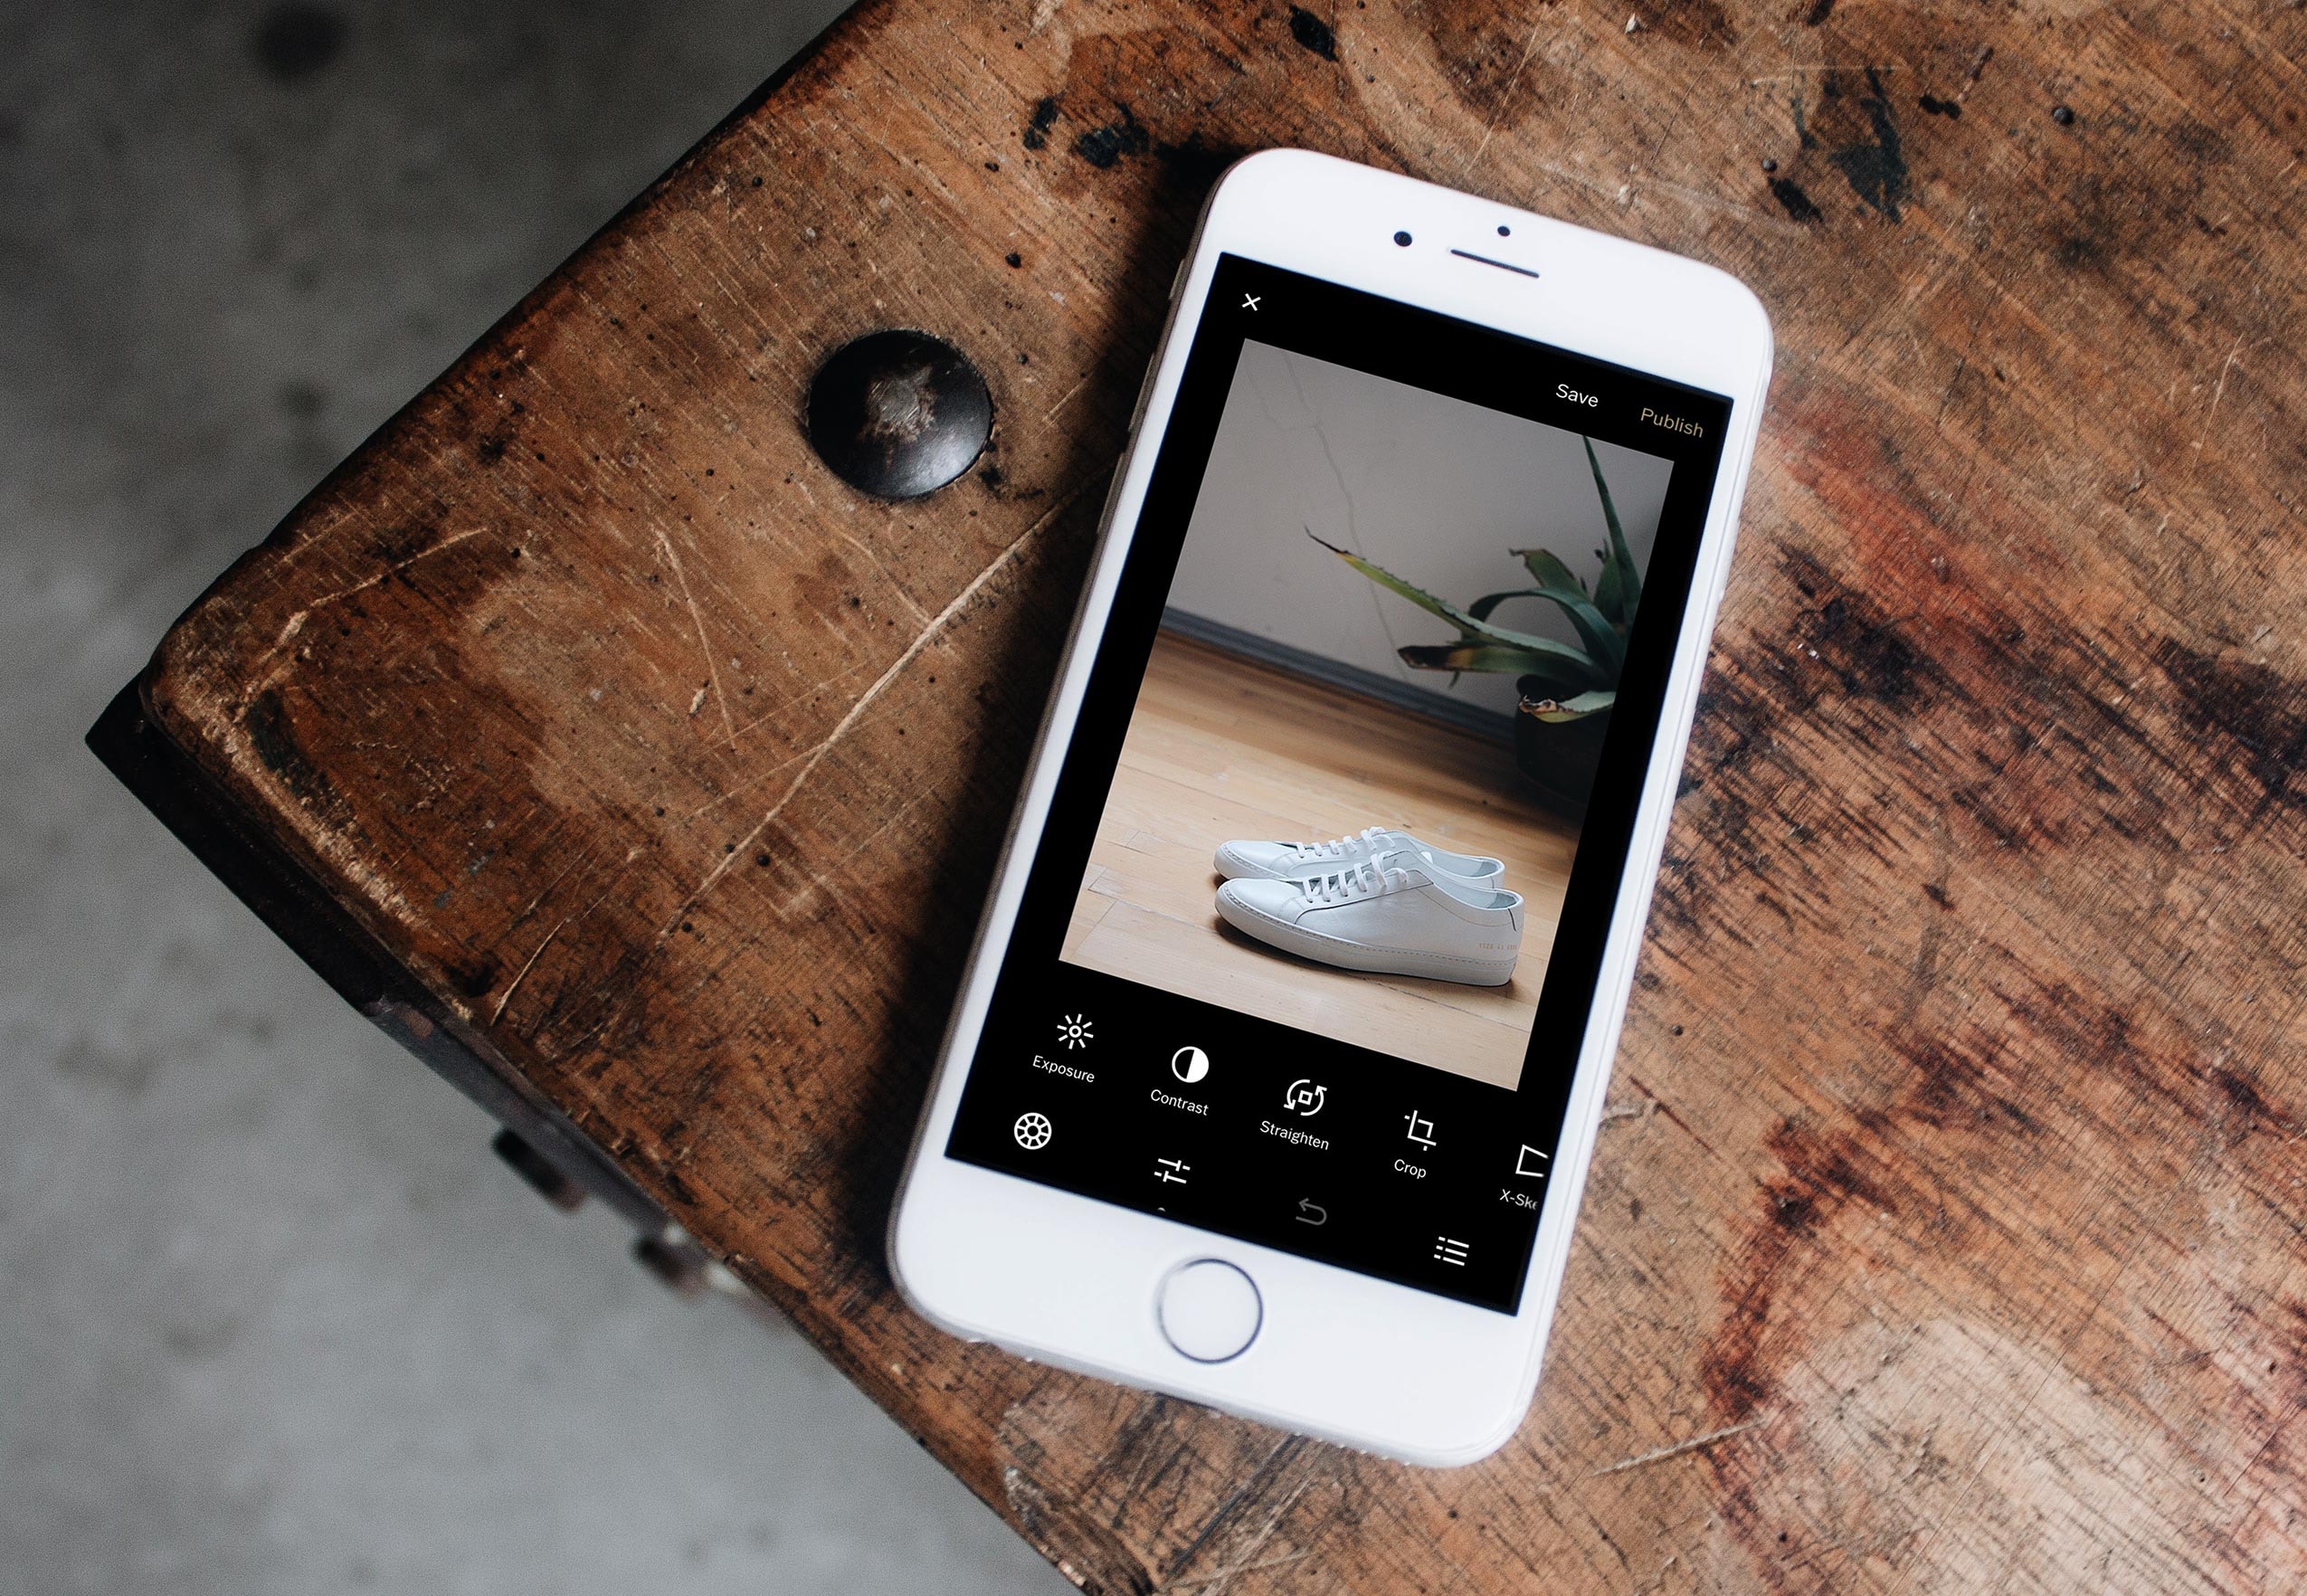
More edit and filters
The next screens deal with more traditional editing, like contrast/brightness, cropping, vignette etc. Tadaa SLR also comes with the usual filters which are actually the same filters you get with the classic Tadaa photo sharing app or Tadaa 3D. There are about 20+ filters you can choose from, obviously not everything will suit your taste, as a matter of fact you don’t really need to put any filter on.
-
- Edit Page
-
- Filters

-
- Standard Edit

-
- Crop
-
- Rotate

-
- Vignette

Save and Share
When you are happy with everything you can tap the Save button and your final image will be saved to your Photo Album (Tadaa save the image in Full Resolution). From this Save screen you can also share the image directly to Tadaa photo sharing network, should you choose to do it. Just add a caption and add the location (or you can turn it off if you wish) and tap on the Upload button.
You also have a choice to simultaneously share the image to Facebook, Twitter and Tumblr provided you have linked your accounts in the setting.
But if you don’t want to share it just yet that’s fine too. You can pick up the image from your Photo Album and run it through other photo app for further editing, for example. Or share it to other photo sharing network, e.g. Instagram, EyeEm, or Flickr.
By the way, here is one cool thing, Tadaa SLR saves the editing session of an image. This means if you go away in the middle of editing and reloaded the original photo you won’t loose your work (your mask for example), it will still be there waiting for you to continue editing.
Final Verdict
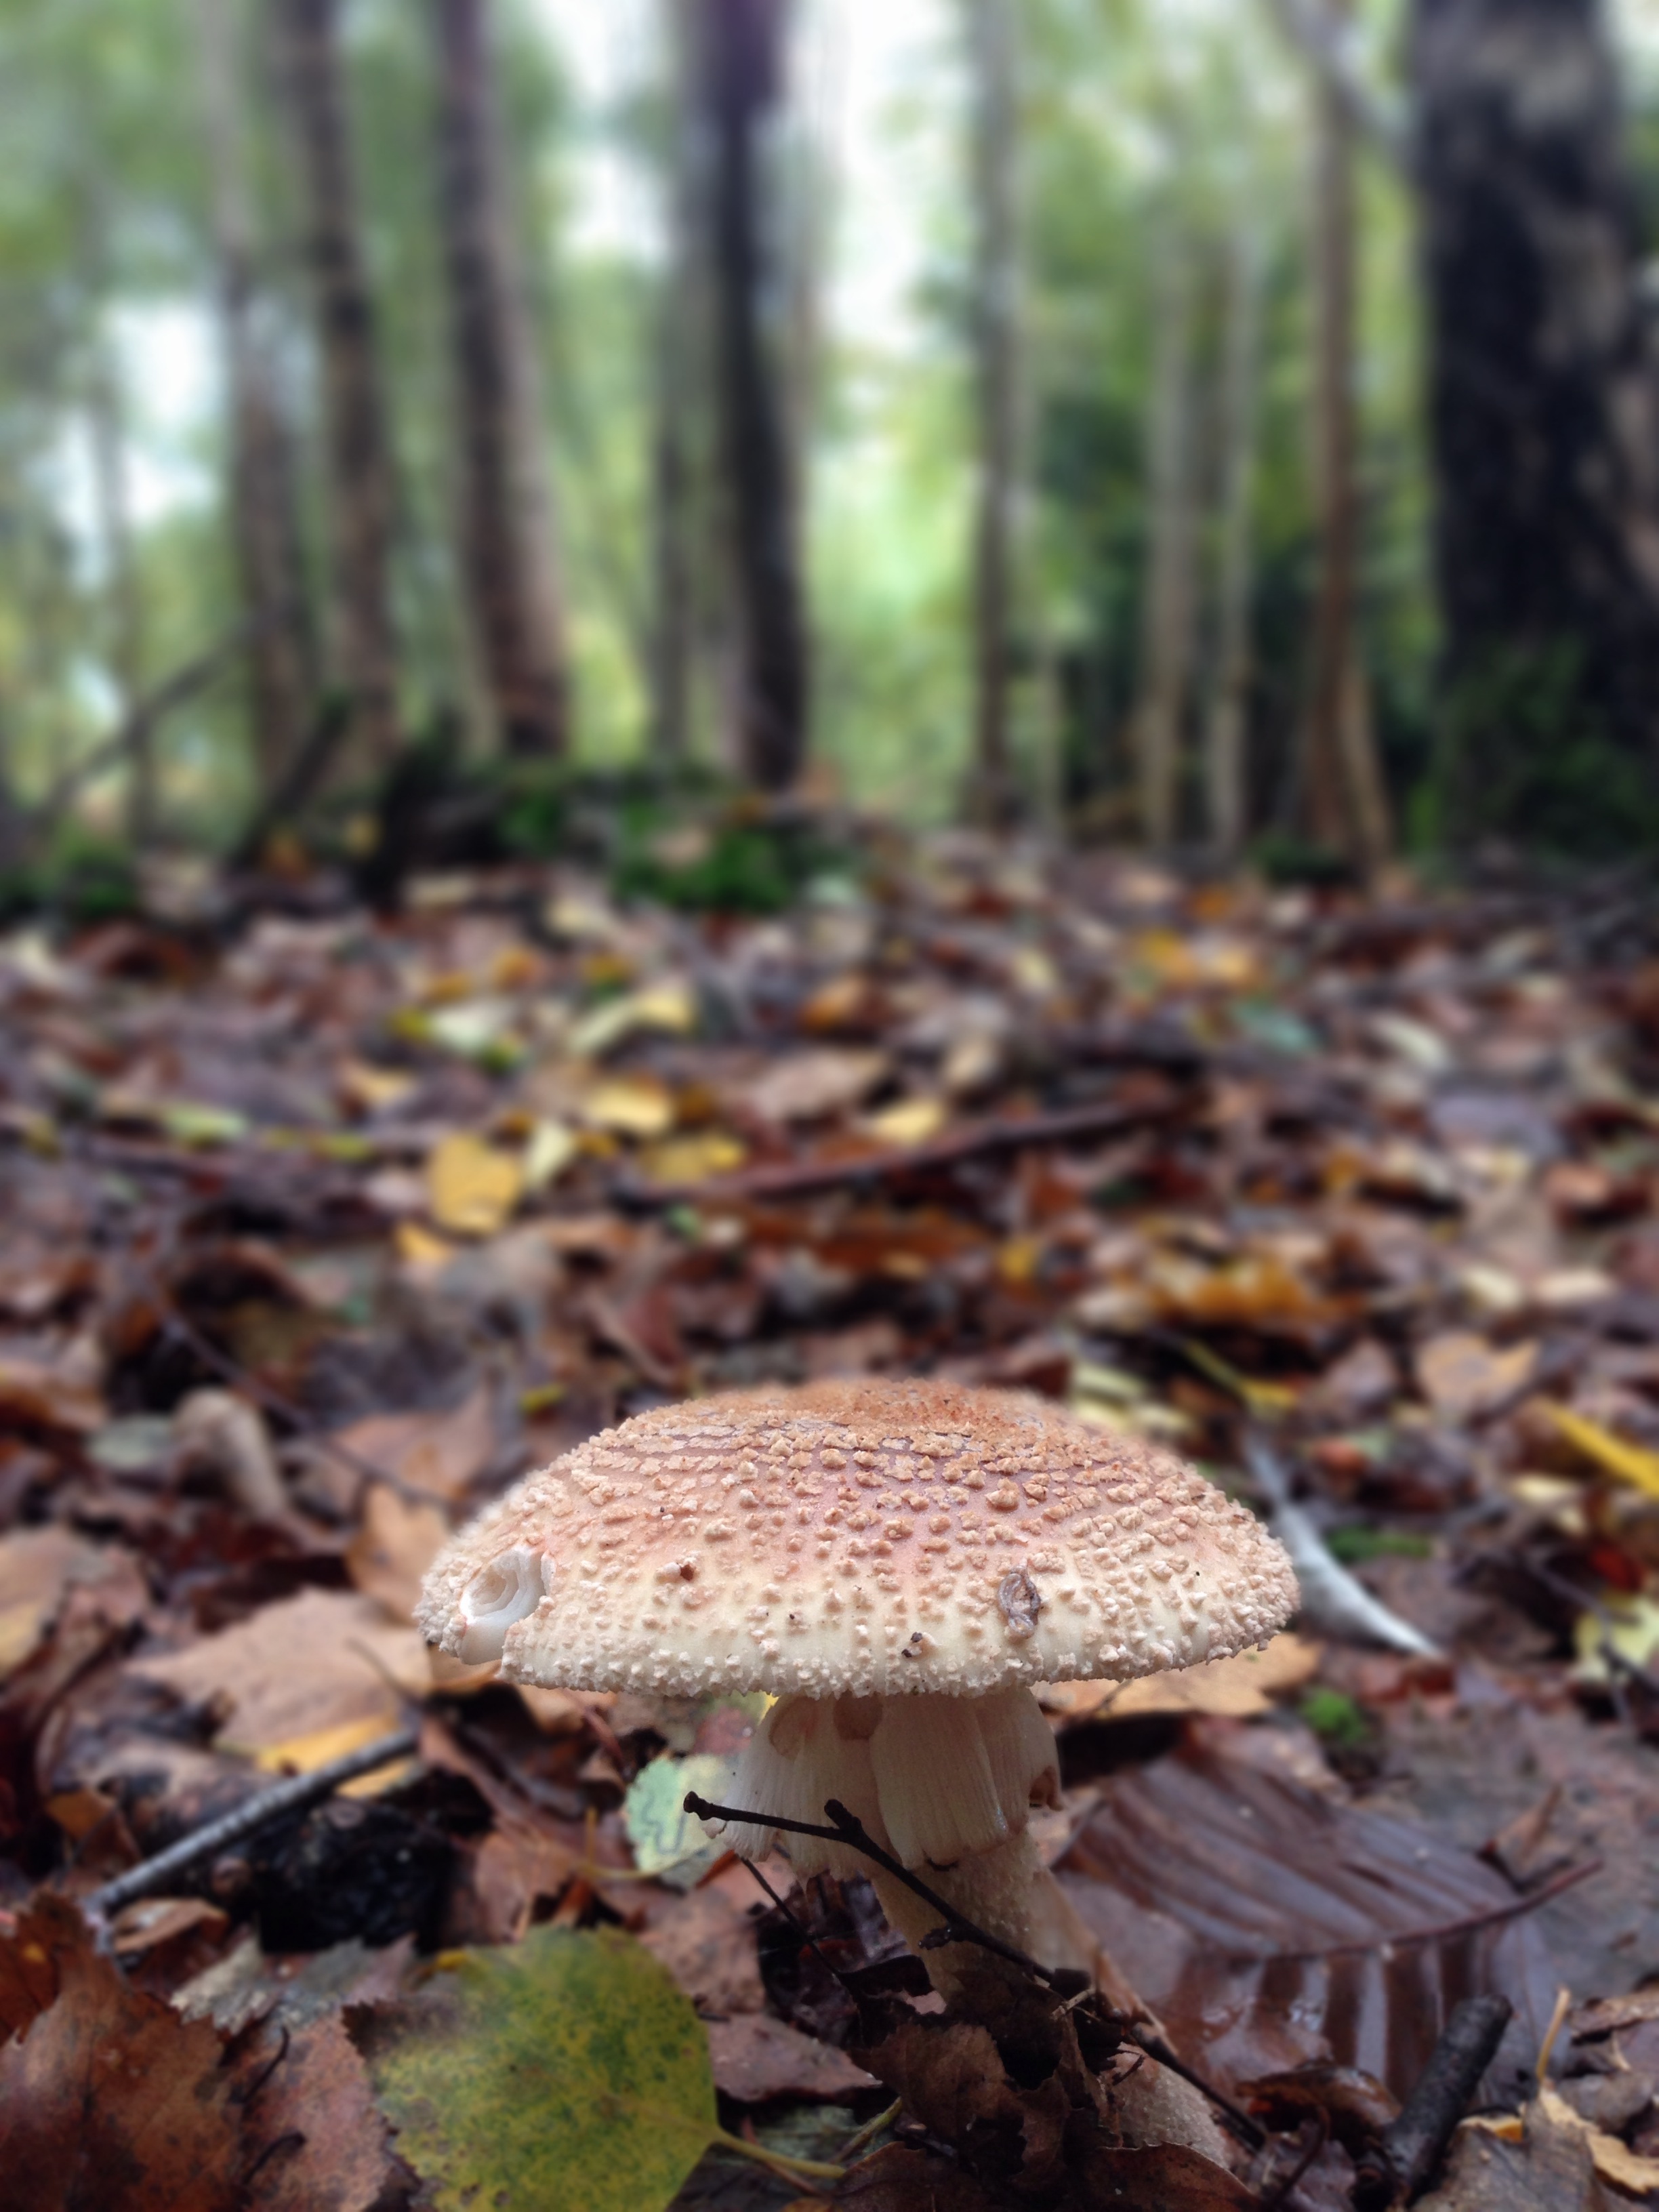
Tadaa team claimed that their edge detection algorithm is the best among its competitors. Instead of giving my direct judgement here I am going to let you to judge the result yourself.
So, here are the same photo sample I’ve been using throughout this post but ran through different Bokeh Effect apps that I think are Tadaa SLR main competitors.
From Left to Right: BigLens, AfterFocus, FingerFocus and Tadaa SLR
-
- BigLens
-
- AfterFocus
-
- FingerFocus

-
- Tadaa SLR

And here are the 100% Zoom comparison of those edges from the 4 apps (you can do this with an app called Photo Quality Check):
-
- BigLens 100% Zoom
-
- AfterFocus 100% Zoom
-
- FingerFocus 100% Zoom

-
- Tadaa SLR 100% Zoom
I am going to leave you to make your own opinion. But whatever that is, after trying all 4 apps, I have to say that Tadaa SLR is definitely giving me one of the best result in faking Bokeh Effect. It is also very user-friendly and feature-complete, though with £1.49 price-tag I admit it’s not the most cost-effective. Mind you, it is still far cheaper than those 35mm Zoom Lenses 🙂
But Tadaa team run Free App campaign from time to time, and if you follow Moblivious, you will get instant notification whenever the app goes Free or when we have promo code to give away 🙂


Create Stunning #Bokeh Effect with your iPhone using Tadaa SLR http://t.co/vVlJCpygvu
Create Stunning #Bokeh Effect with your iPhone using Tadaa SLR http://t.co/GOVg3ZhXse
RT @mahadewa: Create Stunning #Bokeh Effect with your iPhone using Tadaa SLR http://t.co/vVlJCpygvu
“Tadaa SLR is definitely giving me one of the best results in faking Bokeh Effect.” Thanks @moblivious —great review!
http://t.co/EhrrL5TE5G
RT @moblivious: Create Stunning #Bokeh Effect with your iPhone using Tadaa SLR http://t.co/GOVg3ZhXse
RT @tadaa: “Tadaa SLR is definitely giving me one of the best results in faking Bokeh Effect.” Thanks @moblivious —great review!
http://t.c…
RT @tadaa: “Tadaa SLR is definitely giving me one of the best results in faking Bokeh Effect.” Thanks @moblivious —great review!
http://t.c…
How to create DSLR-Like Bokeh (Shallow DoF) Effect with your iPhone using Tadaa SLR http://t.co/8t3cLA3uJn
How to create DSLR-Like Bokeh (Shallow DoF) Effect with your iPhone using Tadaa SLR http://t.co/CEAkduSKuR
RT @moblivious: How to create DSLR-Like Bokeh (Shallow DoF) Effect with your iPhone using Tadaa SLR http://t.co/8t3cLA3uJn
Create Stunning Bokeh Effect with your iPhone using Tadaa SLR http://t.co/SyLHbOg7Vv
RT @mobiography: Create Stunning Bokeh Effect with your iPhone using Tadaa SLR http://t.co/SyLHbOg7Vv
Useful guide to a clever app RT @mobiography: Create Stunning Bokeh Effect with your iPhone using Tadaa SLR http://t.co/roQhrCdKev
[…] manual focus ring on a DSLR lens. Selective focus or bokeh is not really possible with smartphones. There are apps and post processing techniques that simulate the effect, but optical focusing options are […]
Is there any way to control depth of field with an iPhone 5 camera?
iPhone camera doesn’t have Aperture control, simply because there is no physical ‘aperture’ to be controlled, unlike DSLRs. However you can still do DoF effect by using these methods: 1. Take a close up, your background will naturally blur. 2. Use a…